Getting the Printer Ready
- You must be logged into your computer as an Administrator before installing the print driver.
- If you are connecting a cash drawer to the Epson receipt printer, before you turn the printer on, connect the cable that came with the cash drawer to the back of the cash drawer, and to the port on the back of the receipt printer.
- Make sure the power cable and the USB cable are connected to the printer only. Do not connect the printer to the computer at this time.
- Make sure the paper is installed and then power on the printer.
- The print driver can be download from our website at https://www.theuniformsolution.com/downloads-printer-drivers. Save the driver for the printer you have to your desktop or to your downloads folder.
Installing the Print Driver
- Located the printer *.exe file that you downloaded and double-click to run the install.
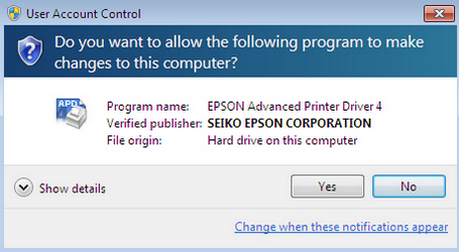
- If the User Account Control screen appears, click, “Yes” to allow changes to be made to the computer. The User Account Control Screen could be different than the example shown below.

- Click “Next” to start the install process.

- Click, “I accept the terms of the license agreement” then click Next.

- Accept the “Standard” setup type then click Next.

- click the “Add” button to select the printer.

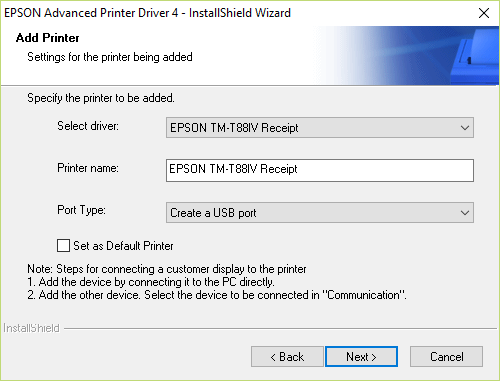
The “Add Printer” screen is where you select the driver and name your printer. The “Port Type” field is where you will select the port that you are connecting the printer to. Click the down arrow and select “Create a USB Port.” Click Next.

- Click Next.
 Click Next.

- Status screen showing the progress of the driver install.

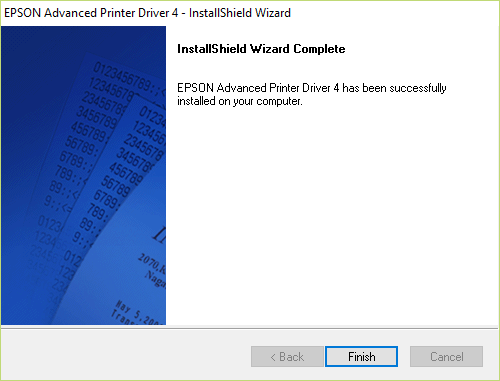
- Click Finish.

Connecting the Printer to the Computer
- Now you are ready to connect the printer to an available USB port on the back of your computer.
- Before connecting the USB cable to the computer, make sure the printer is ON. The Epson print driver is specific to the USB port that you plug the printer into.