
Overview
If a vendor is not available in the standard TUS vendor/catalog list, you can still add their products by setting up a manual vendor and importing inventory using a CSV file.
This article walks you through:
- Adding a new manual vendor
- Importing inventory for that vendor
Step 1: Add a New Manual Vendor
- From the main menu, navigate to: List → Vendors.
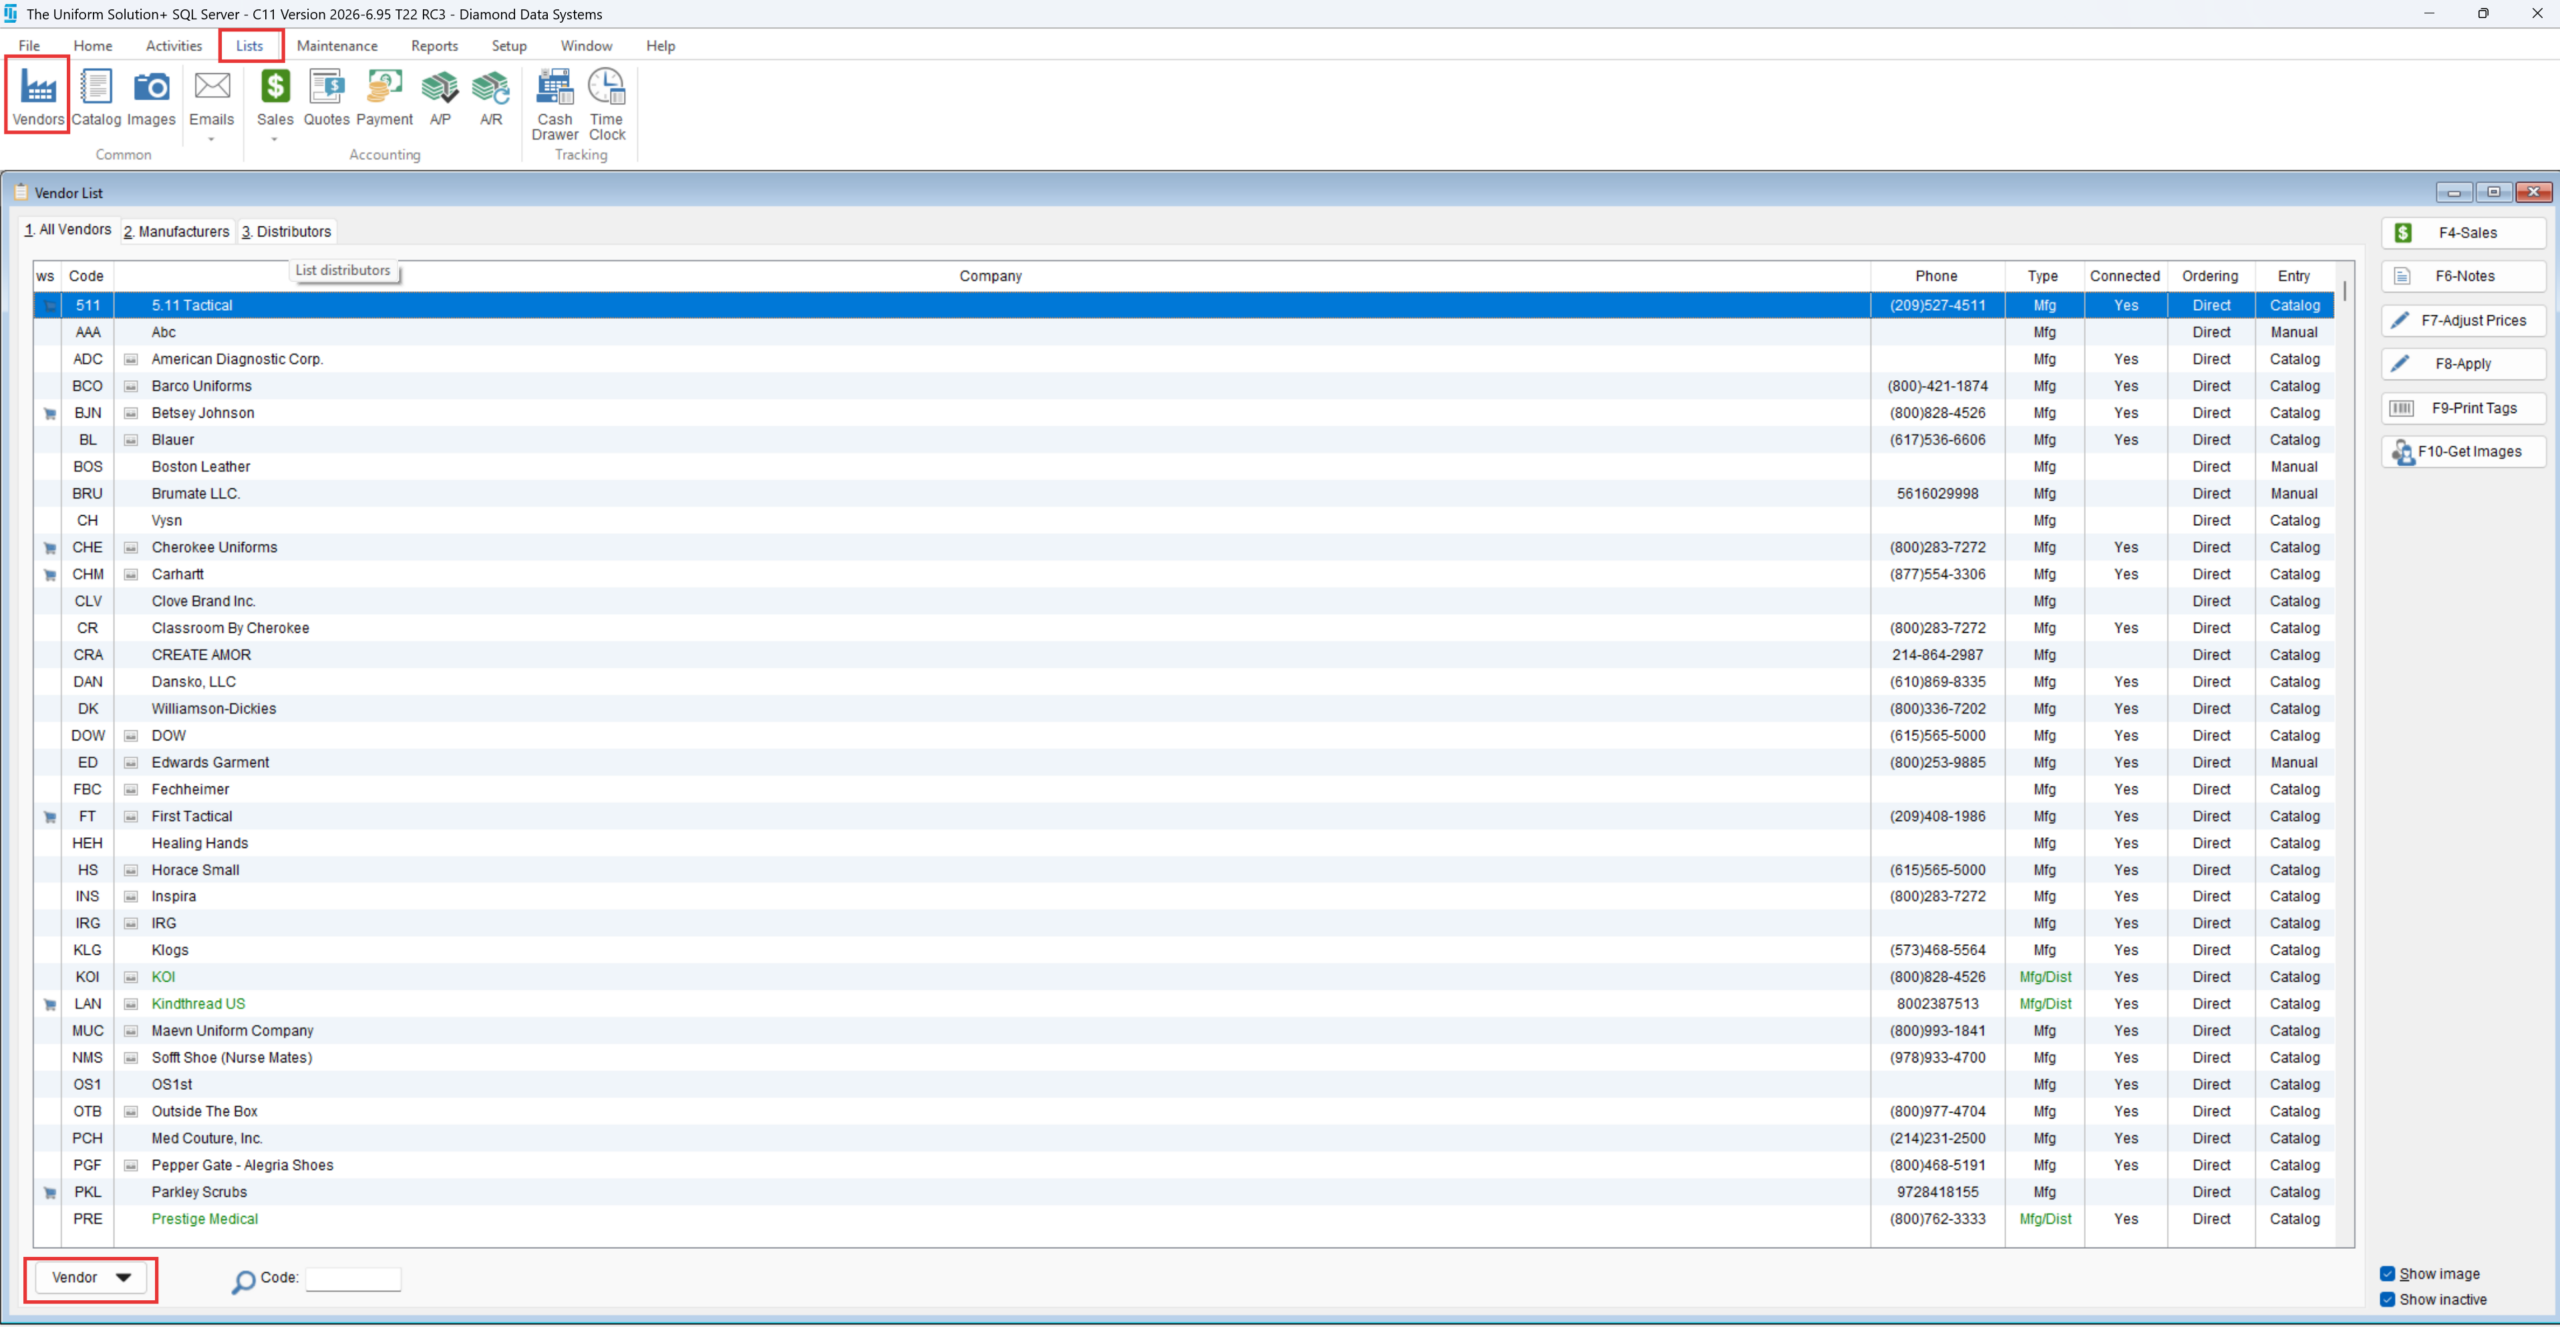
- In the Vendor list screen, select Vendor from the bottom-left corner and choose: New Vendor.
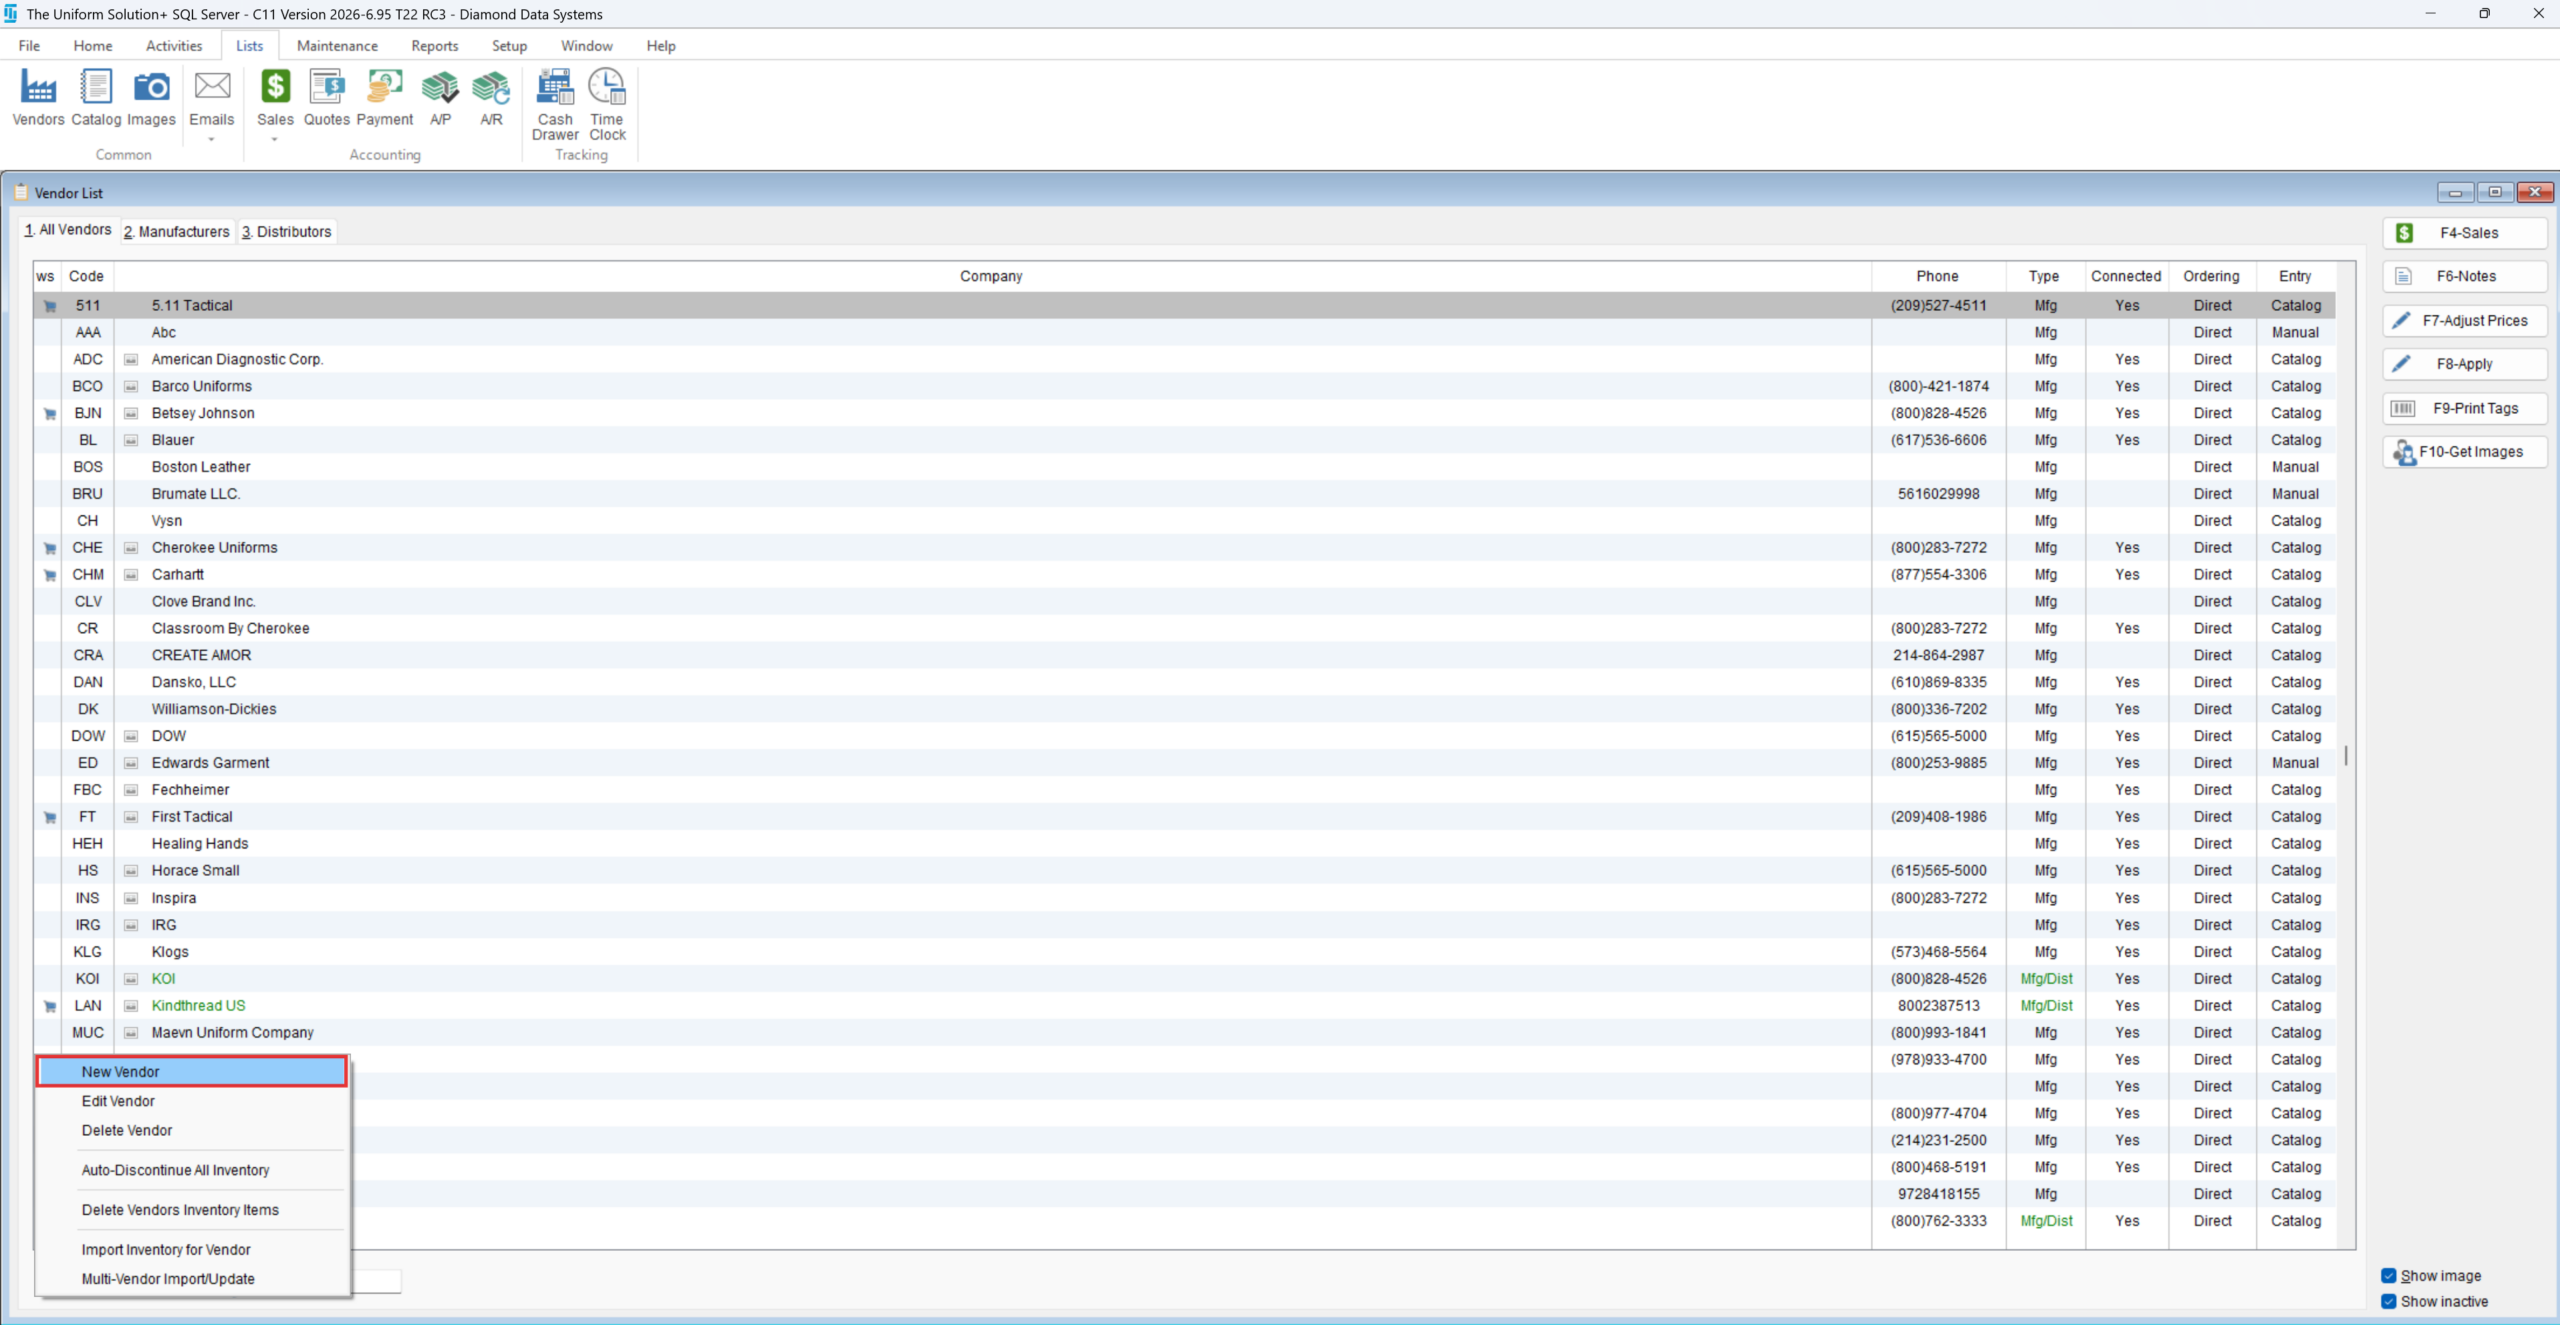
- Enter the required vendor details:
- Company Name
- Vendor Code
- Tag Label
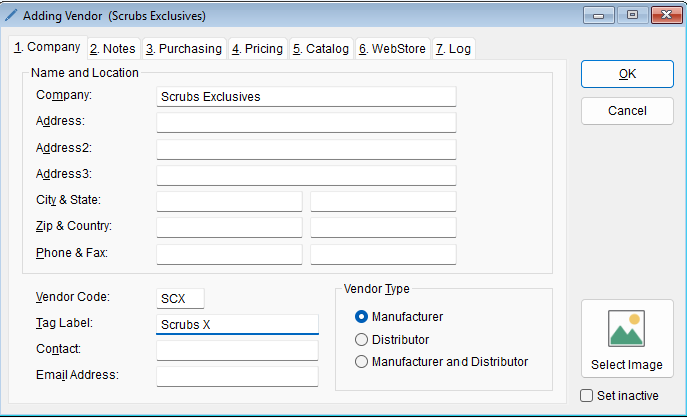
- Click OK to save the new vendor.
Step 2: Prepare the Import File
To successfully import inventory, your file should be saved in CSV format and follow the required structure. You can download the template here: Inventory Import Template. Use the provided template to structure your data correctly.
Tip: Using the template helps prevent import errors and ensures a smooth upload into the system.
Step 3: Import Inventory for the Vendor
Once the vendor has been created, you can import inventory using a CSV file.
- In the Vendor list, locate and select the vendor you just created.
- Right-click on the vendor and select: Import Inventory for Vendor.
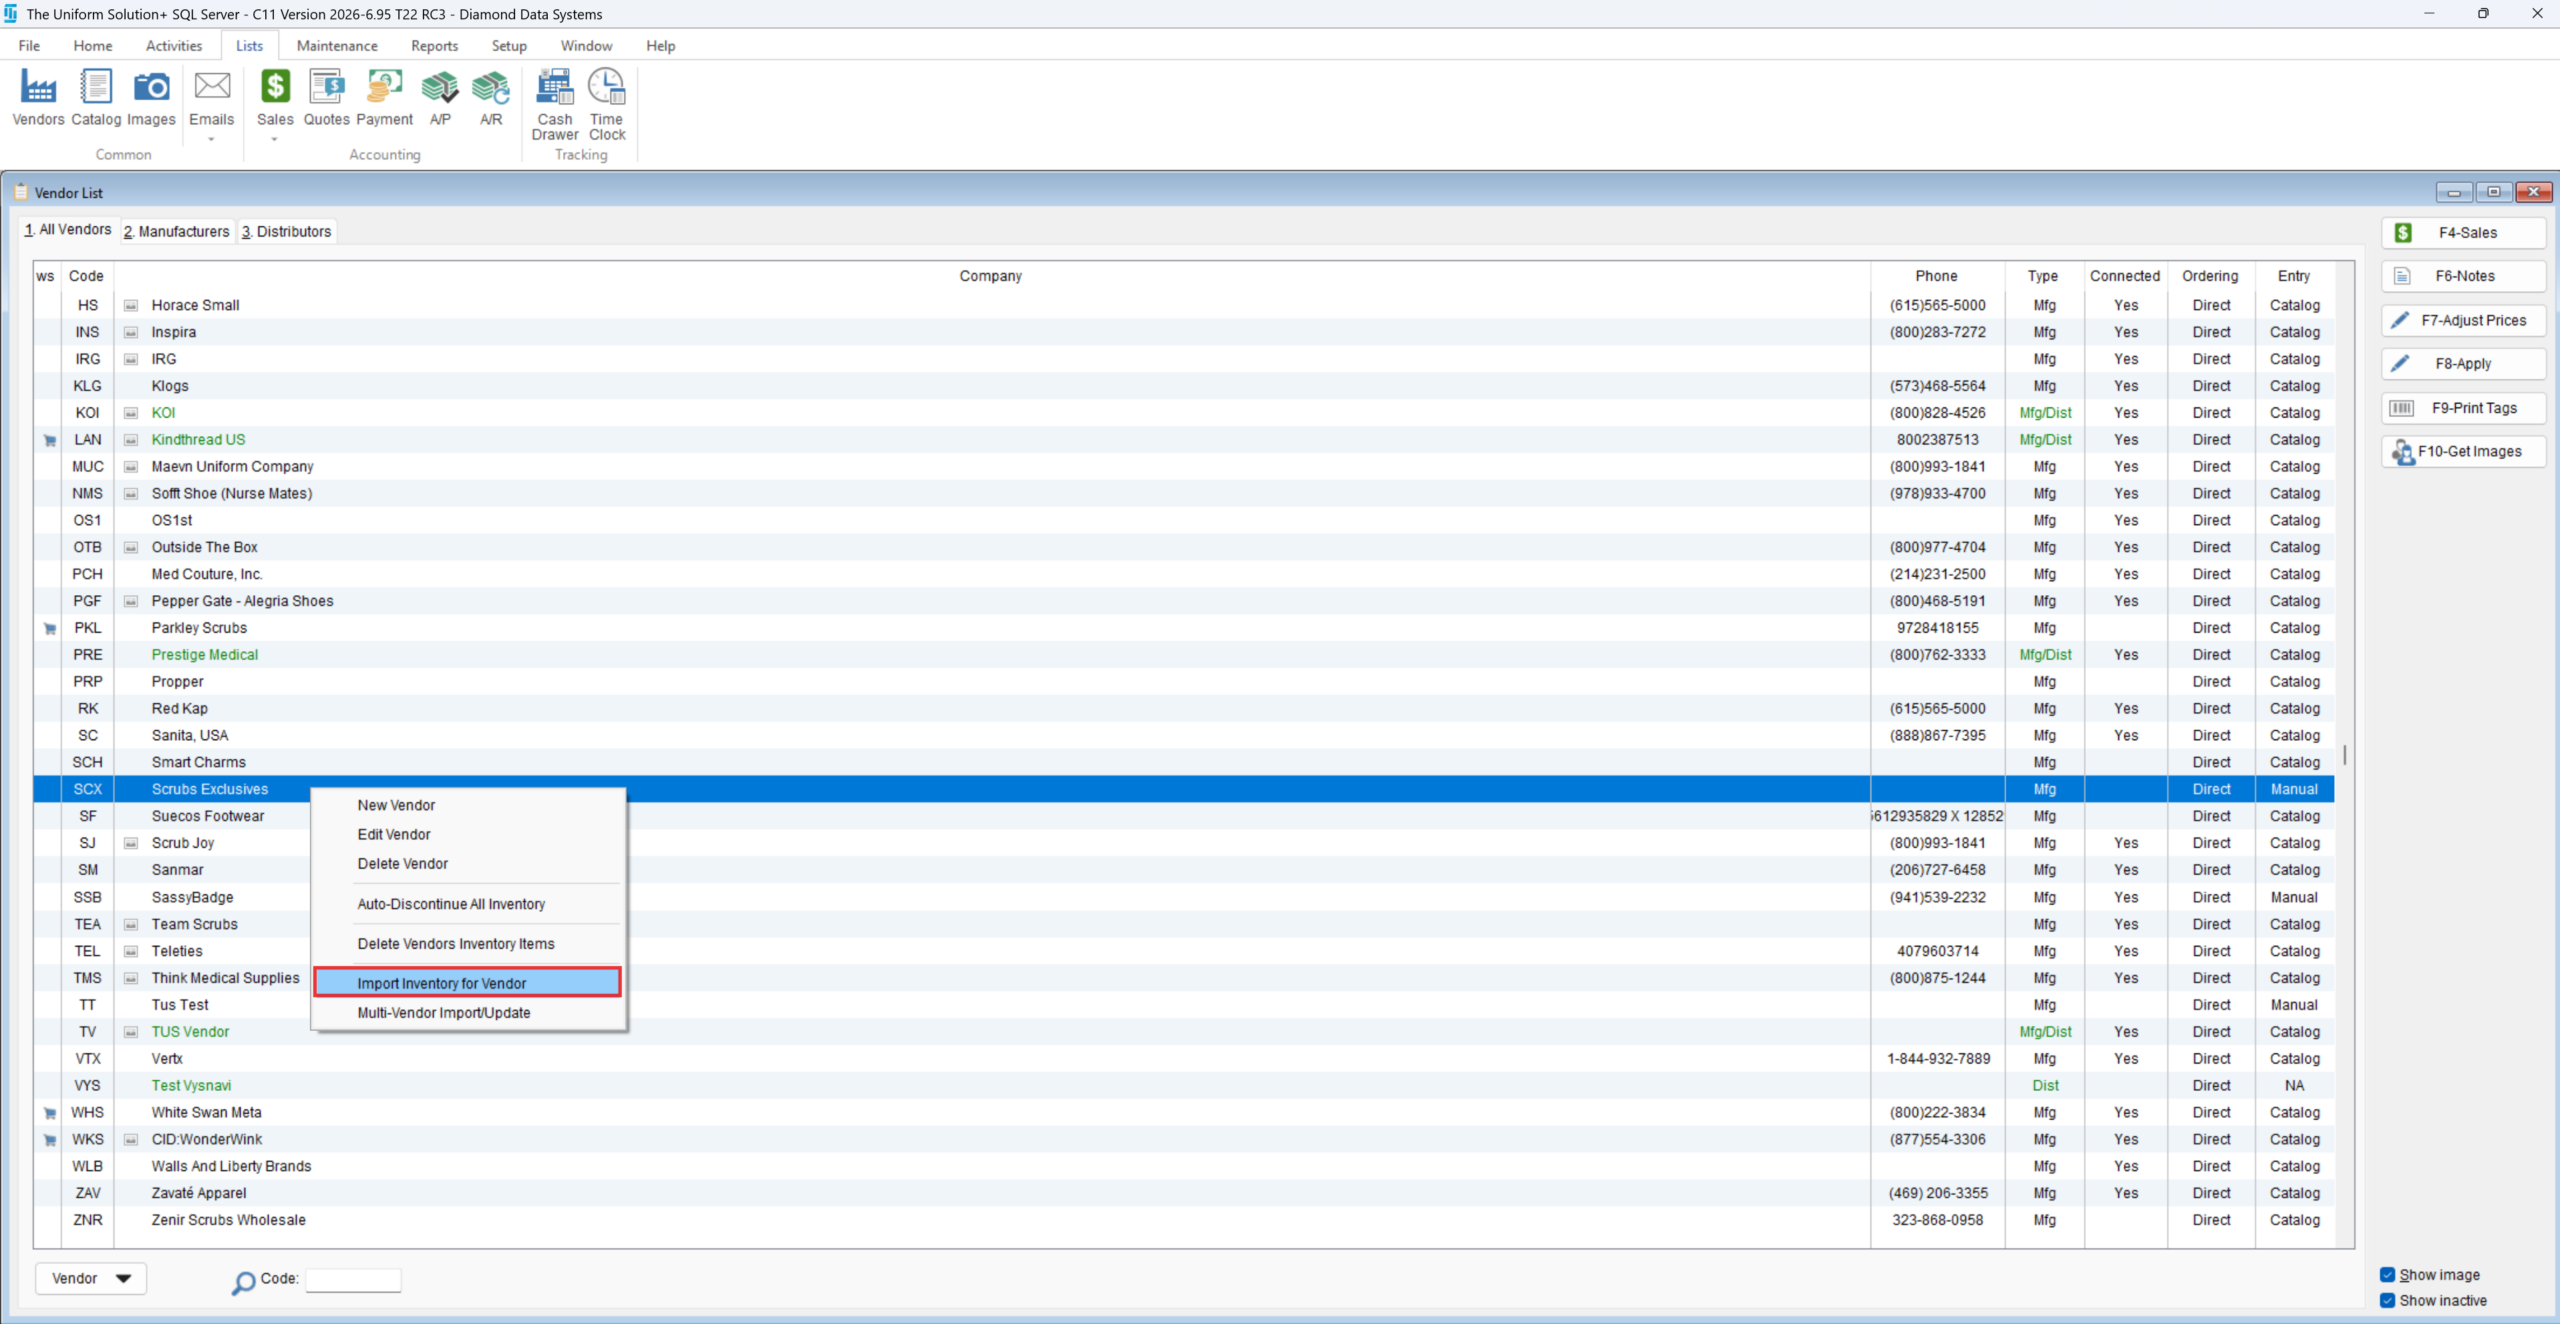
- A confirmation window will appear with import format details. Click Import to continue.

- Browse and select the CSV file.
Step 4: Review and Complete the Import
- After selecting the CSV file, a preview of the data will display.
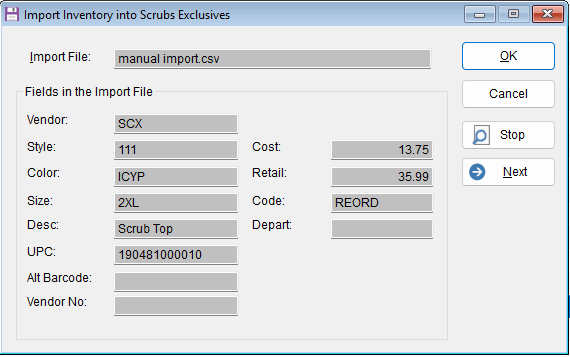
- Review the information to ensure accuracy.
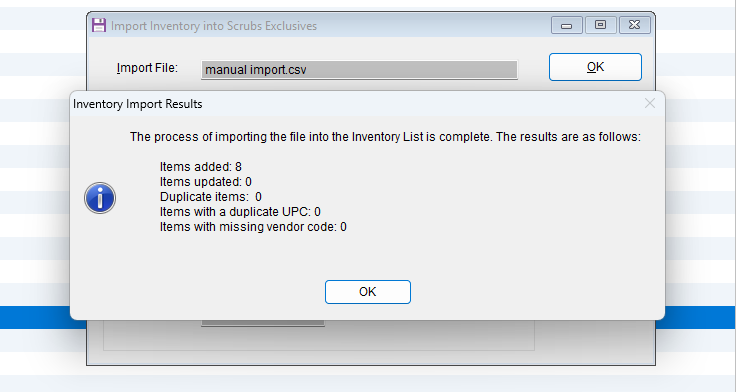
- Click OK to proceed with the import.
- A confirmation window will appear showing the import results (items added, duplicates, etc.).
- Click OK to finalize the process.
Step 5: Verify Imported Inventory
To confirm the import was successful:
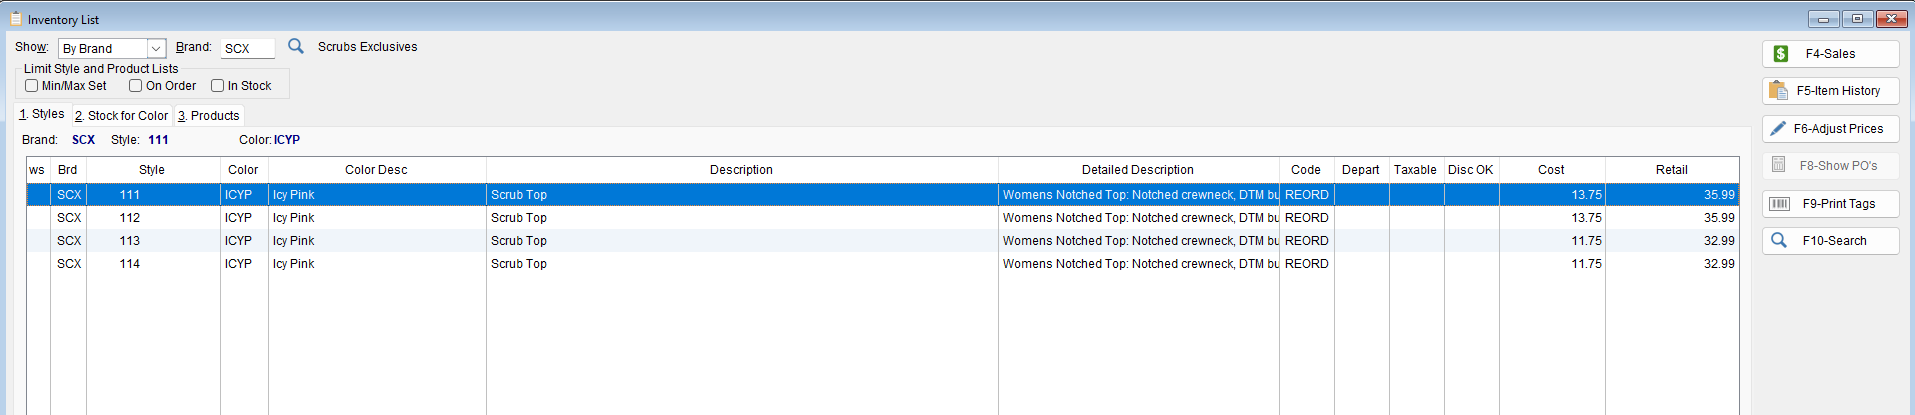
- Go to: Inventory List
- Use the filter to search by the vendor code you created.
- Review the list to ensure all items are visible and the details are accurate.
Additional Notes
- Make sure your CSV file matches the required format before importing.
📌Need more help? Visit our Training & Onboarding site, explore the Knowledgebase, or submit a ticket.