As a Uniform retailer using The Uniform Solution, you can export your Accounts, Customers, Vendors, and Journal Entries to import into QuickBooks. This guide walks you step by step with clear instructions and screenshots so you can move your data efficiently and stay organized.
Recommended Steps
Whether you’re new or existing customers, these are the recommended steps to export and import the reports.
-
Select 🟩 How to create Journal Entry CSV Export Files
- Navigation: Reports > Sales > Daily > Journal Entry/Accounting Export

- Select QuickBooks Online (*.csv files)
- Review the Options and select appropriate options for the export file.
- Select Export Folder will allow you to select the folder destination for the files

The End Date is used for the exported files
The exported files should look similar to files below. *Your export will include 4 export files if you have AP or Vendor-based transactions*
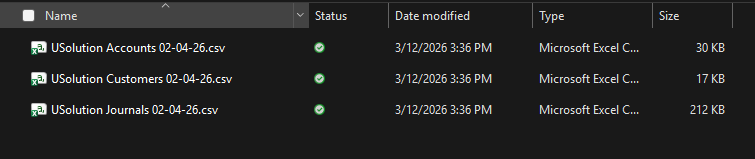
We recommend importing into QuickBooks in this order to avoid receiving possible error messages.QuickBooks Name The Uniform Solution File Name Chart of Accounts USolution Accounts <MM-DD-YY.csv> Customers USolution Customers <MM-DD-YY.csv> Vendors (if needed/optional)
* file is created only if export includes Accounts Payable (AP) or vendor-based transactionsUSolution Vendors <MM-DD-YY.csv> Journal Entries USolution Journals <MM-DD-YY.csv> <MM-DD-YY> is the end date when the data exported.
- Navigation: Reports > Sales > Daily > Journal Entry/Accounting Export
-
Select 🟩In QuickBooks Online, navigate to Import data to get started.

-
Select 🟩Import Chart of Accounts Instructions
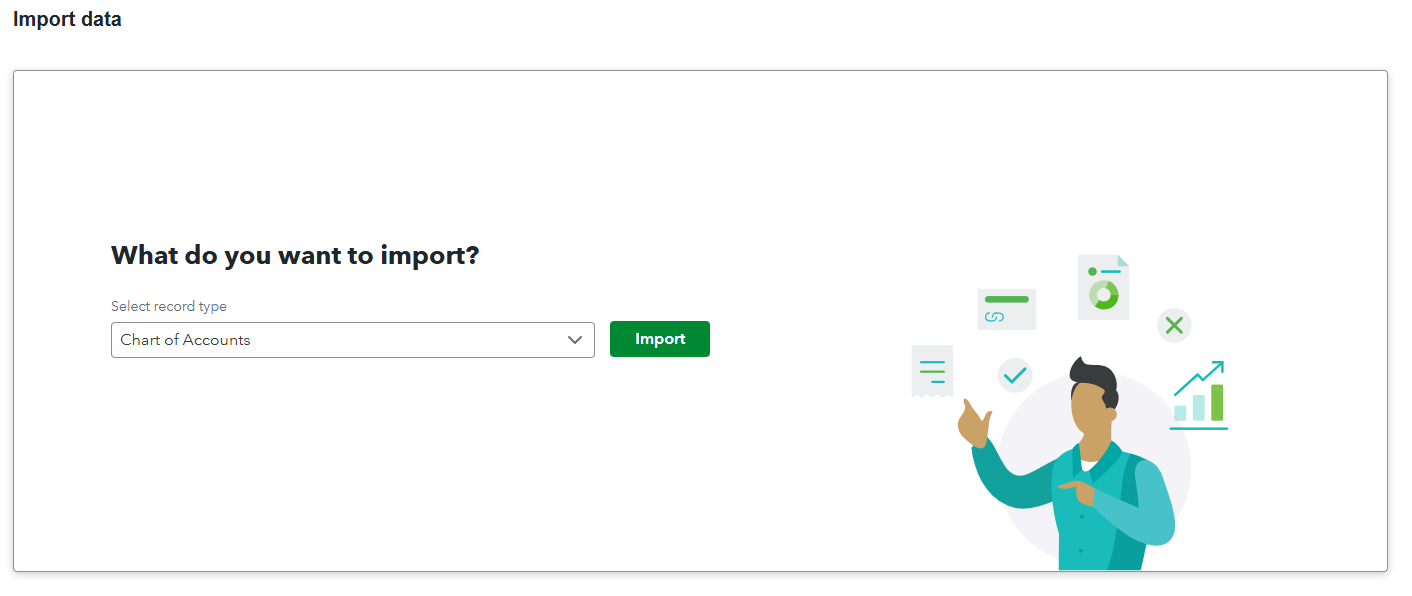
- Select Chart of Accounts from the dropdown and Import
- Browse and select “USolution Accounts <MM-DD-YY.csv>”
- Select Next and review the fields
- Select Next and review the accounts
If you see a message saying that some accounts weren’t imported, this usually just means those accounts already exist in QuickBooks, so there’s nothing you need to fix.
Below is a list of the parent accounts that The Uniform Solution can export to QuickBooks, along with the Account Type and Detail Type that QuickBooks will assign to them if you import these accounts.
Account Type
Select 🟩View Chart of Accounts Table
Account Account Type Detail Type Sales Income Sales of Product Income Sales Discount Income Sales of Product Income Sales Tax Payable Other Current Liabilities Sales Tax Payable Shipping and Handling Income Service/Fee Income Gift Card Liability Other Current Liabilities Trust Accounts – Liabilities Monies Received Other Current Assets Other Current Assets Undeposited Funds Other Current Assets Undeposited Funds Accounts Receivable Accounts receivable (A/R) Accounts receivable (A/R) Customer Deposits Other Current Liabilities Trust Accounts – Liabilities Write Off Expenses Bad Debts Coupon/Promo Payment Income Discounts/Refunds Given Account Transfers Other Current Liabilities Trust Accounts – Liabilities Unpaid Sales* Inventory Other Current Assets Inventory Inventory – In-Transit Other Current Assets Inventory Cost of Goods Cost of Goods Sold Supplies & Materials – COGS Cost of Goods:Non-Standard Cost of Goods Sold Supplies & Materials – COGS Cost of Goods:Freight Cost of Goods Sold Shipping, Freight & Delivery – COS Cost of Goods:Discount/Adjustment Cost of Goods Sold Supplies & Materials – COGS Accounts Payable Accounts payable (A/P) Accounts payable (A/P) Inventory Adjustment Cost of Goods Sold Supplies & Materials – COGS Opening balance equity* *: These accounts are standard QuickBooks accounts and will not be included in the list of accounts exported by The Uniform Solution
Customer
Select 🟩Customer – Import Instructions

- Select Customers from the dropdown and Import
- Browse and select “USolution Customers <MM-DD-YY.csv>”
- Select Next
- Select Done
If you see a message saying that some customers weren’t imported, this usually just means those customers already exist in QuickBooks, so there’s nothing you need to fix.
After importing your accounts, customers, and vendors into QuickBooks, it’s a good idea to log out and then log back in. This helps ensure that QuickBooks recognizes and updates your new account changes correctly.
Vendor
Select 🟩Vendor – Import Instructions
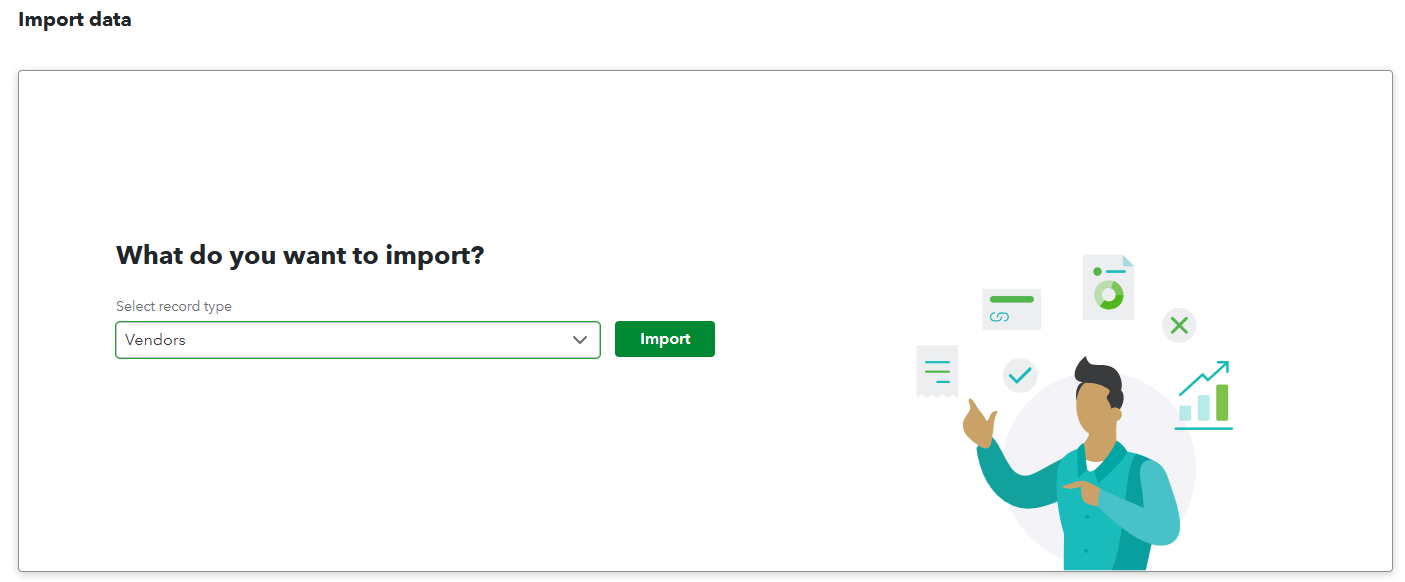
- Select Vendors from the dropdown and Import
- Browse and select “USolution Vendors <MM-DD-YY.csv>”
- Select Next
- Select Done
If you see a message saying that some vendors weren’t imported, this usually just means those vendors already exist in QuickBooks, so there’s nothing you need to fix.
After importing your accounts, customers, and vendors into QuickBooks, it’s a good idea to log out and then log back in. This helps ensure that QuickBooks recognizes and updates your new account changes correctly.
Journal Entries
Select 🟩Journal Entries – Import Instructions
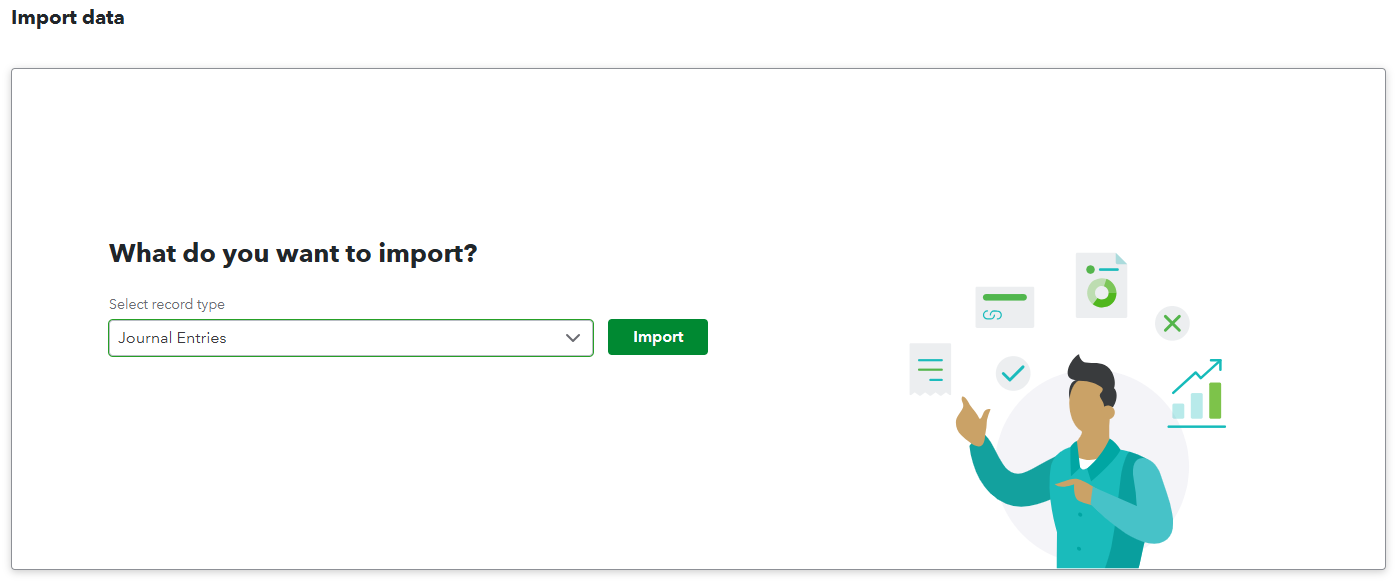
In some cases, multiple files named “USolution Journals <date>-<n>.csv” may be generated, where n starts at 2 and increases. This happens when the export contains more than 1,000 lines. When this occurs, you will need to run the import process several times, selecting a different file each time until all files have been successfully imported.- Select Journal Entries from the dropdown and Import
- Browse and select “USolution Journals <MM-DD-YY.csv>”
- Select Next
- At this step, either the journal entries will import or you will get an error window indicating one or more errors.
There are times, simply logging out and logging back into QuickBooks resolves the following Journal Entry import errors.
Error Description Resolution “Name invalid” Either customer(s) or vendor(s) do not exist in QuickBooks. Follow the steps above for Customers and Vendors. Once you have imported the files again, log out and log back in to rerun the journal import. “Line Account invalid” The account does not exist in QuickBooks. Follow the steps above for Accounts. Once you have imported the files again, log out and log back in to rerun the journal import. “Location invalid” If you are using QuickBooks Plus or QuickBooks Advanced and have enabled Locations Manually add the locations into QuickBooks “Class invalid” If you are using QuickBooks Plus or QuickBooks Advanced and have enabled Classes Manually add the classes into QuickBooks Related Articles