“Compare At” pricing allows you to show customers the difference between your regular retail price and a higher reference price—often the manufacturer’s suggested retail price (MSRP) or a competitor’s price. This can help highlight savings, increase perceived value, and encourage purchasing decisions.
If you’d like to display a “Compare At” price on your price tags, follow the steps below to set up multiple pricing levels:
-
First, you’ll want to make sure that you have at least 2 price levels set up in the program.
-
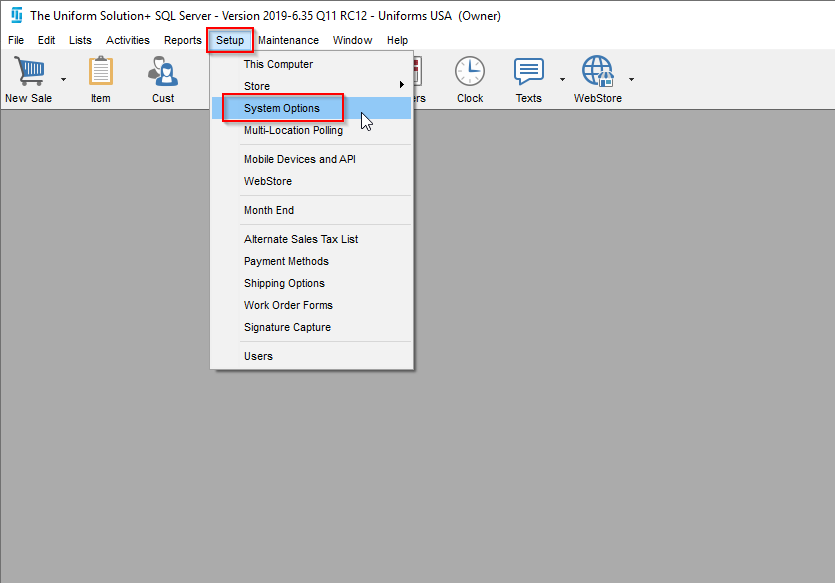
To do this, go to Setup > System

-
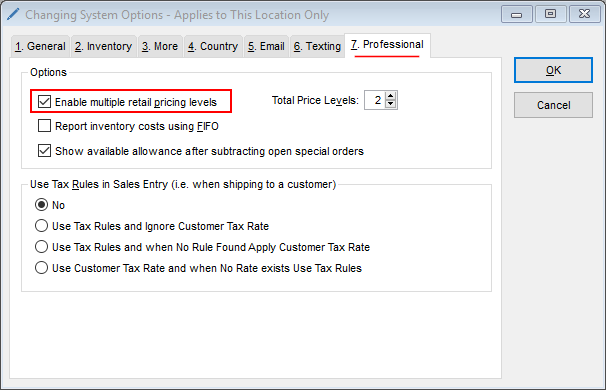
Select the 7. Professional tab at the top. Then check the box to enable multiple levels, and select the number of desired levels in the Total Price Levels scroll box.
- Click OK
-
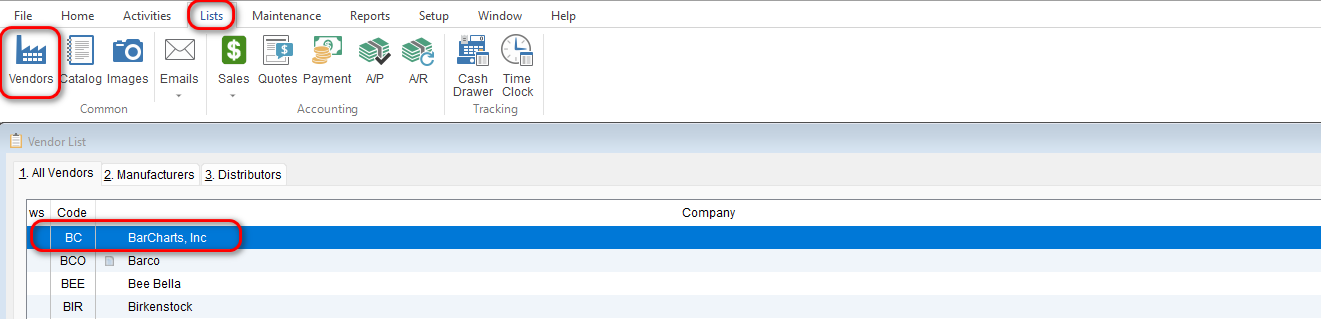
Then go to Lists > Vendors
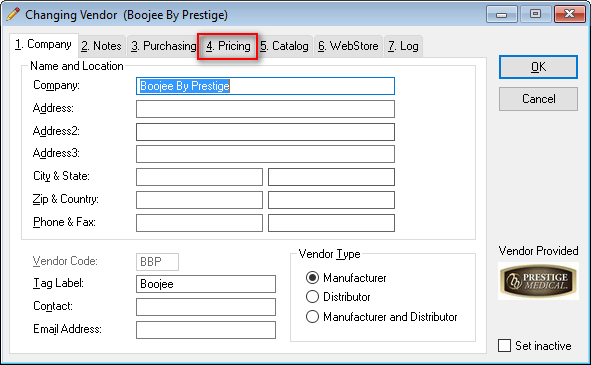
- Double-click the desired vendor and select the Pricing tab.
-
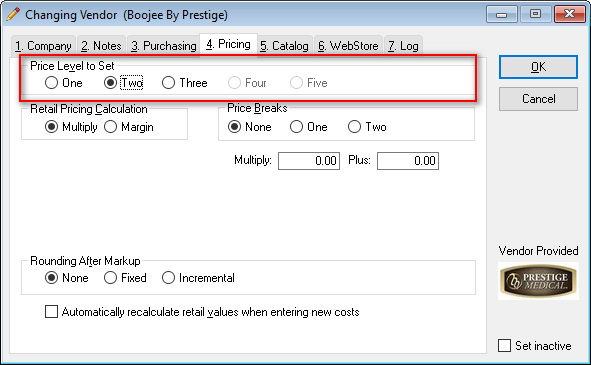
Under Price Level to Set make sure you have at least Two selected.
-
Set the desired second pricing level in the Retail Pricing Calculation section. You’ll most likely want this price level to be higher than your first price level.
-
Select OK to save you changes.

Now that you’ve got a price level to compare your retail price to, let’s set up the program so that it prints on your price tags.
-
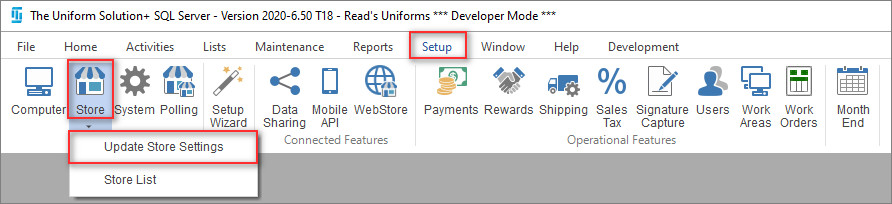
Go to: Setup > Store > Update Store Settings.
-
On the Pricing tab under the Tag and Retail Pricing section, select Compare.
-
The “Compare At” (higher) price should be on the bottom.
-
Once all of the desired options have been set, select OK to save your changes.