Table of Contents:
- Create a work order
- Work Order Field Types
- Work Order Creation Examples (HEM- Standard Work Order)
- Work Order Creation Examples (Patches- Standard Application)
- Work Order Pricing
This document will cover how to set up work orders in the program. Work orders can be set up in many different ways to accommodate several scenarios based on your needs.
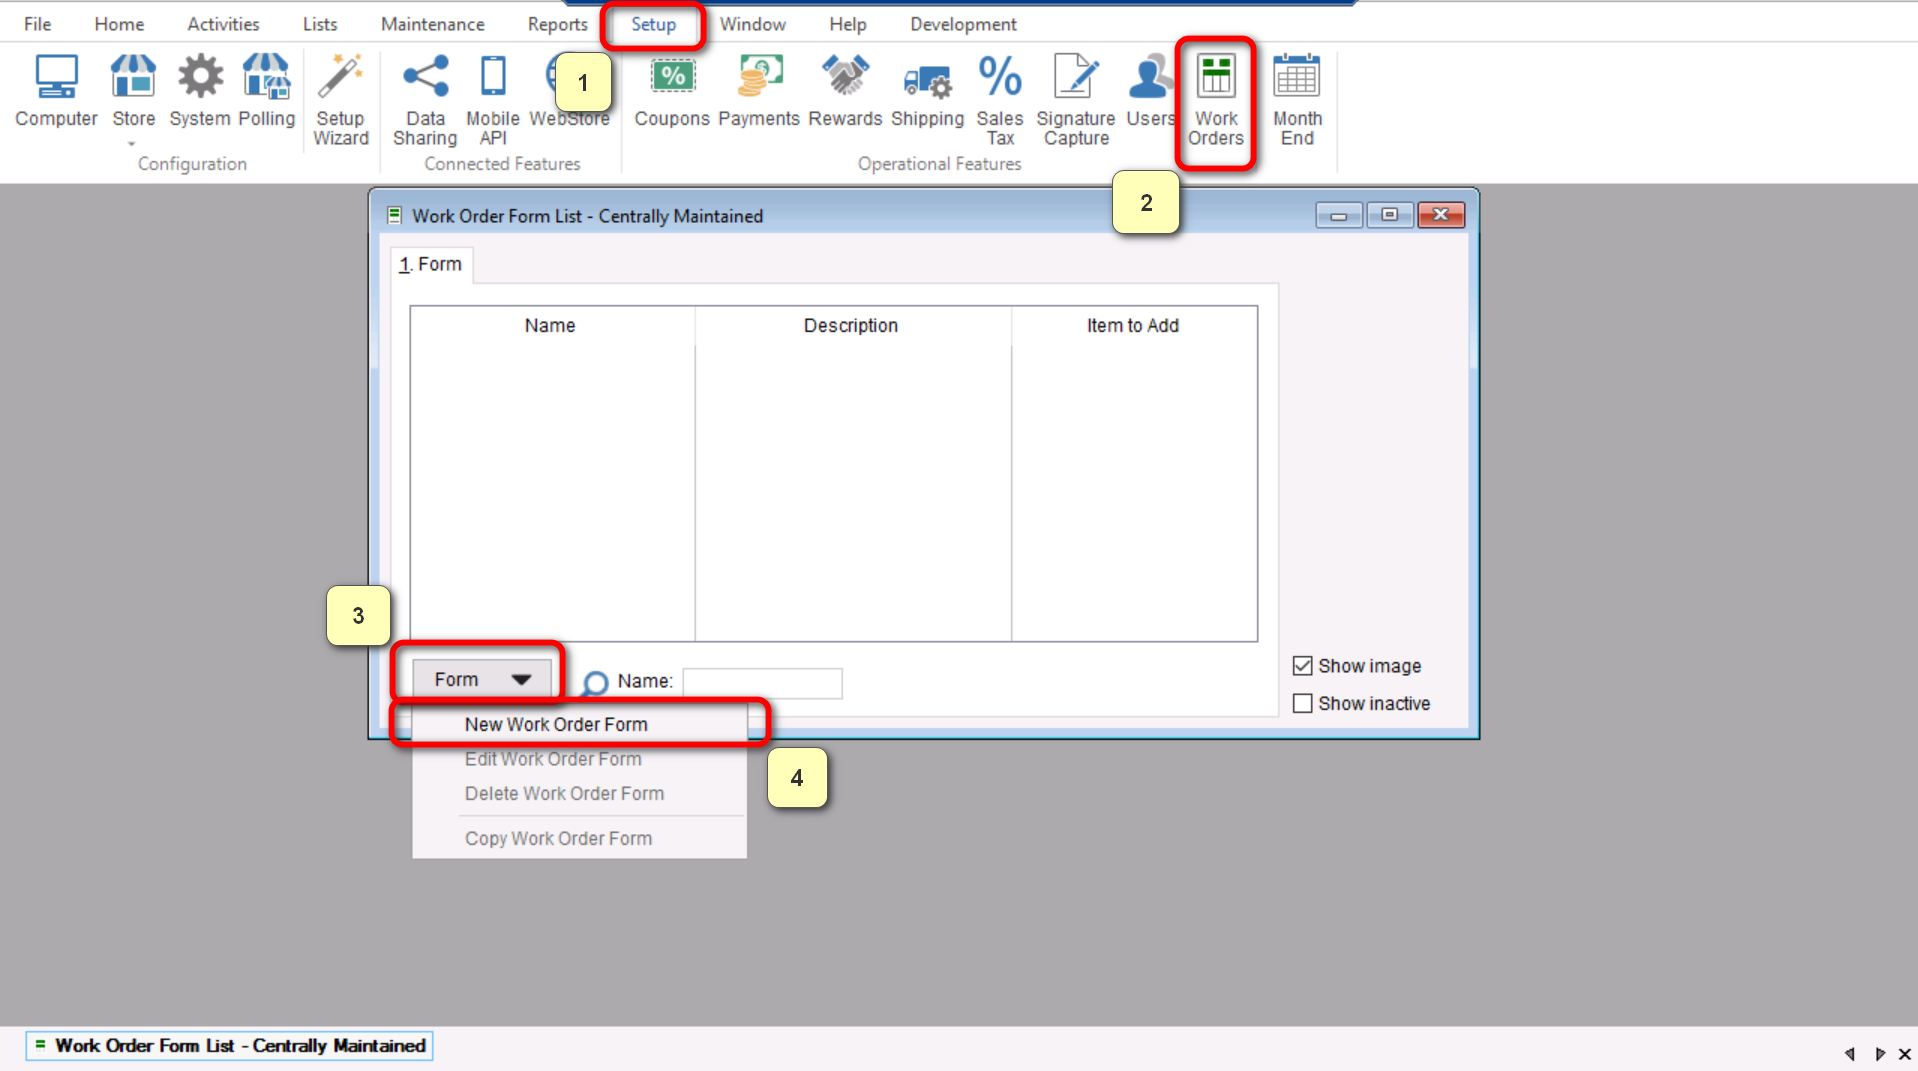
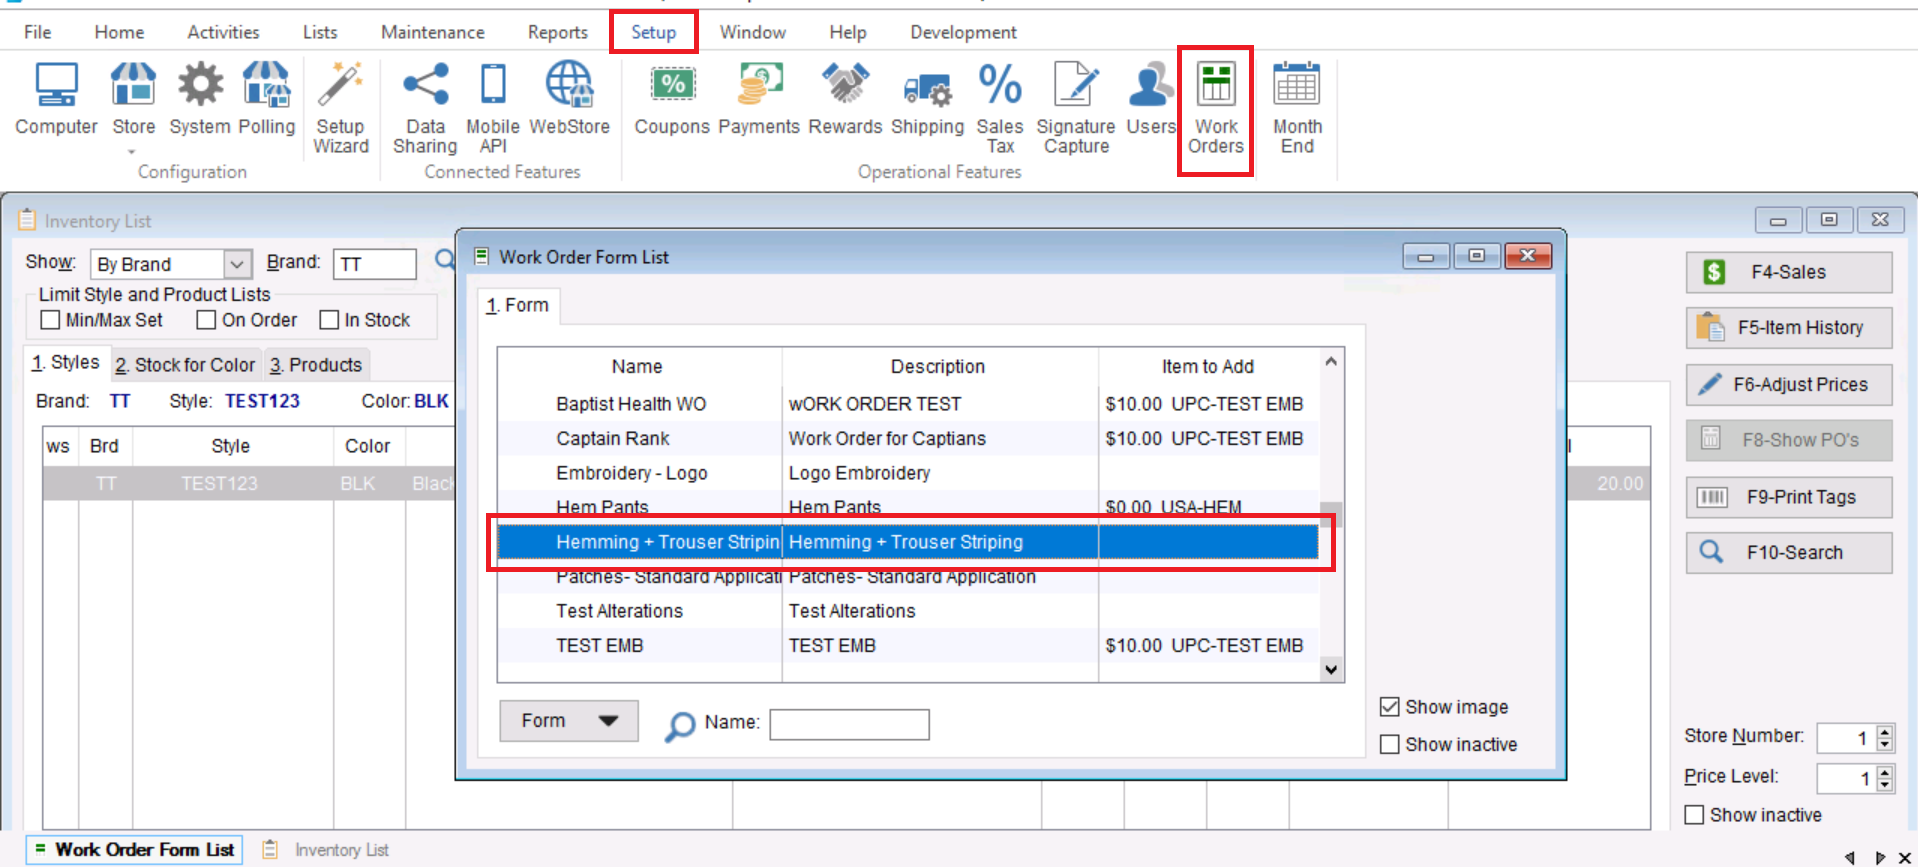
- To start creating your work order, you will go to “Setup>Work Orders” and choose “New Work Order Form” by selecting “Form” at the bottom left of the screen that opens.
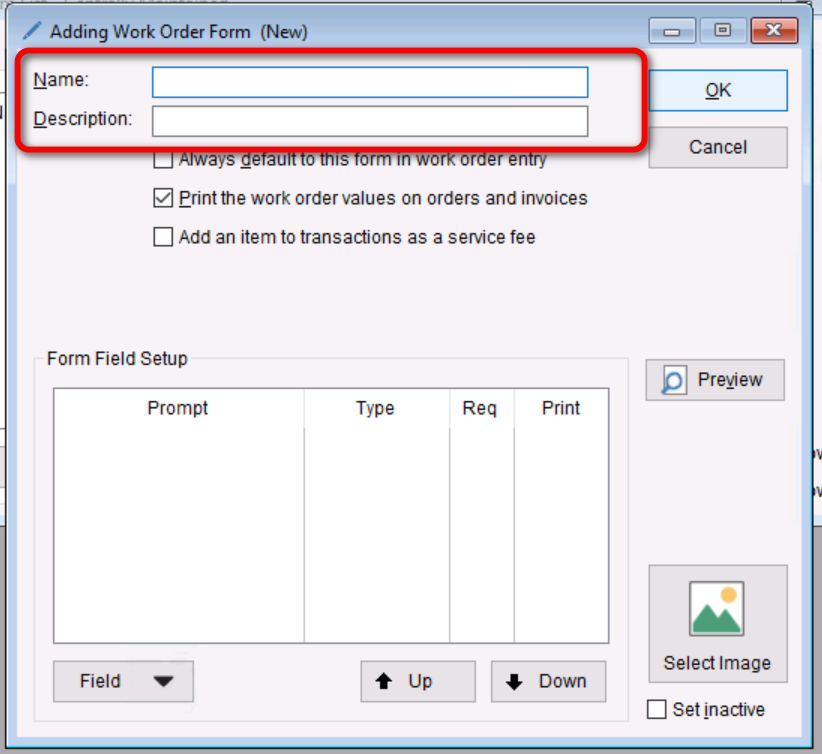
- Once you have opened the “Adding Work Order Form (New)” screen you can enter the “Name” and “Description” of the work order, these two values can be the same however the “Name” portion is how it would show to your customers in case you want to make them different.
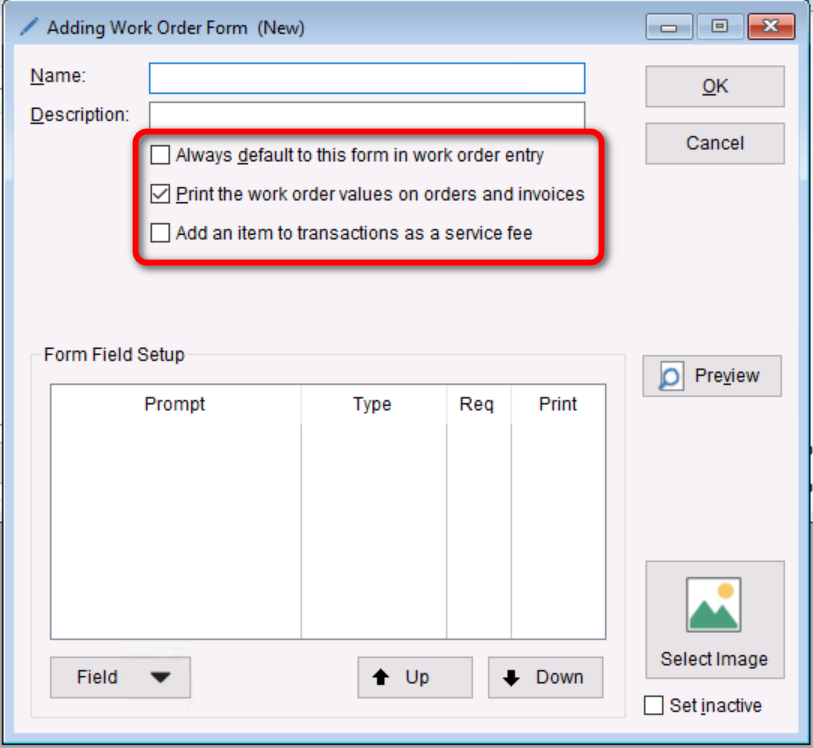
- Next you will need to understand what the 3 checkboxes under the Name and Description mean before you can start building out specifics on your Work Order.
- Always default to this form in work order entry- This section is referring to in store invoices indicating that when this is selected it will be the initial work order option shown when choosing a work order. Essentially to make it easier if this will be used often.
- Print the work order values on orders and invoices- This option will allow the values selected on your work order to physically show on the receipt along side the item details.
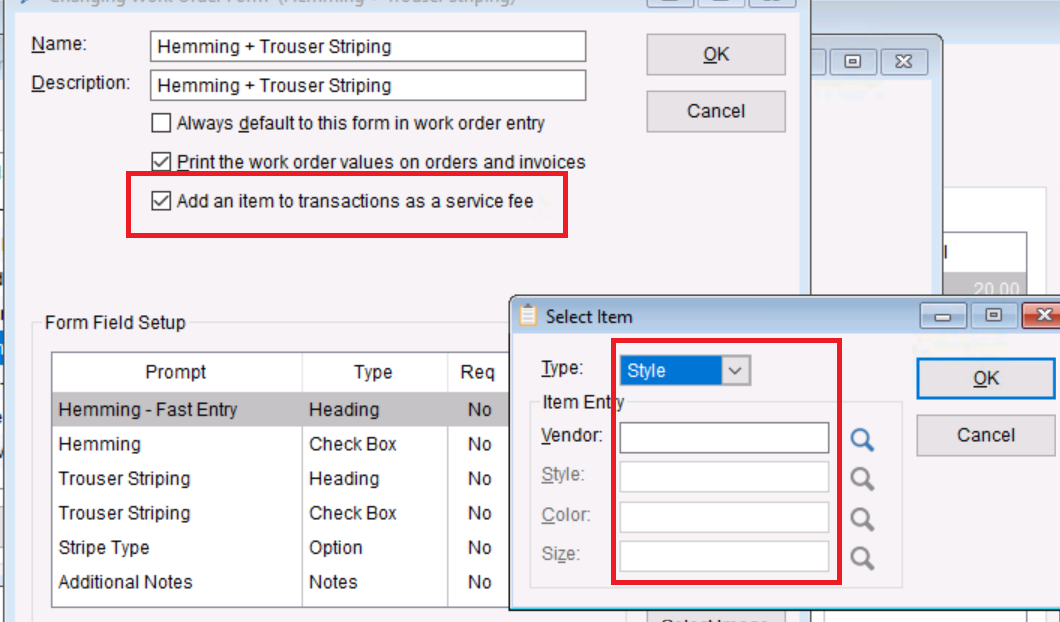
- Add an item to transactions as a service fee- This option will allow you to link an items price to your work order. (Note that this will only add the items price to the Work Order, it will not adjust the stock for said item when added to an invoice)
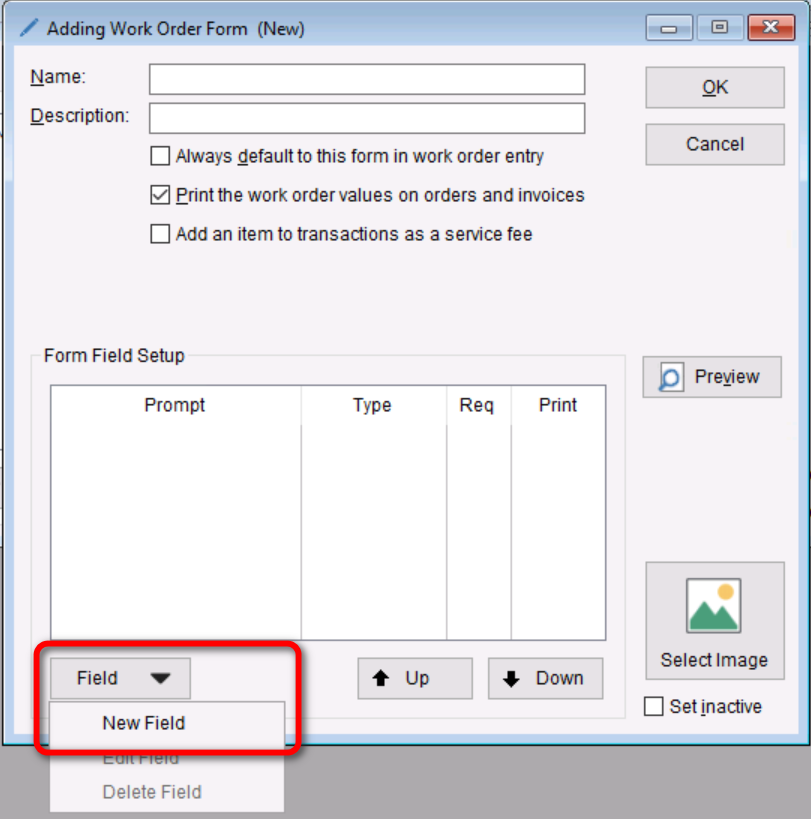
- From here we need to start figuring out how we want to structure our Work Order in TUS. Work orders are structured by adding line items into the “Form Field Setup” section by clicking on “Field” and selecting “New Field”. As we go through these sections we will continue adding fields until we have all the information desired for our customers.
- From here you will be brought to the “Adding Work Order Form Field (New)” where you can choose what “Field Type” we will be selecting. The following will break down the intended purpose of the “Field Types” available.
Work Order Field Types
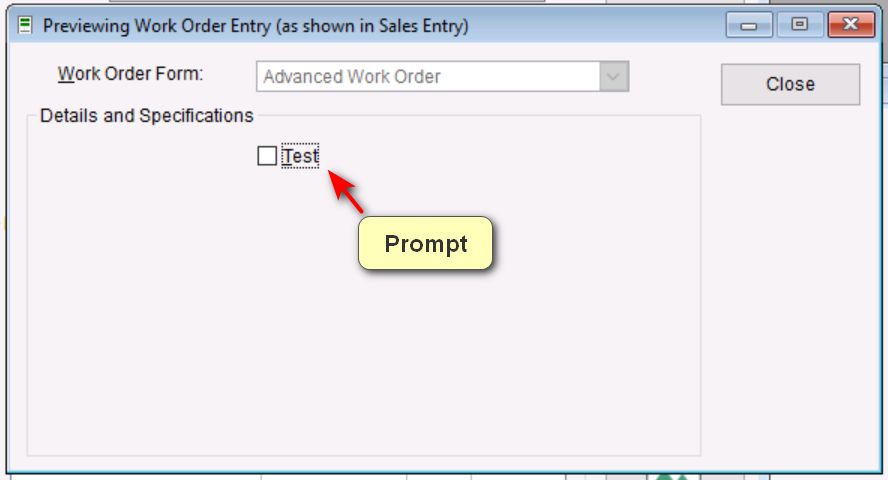
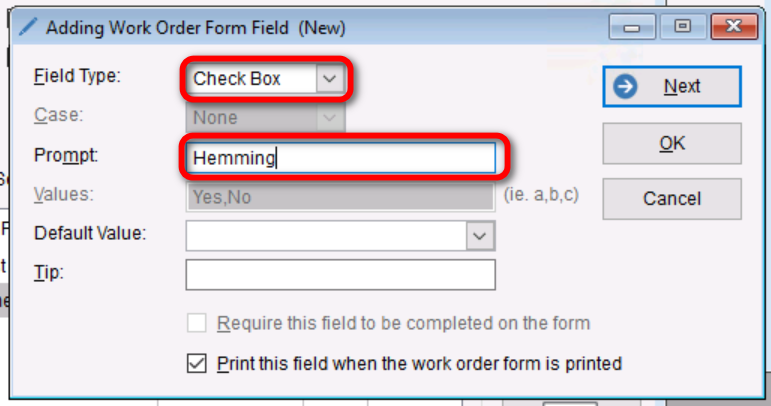
- Check Box – Generates a prompt of your choosing with a check box next to it that your customers can select to indicate certain choices.
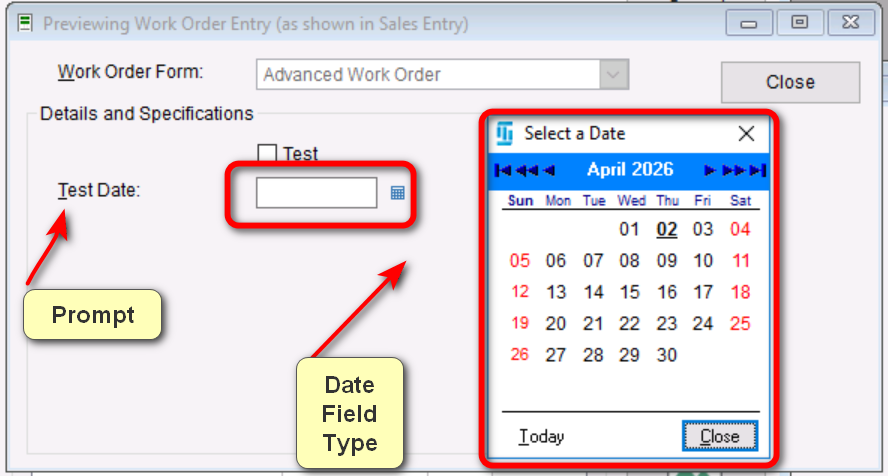
- Date – Generates a prompt of your choosing along with a field that allows your customers to enter a specific date.
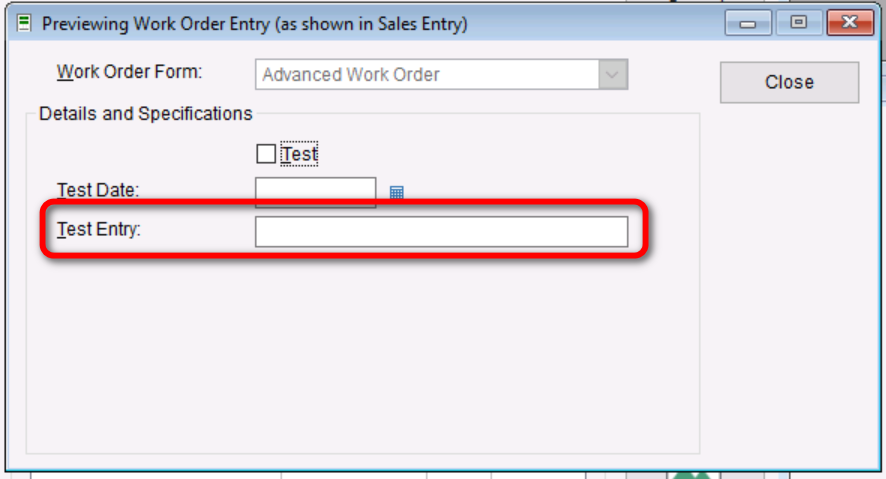
- Entry – Allows you to create a prompt with a field for an open-ended response. Note: This field has a 40-character limit.
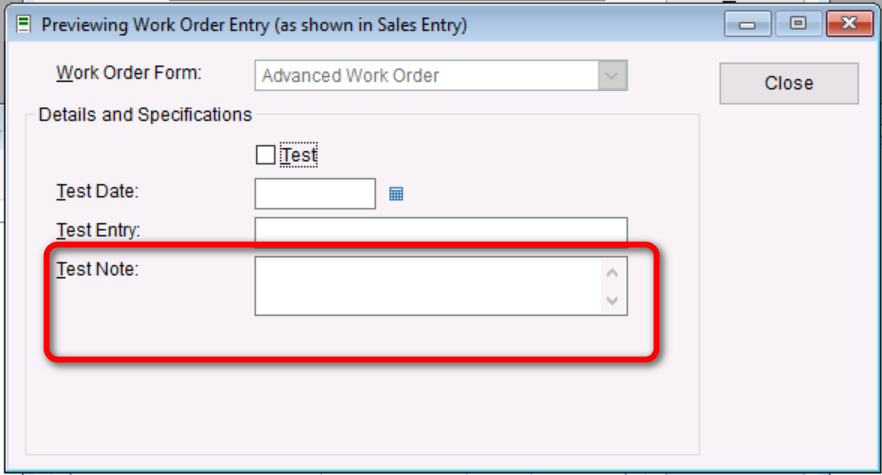
- Note – Similar to Entry because it allows for an open-ended response, but this field allows more characters. Limit: 200 characters.
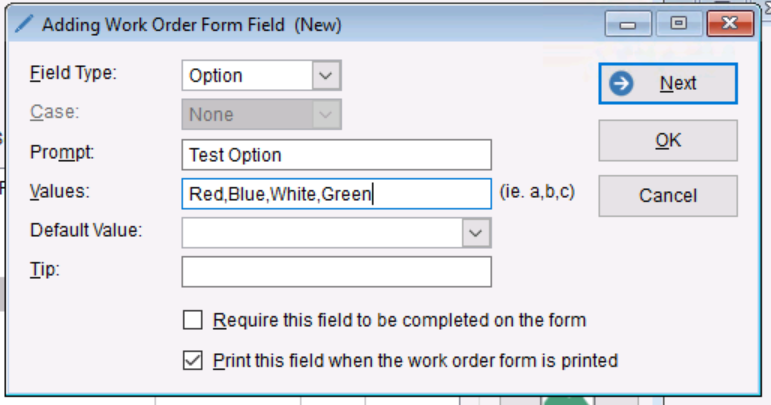
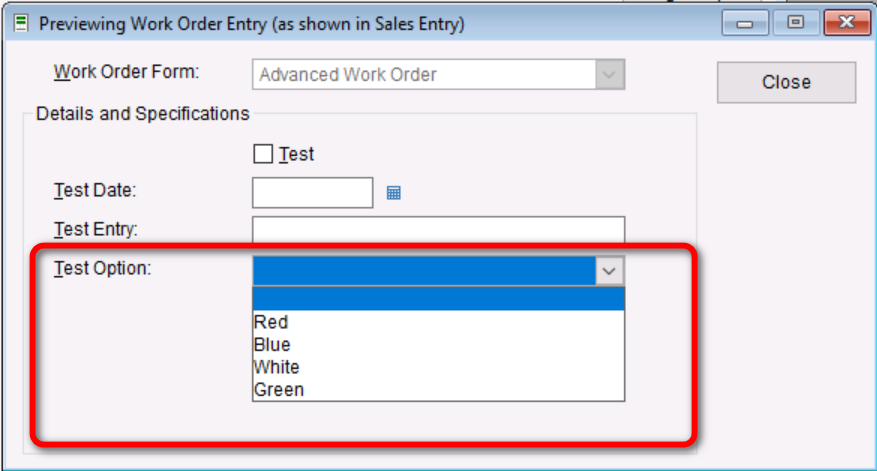
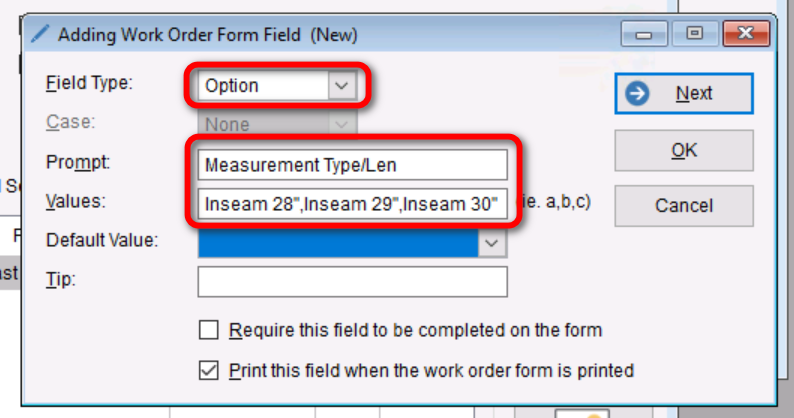
- Option – Allows you to enter a prompt along with a preloaded set of values. Separate each value with a comma. The customer can then choose from those selections using a drop-down menu.
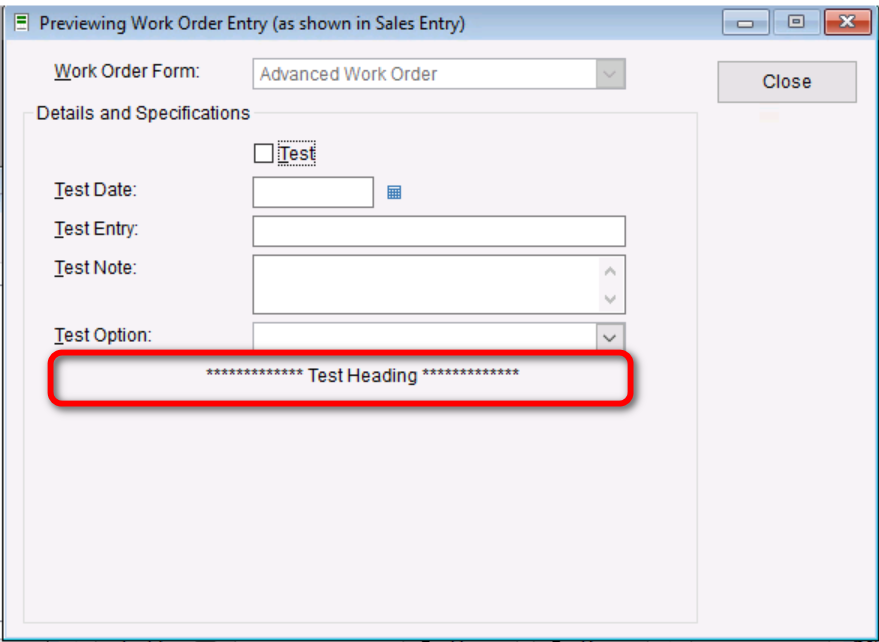
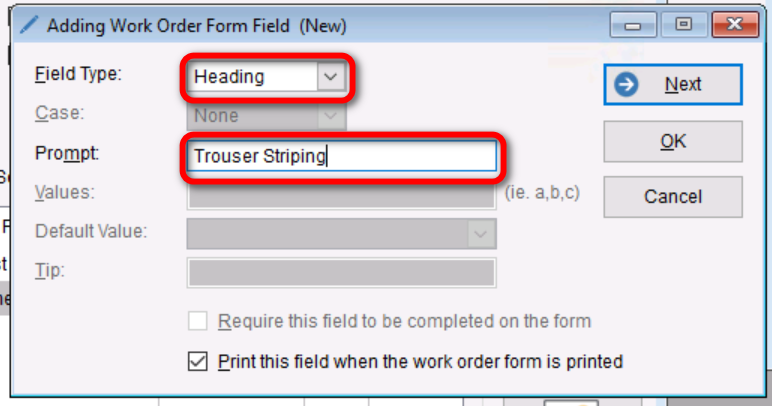
- Heading – Creates a single line item that cannot be adjusted or added to. It is primarily used as a heading or informational section.
- Check Box – Generates a prompt of your choosing with a check box next to it that your customers can select to indicate certain choices.
Now that you have a better understanding of how to create and add to work orders, lets work through some examples of work orders you might need to create in TUS.
HEM (Standard Work Orders)
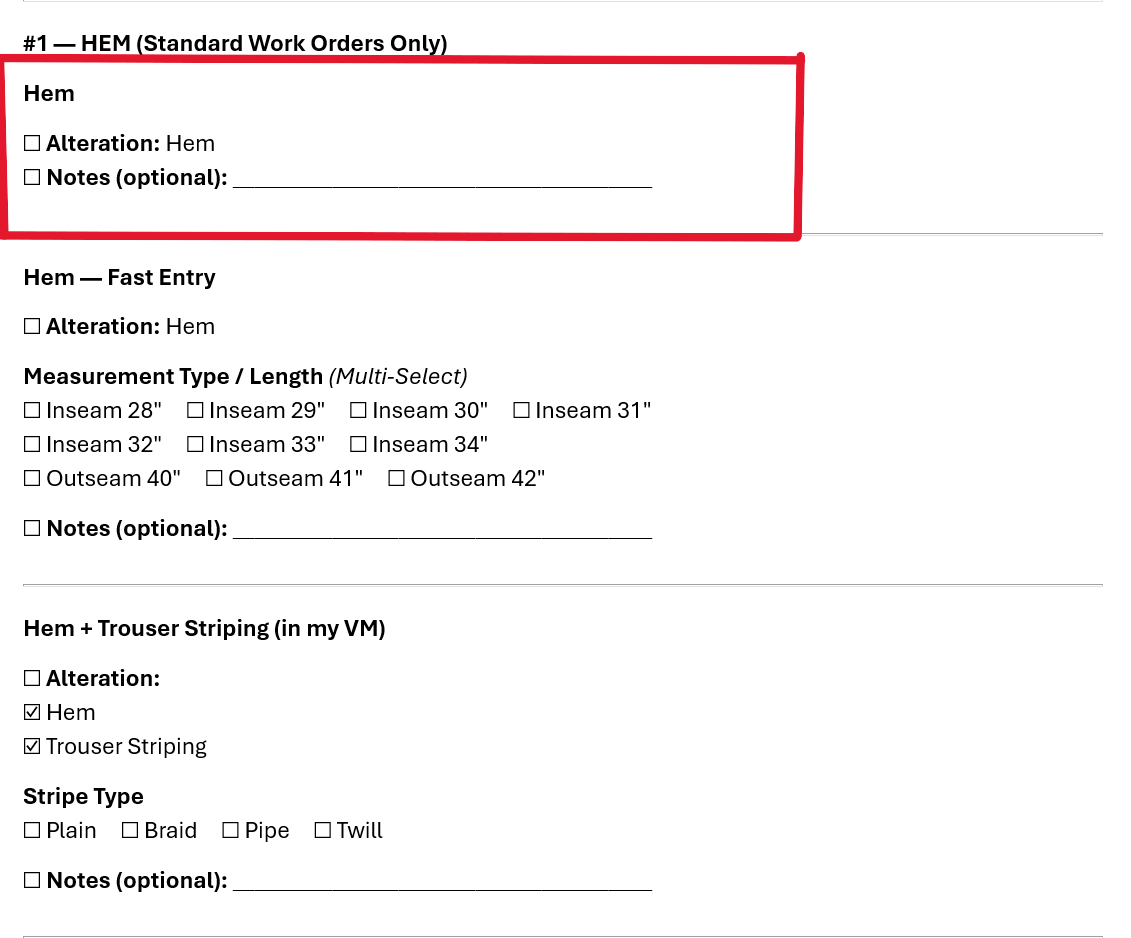
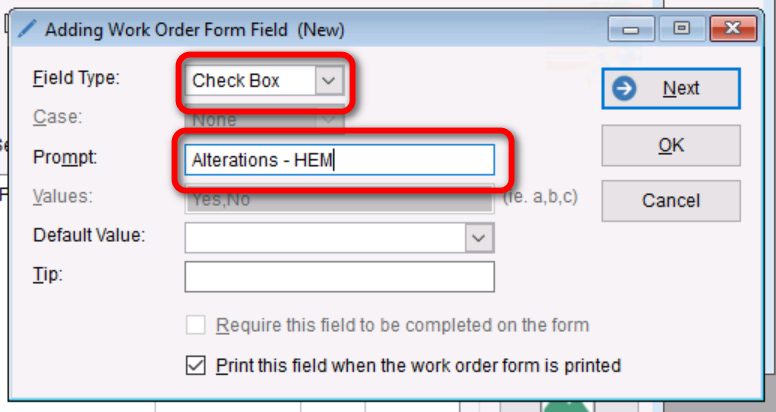
- To start creation on the first work order you can see above for “Hem” you will see that there is a “Alteration” section which is optional and requires a checkbox to opt into the modifications, in this case you would use the “Check Box” Field Type and set the “Prompt” to “Alteration – HEM”.
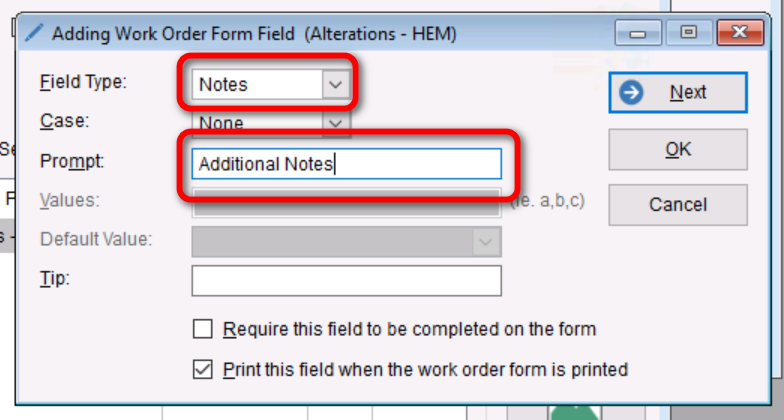
- Next you will need to address the “Note” line which since you will want to give them some additional characters to work with you will choose the “Note” Field Type.
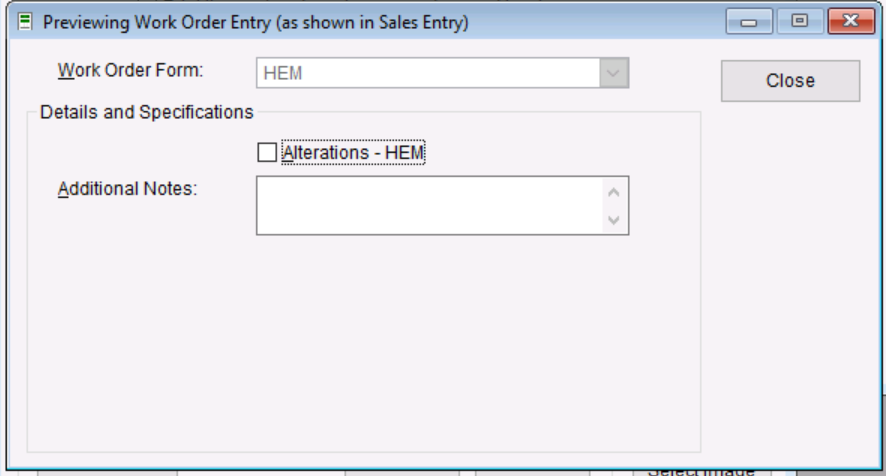
- Once you have added these selections you will be left with a work order that looks like the graphic below.
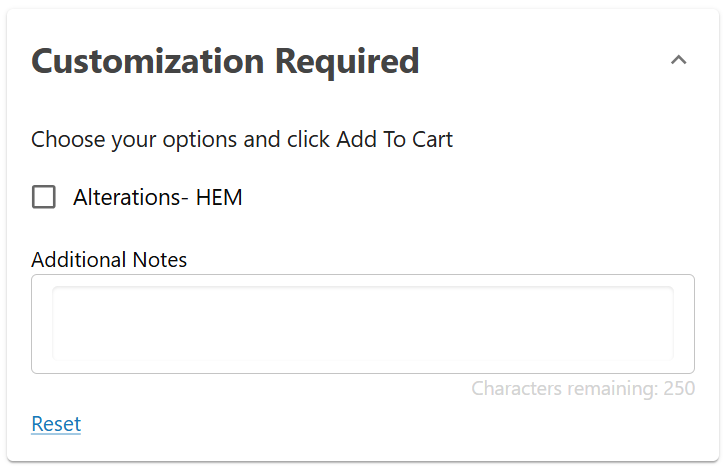
- Here is what your work order would look like on the webstore.
Moving onto the second work order on our example, this section will cover some additional options needed to create both “HEM- Fast Entry and HEM + Trouser Striping” on one work order in TUS. 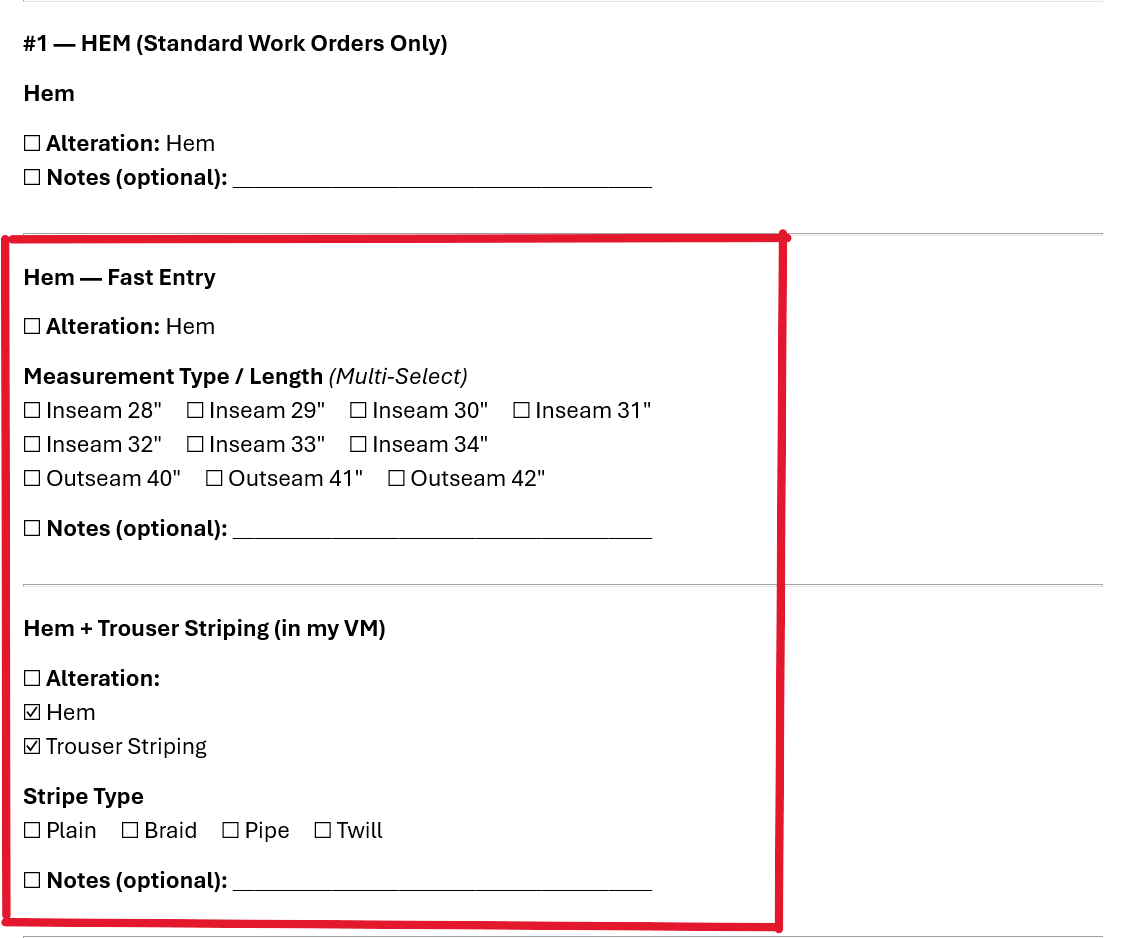
-
- To start this process we will need to find a good way to lay these sections out to make it easier for your customer to make their selections. In this case you will want to work the list from top to bottom indicating section breaks with the “Heading” field type.
- You will start the “Fast Entry” section by entering a “Heading” Field type for “Hem- Fast Entry”

- From here you can add a “Check Box” Field type to indicate whether they are opting into the “Hemming”
- Next you will use the “Options” field type to create a list of choices a customer can select from for the Measurement Type/Length. Here you will add the prompt as Measurements or some variation of that and add the Inseam 28-42 in the “Values” section seperated by a Comma.
- Since their are multiple “Note” sections you can save that as the last option so you dont create duplicate fields.
- You will start the “Fast Entry” section by entering a “Heading” Field type for “Hem- Fast Entry”
- To add the second section you will repeat the steps from the previous example and start working down the list.
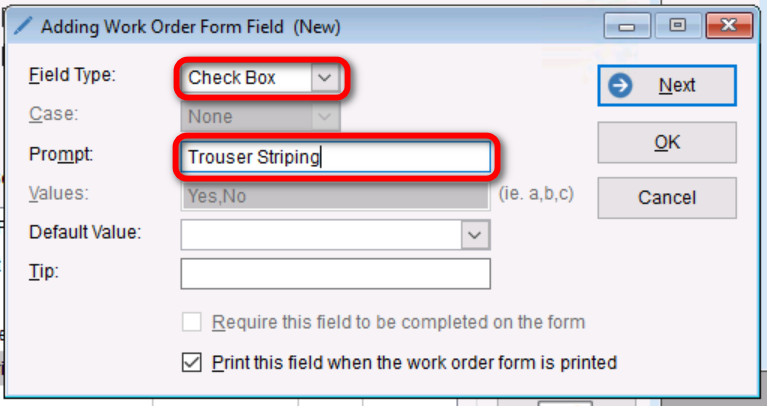
- First you will seperate the two sections by adding a “Heading” Field type and add the “Prompt” as “Trouser Striping”
- Next since we already have a “Check Box” created for “Hemming” we will add one here for the “Trouser Striping”.
- Since their are options to choose from in the next section we will use the “Options” Field type to create a drop down menu for the customer to choose from. As mentioned the “Prompt” should be “Stripe Type” and the options should be listed in the “Values” section seperated by a comma.

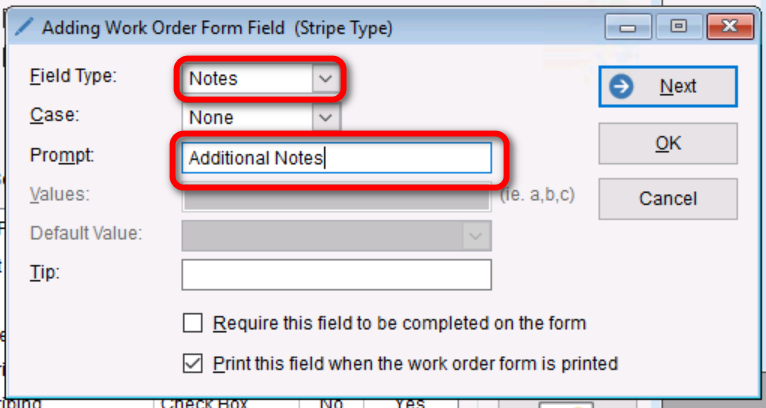
- Lastly we can add a “Note” field so customers can add any additional notes they deem necessary to complete the work order.
- First you will seperate the two sections by adding a “Heading” Field type and add the “Prompt” as “Trouser Striping”
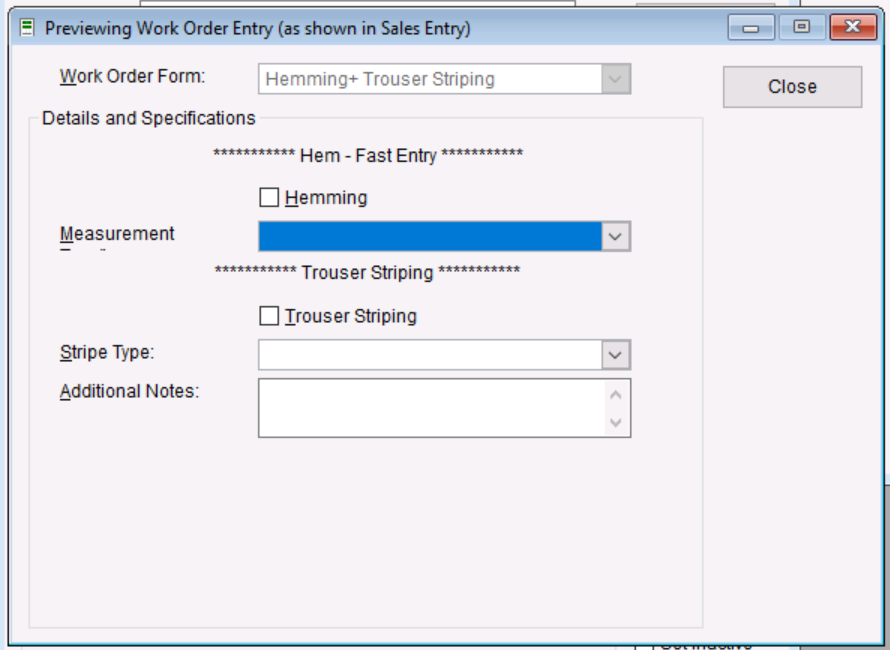
- Once completed you should have a Work order that looks like the following.
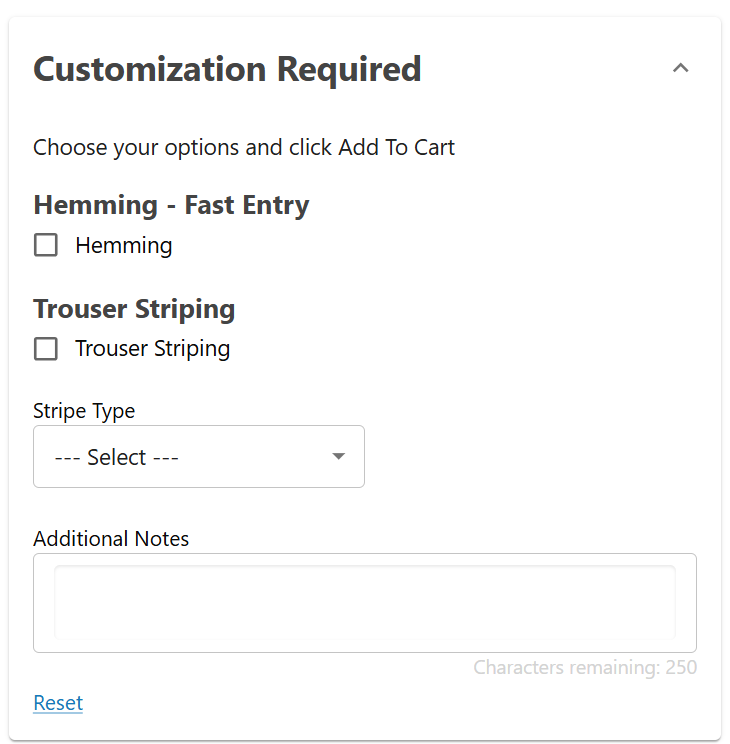
- Along with an example of how this work order would look on the Webstore.
- To start this process we will need to find a good way to lay these sections out to make it easier for your customer to make their selections. In this case you will want to work the list from top to bottom indicating section breaks with the “Heading” field type.
Patches (Standard Application)
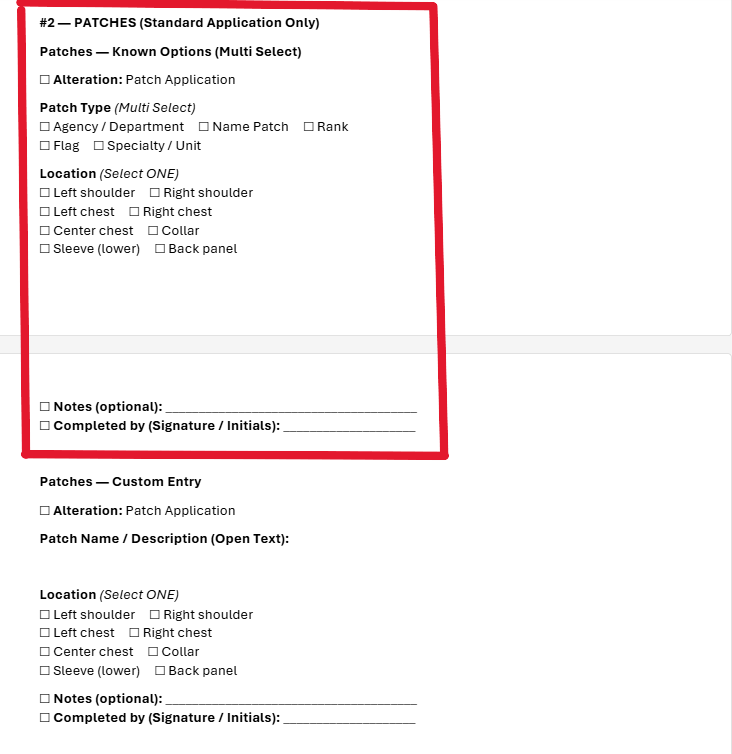
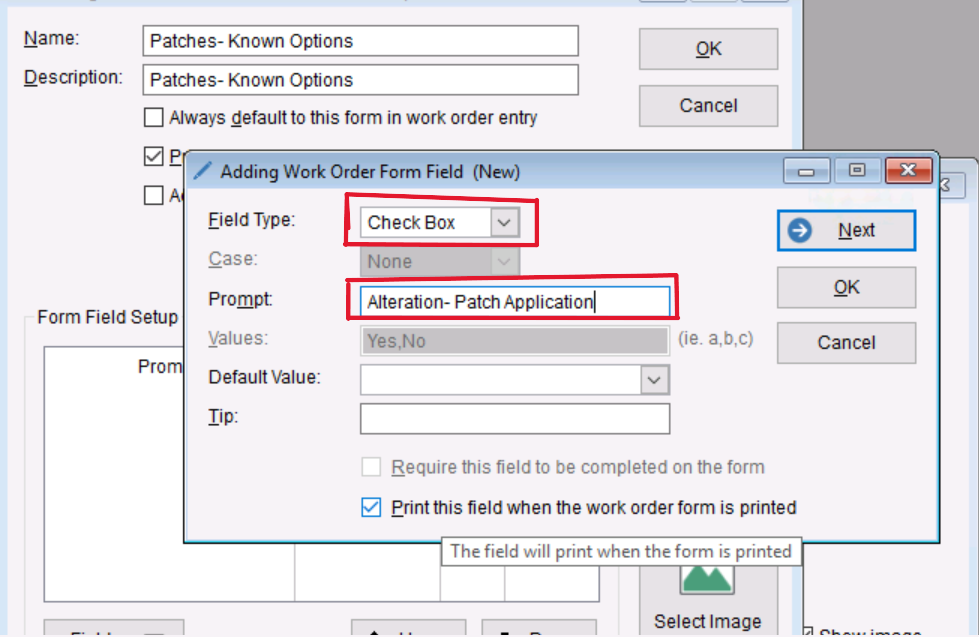
- To start creation on the first section for “Patches- Known Options” you will start creating a new work order and add a “Field Type” of “Check Box” and set it up with a prompt of “Alteration- Patch Application”. This will create a optional check box for the customer to choose.
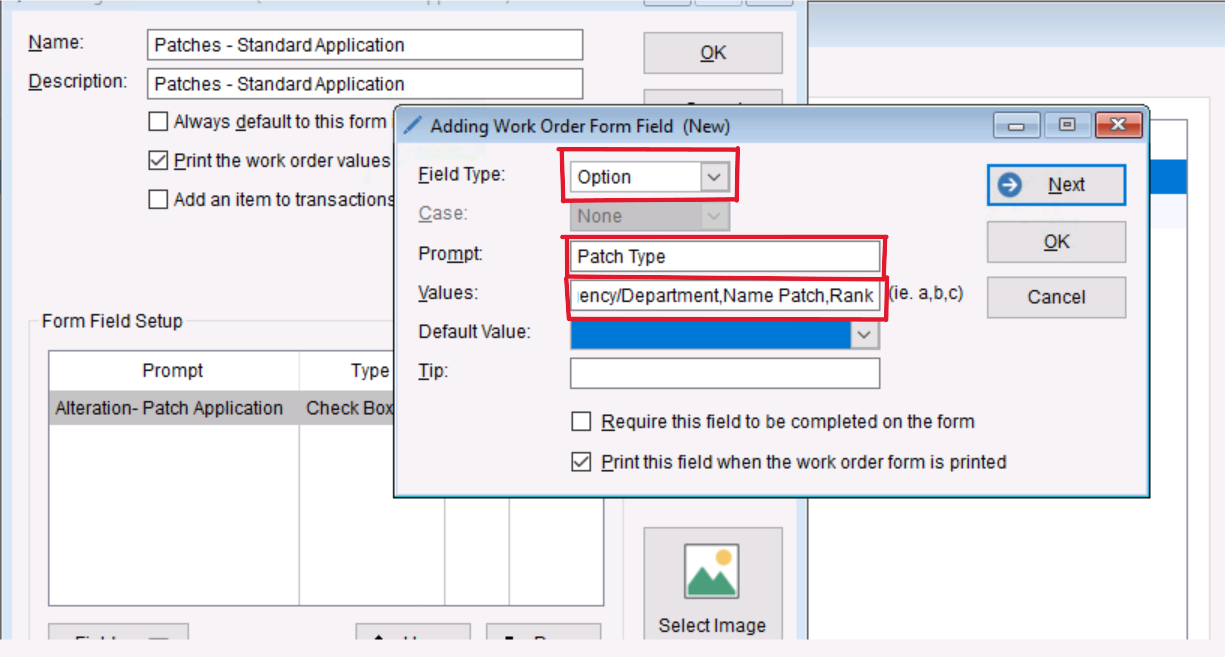
- Next you need to create a “Option” field type to be able to list out multiple options for the customer to select from, you can do this by setting the prompt up as “Patch Type” and list the different patch types in the “Values” section all separated by a comma.
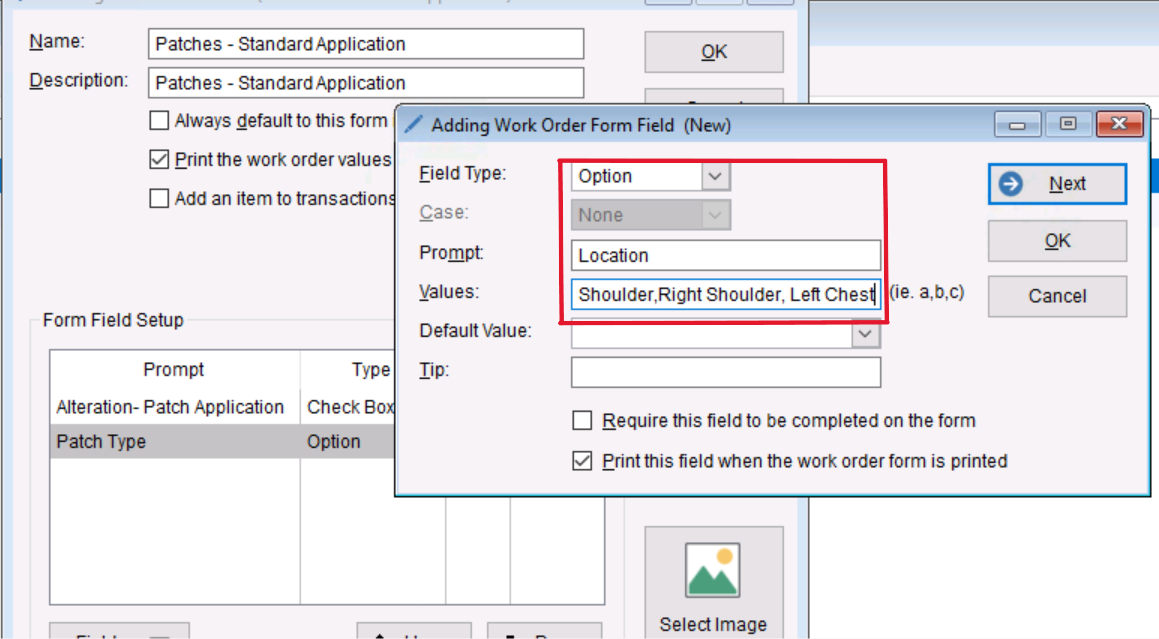
- You will do the same thing on the next selection for “Location” as its also a multiple choice selection. Add “Location” for the prompt and fill the “Values” section with the different options for locations separated by a comma.
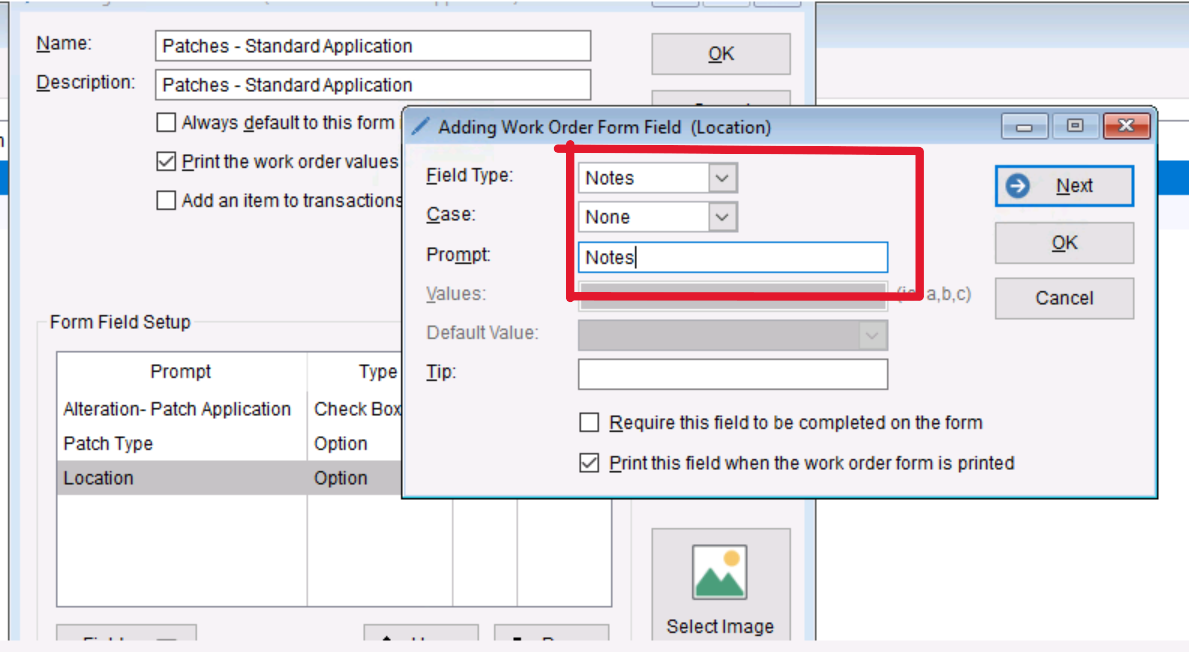
- Your next option to add in this scenario is the Notes section, you can do this by adding a “Field Type” of “Note” and marking the prompt as “Notes” or some other variation you would like.
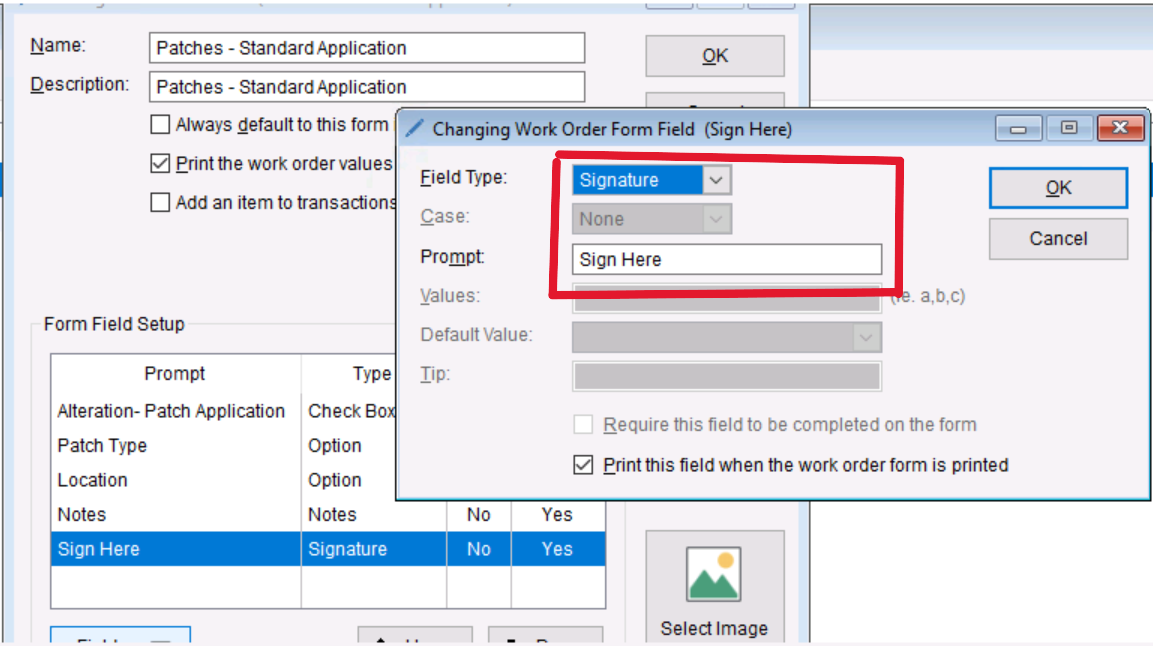
- Lastly you can finish this section off by adding a “Signature” Field type.
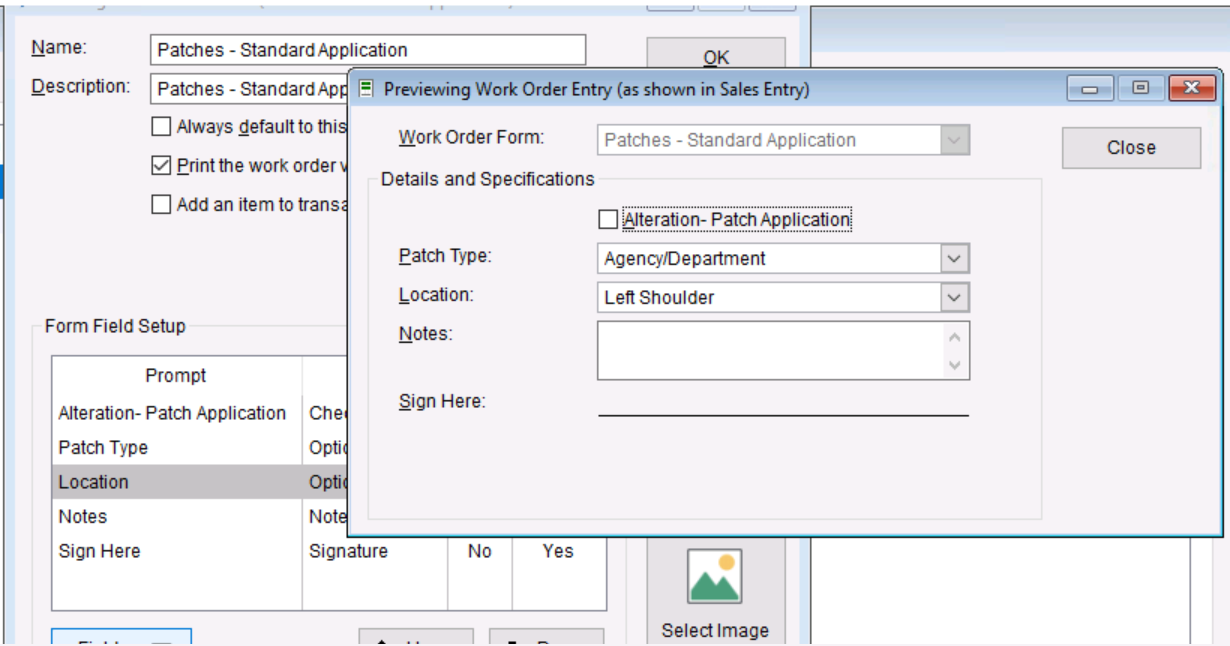
- Once you have added your Signature line you should be able to hit “Preview” and see your completed Patches Work Order.
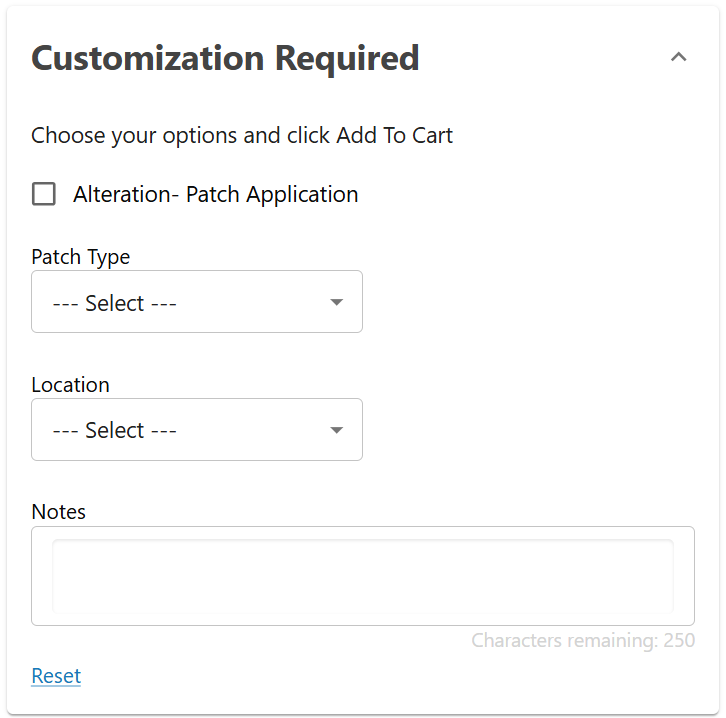
- Here is that work order example on the Webstore.
Next, you need to understand how to apply pricing to a Work Order. In TUS, pricing cannot be assigned directly to a Work Order. Instead, an inventory item must be attached to the Work Order, allowing the system to use the retail price associated with that item (Note that the item you choose will not have its stock affected and its only used as a way to get the pricing needed for the Work Order).
Work Order Pricing
- To start this process, you will need to determine the price of your Work Order and find a corresponding item in your inventory list that you want to link to the Work Order. If you cannot find an item, please refer to the Creating Items Manually article to create an item you can use instead.
- Once you have either found or created your item, you can open your created Work Order in Setup>Work Orders and double click to open your Work Order.
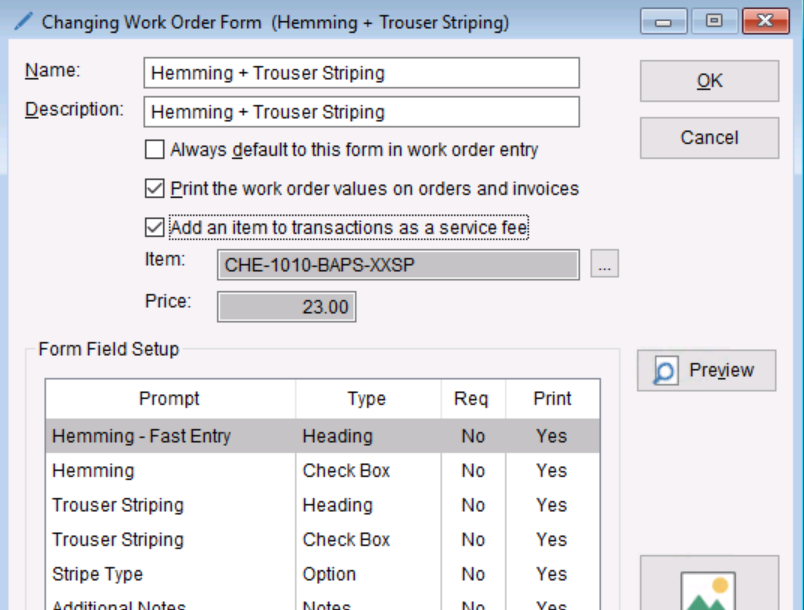
- Once you have opened your Work Order you will see the option to “Add an item to transactions as a Service Fee” you will check this box use the search boxes to find either the Style or Product you have chosen or created. Select OK on the next 3 sections to save your changes.
- Now that you have saved your selection you will see the price saved on the Work Order. This will be the price associated with the work order whenever attached to an item.
- From here you can select OK to Save your work order and use it on future items. You can also refer to the Work Order: Adding Embroidery and Customization document to get more information on adding a work order to a sale.