-
Add a new sale
-
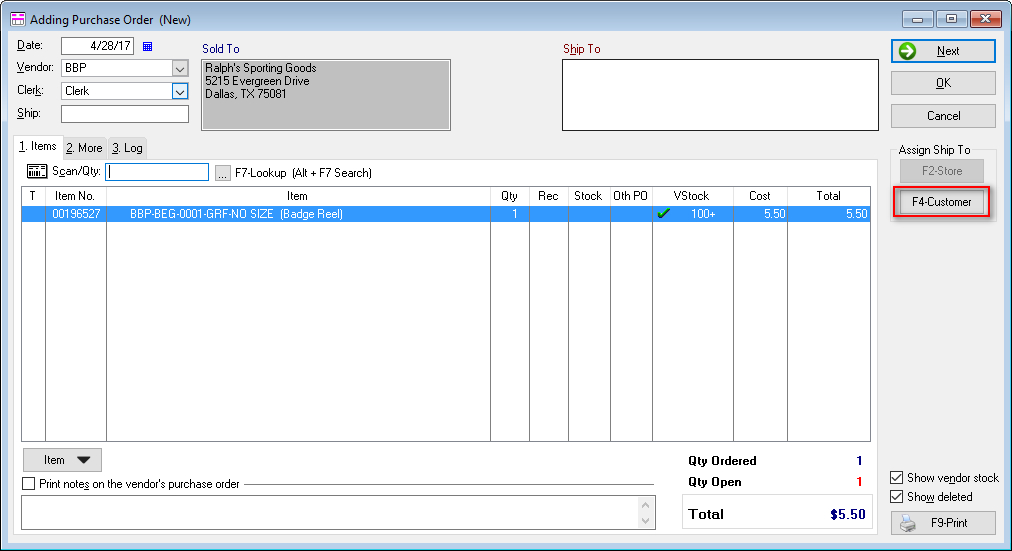
Click the F4 Get Cust button located on the right of the window to launch the Customer Search window.
-
Use the Customer Search window to select the customer (Press F2-New at the bottom to add a new customer).
-
Once the customer is selected, you’re returned to the sale screen. Scan the drop ship item.
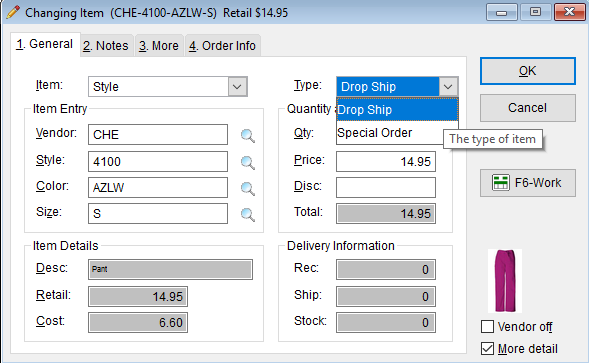
- Double click on the inventory item, and using the Type drop down menu, select Drop Ship.
-
Click F5 Payment to complete the Special Order sale.
-
-
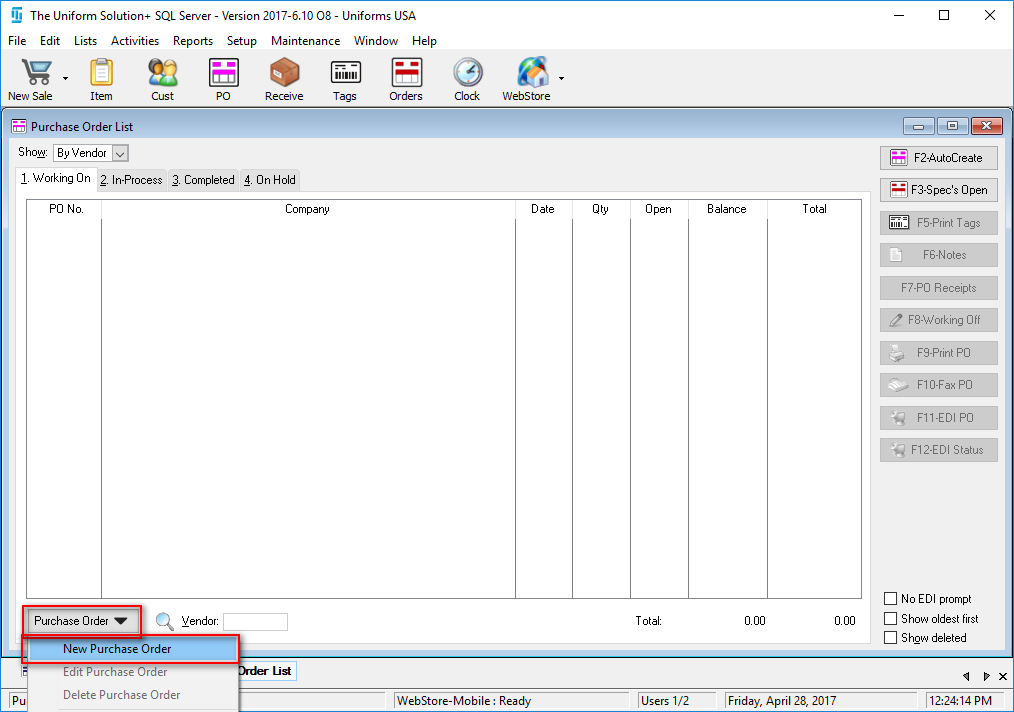
Create a new PO by selecting the PO icon in the program’s toolbar
-
Allocate the Special Order/ PO
-
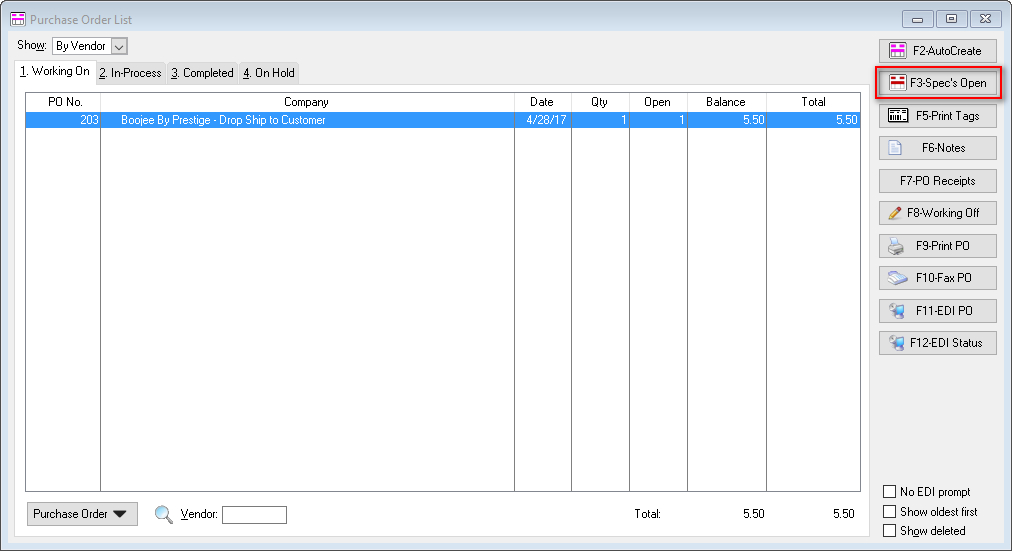
Access the Purchase Order list by selecting the PO button in the program’s toolbar.
-
Select F3-Spec’s Open on the right of the window
-
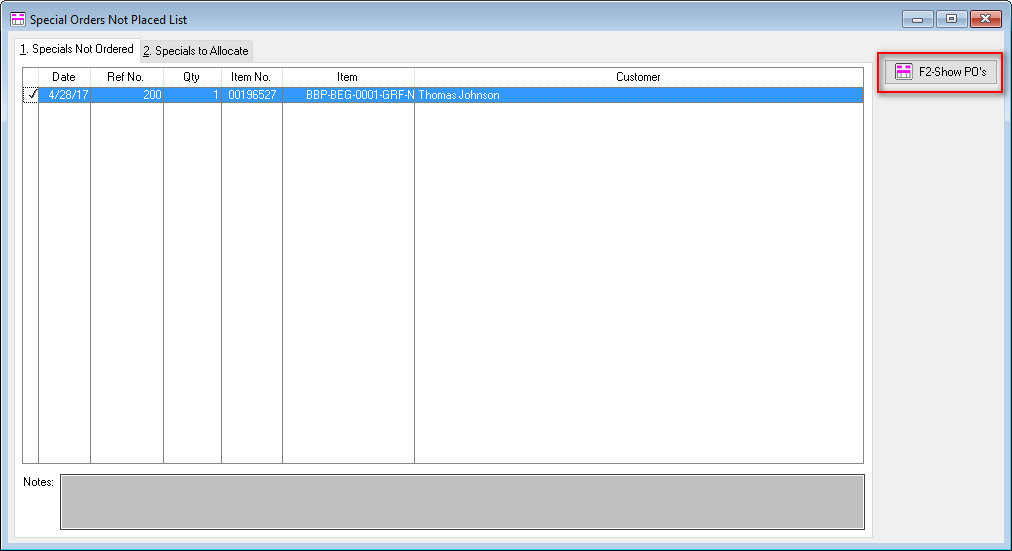
Select the desired special order from the Specials Not Ordered tab, then click F2-Show PO’s
-
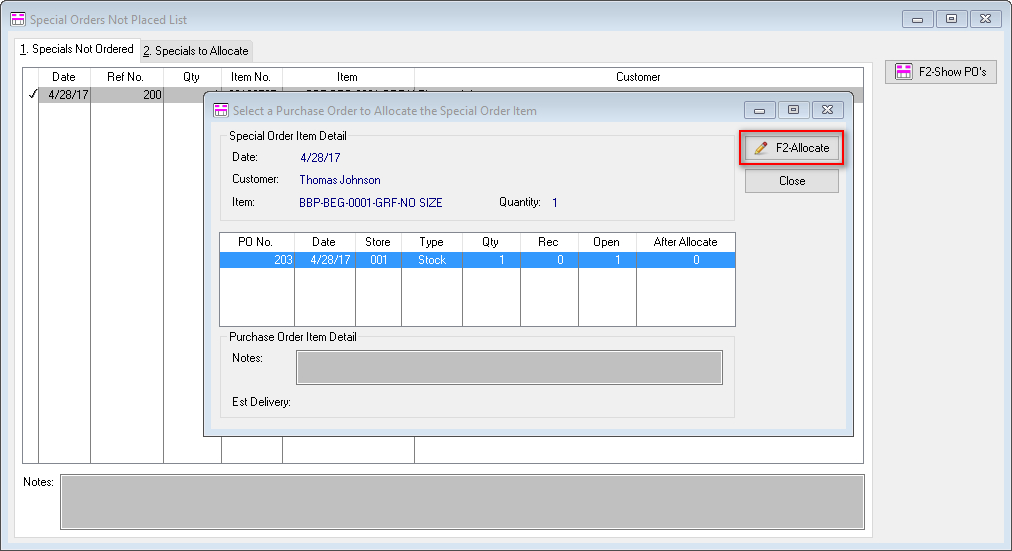
Select a purchase order to allocate to the special order item and click F2-Allocate
-
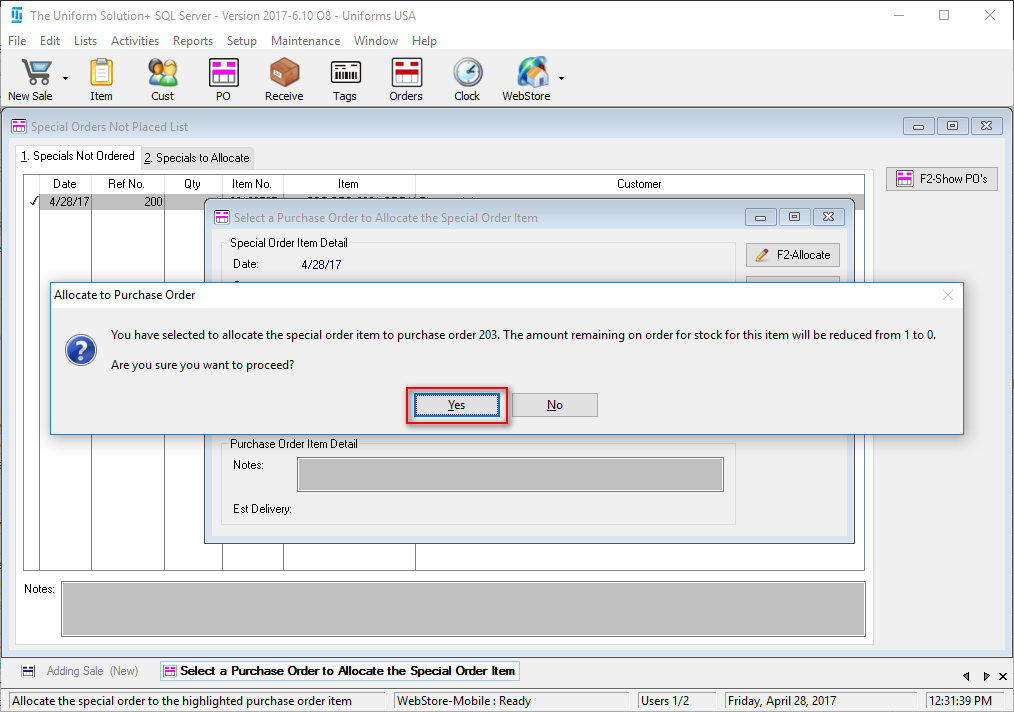
Click Yes to complete the allocation
-
How to create a Drop Ship
Updated on August 4, 2017
