If you are provided with a file from your vendor that includes MAP, the multi-vendor import feature in The Uniform Solution allows you to quickly update your prices in a bulk method rather than having to manually edit each item. This instructional will assume that you already have a file in the correct format provided to you by the vendor. As always, call support for additional assistance fill out the Support form on our site.
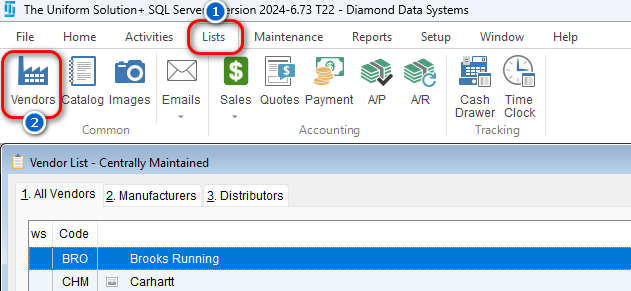
- In The Uniform Solution, navigate to Lists>Vendors/Mfg
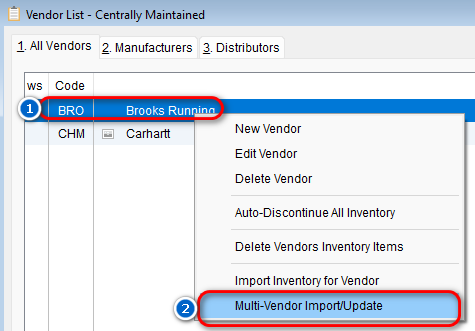
- Right click on the vendor you wish to update and select the last option that appears “Multi-Vendor Import/Update”.
- A new window will come up telling you the specifications for your file. Ideally, your vendor has already given you a file that is properly formatted. Select “Import” from this window and you will be prompted to select the file (if the file was emailed to you, you must have first saved it to your computer).
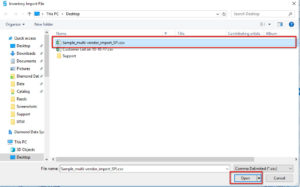
- Navigate to where you have saved the import file, select it, and click “Open”.
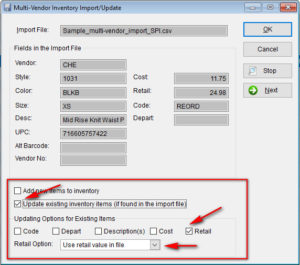
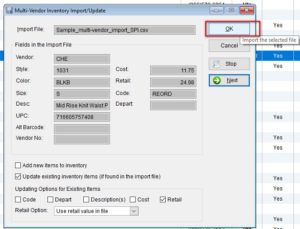
- You will now see the import screen where you can choose what should be updated. This is NOT a replacement for the catalog. We are simply going to update items that have MAP to use the price in the file rather than the usual vendor markup formula. At the bottom, make sure that “Add new items to inventory” is not selected. Check the box to “Update existing inventory items (if found in the import file)”. Under the options to update, uncheck everything except for the “Retail” price field. You will also want to make sure that the “Retail Option” dropdown is selected to “Use retail value in file”.
- At this point you can select the “Next” button to rotate through a few items to ensure the data looks correct. Once you are comfortable, select “OK” to import. You will then be prompted to make sure you have confirmed the data and you can then select “Yes” to import.
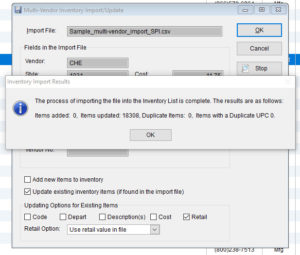
- The file will import and once completed you will see a screen telling you how many items updated. That number will simply depend on how many matching items you had that needed the MAP updated from the file.
