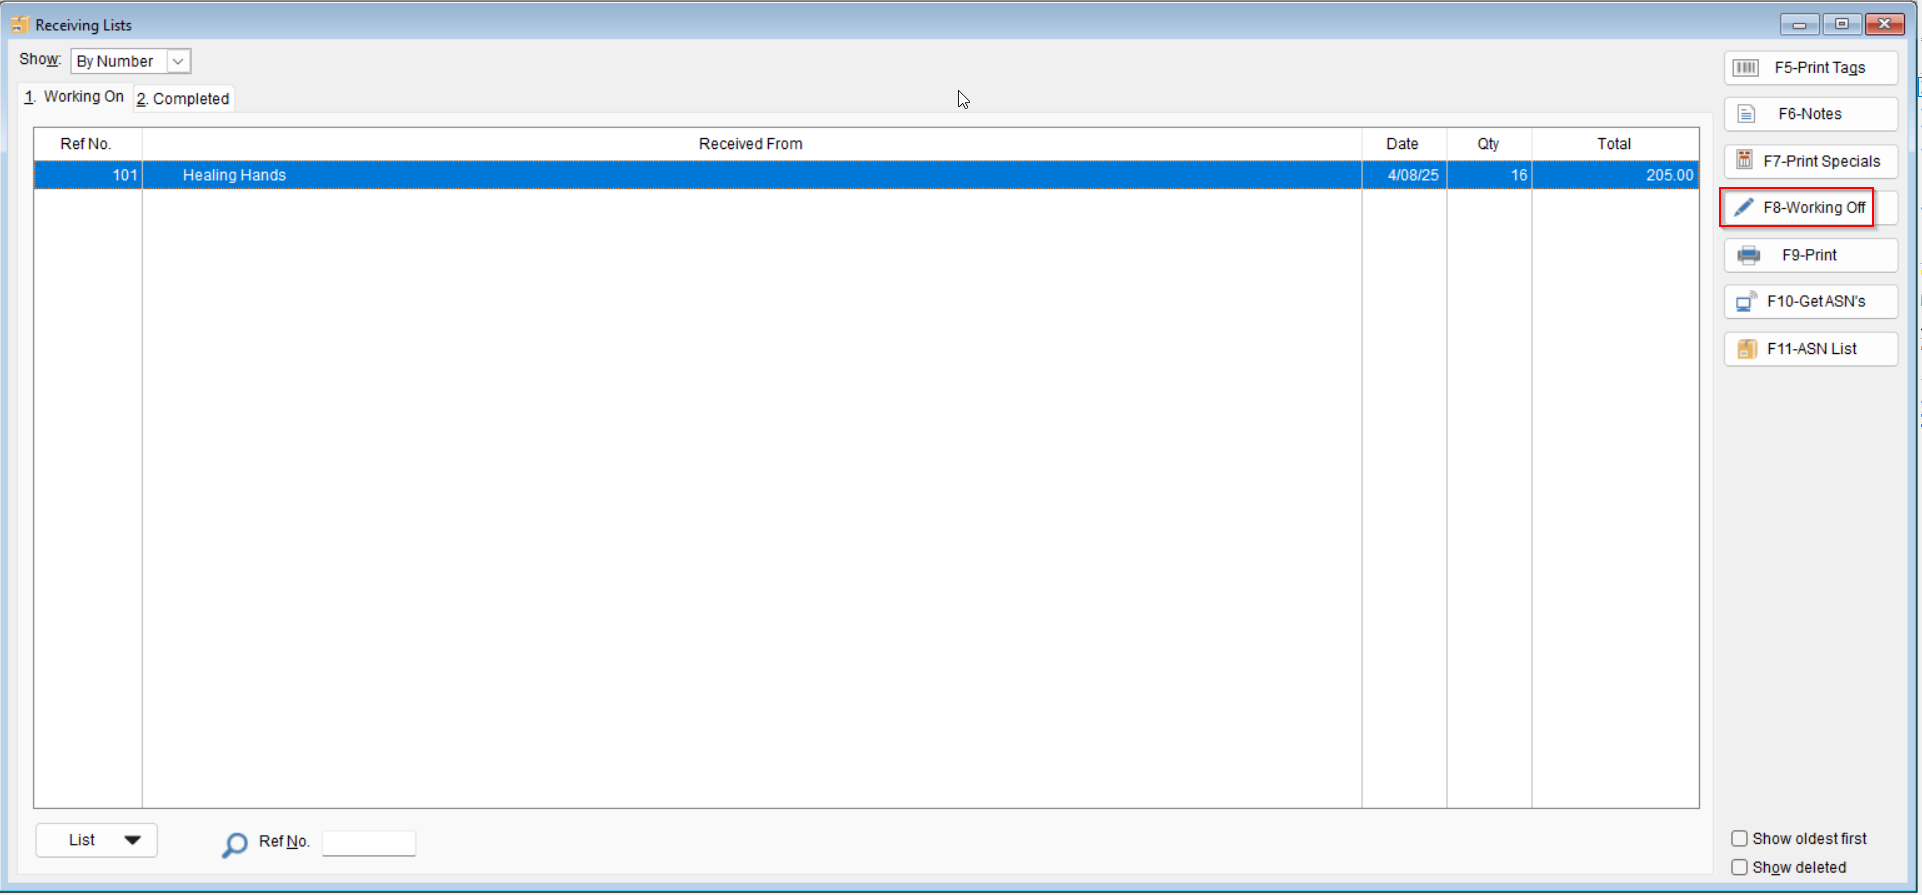
Receiving inventory properly in the program is vital to keeping an accurate inventory list. To create a receiving list,
-
- Select the Receive button on the Home tab of the program’s toolbar
- Select the Receive button on the Home tab of the program’s toolbar

-
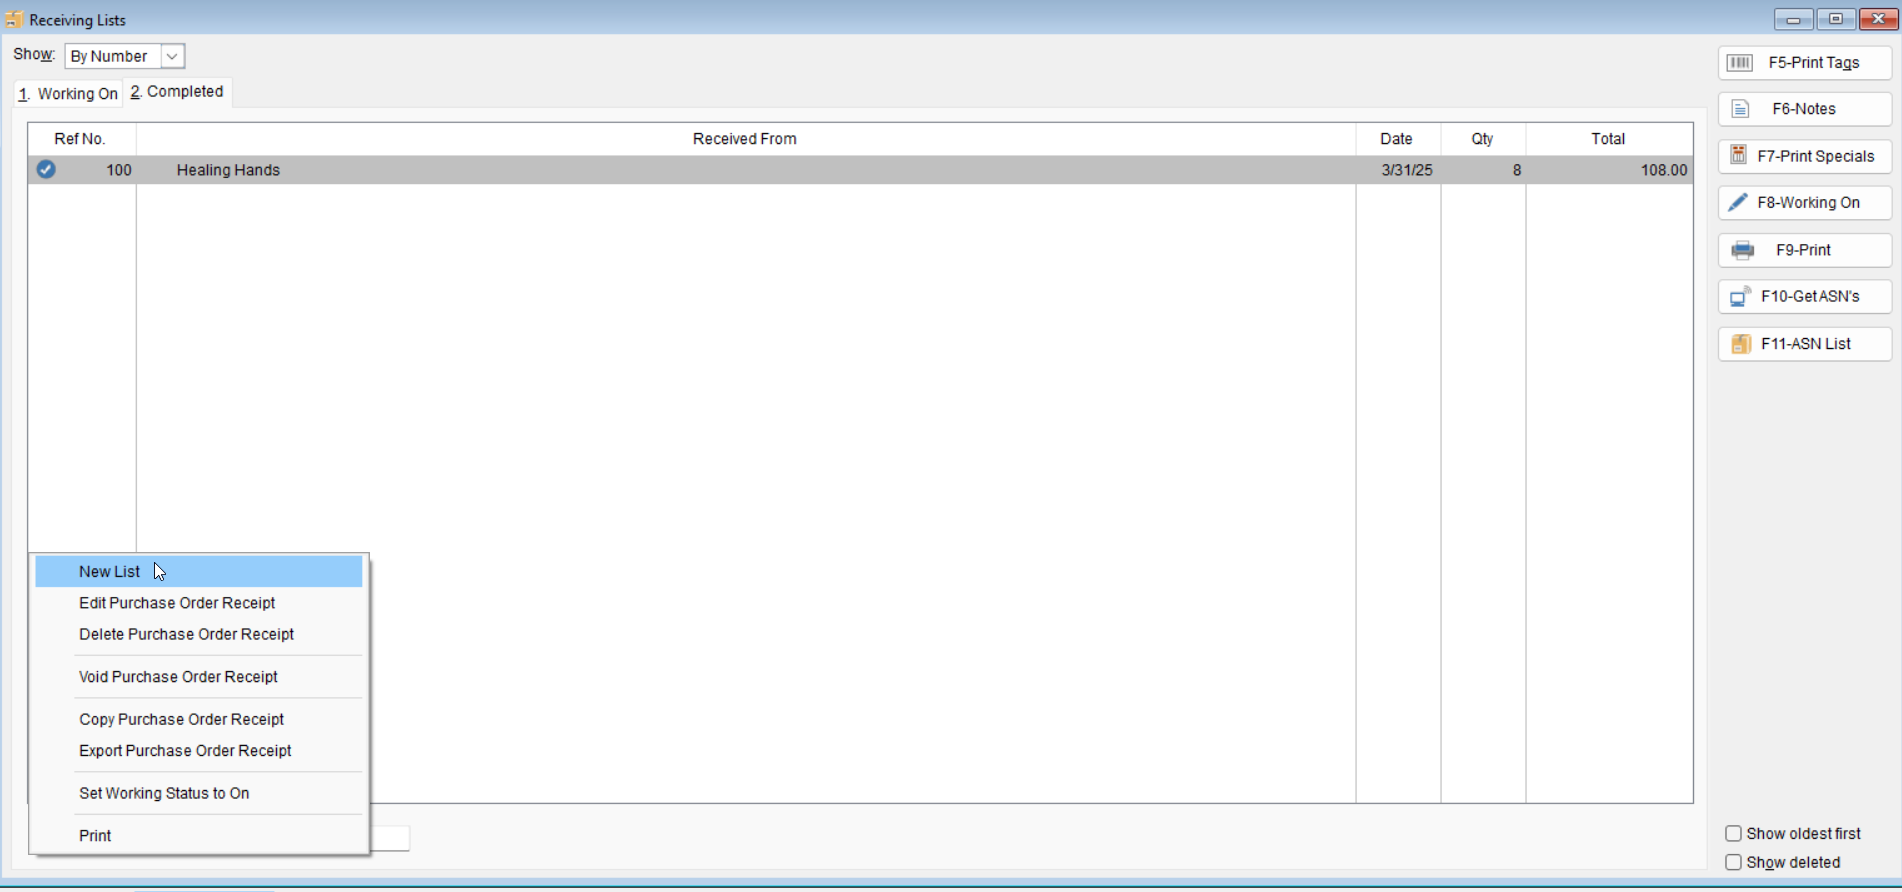
- Select List > New List.
- Select List > New List.
-
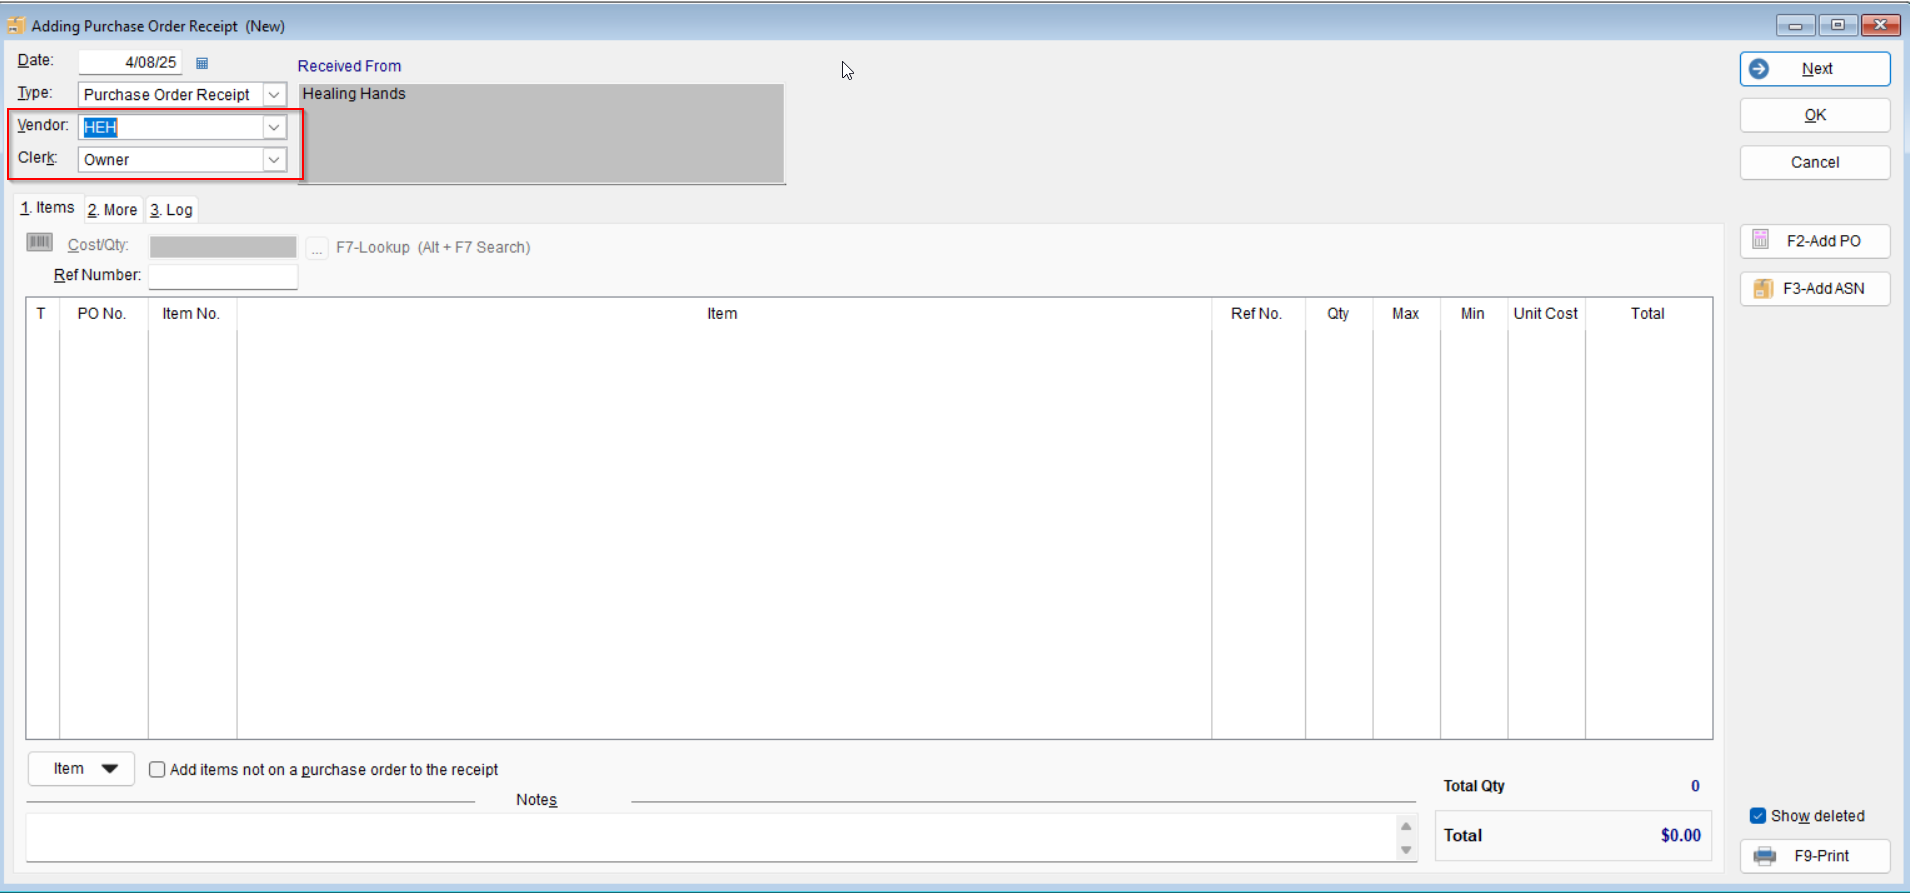
- Select the Vendor in the Vendor section
-
- Select the Clerk using the drop-down arrow
- Select the Clerk using the drop-down arrow
Receive Using POs
-
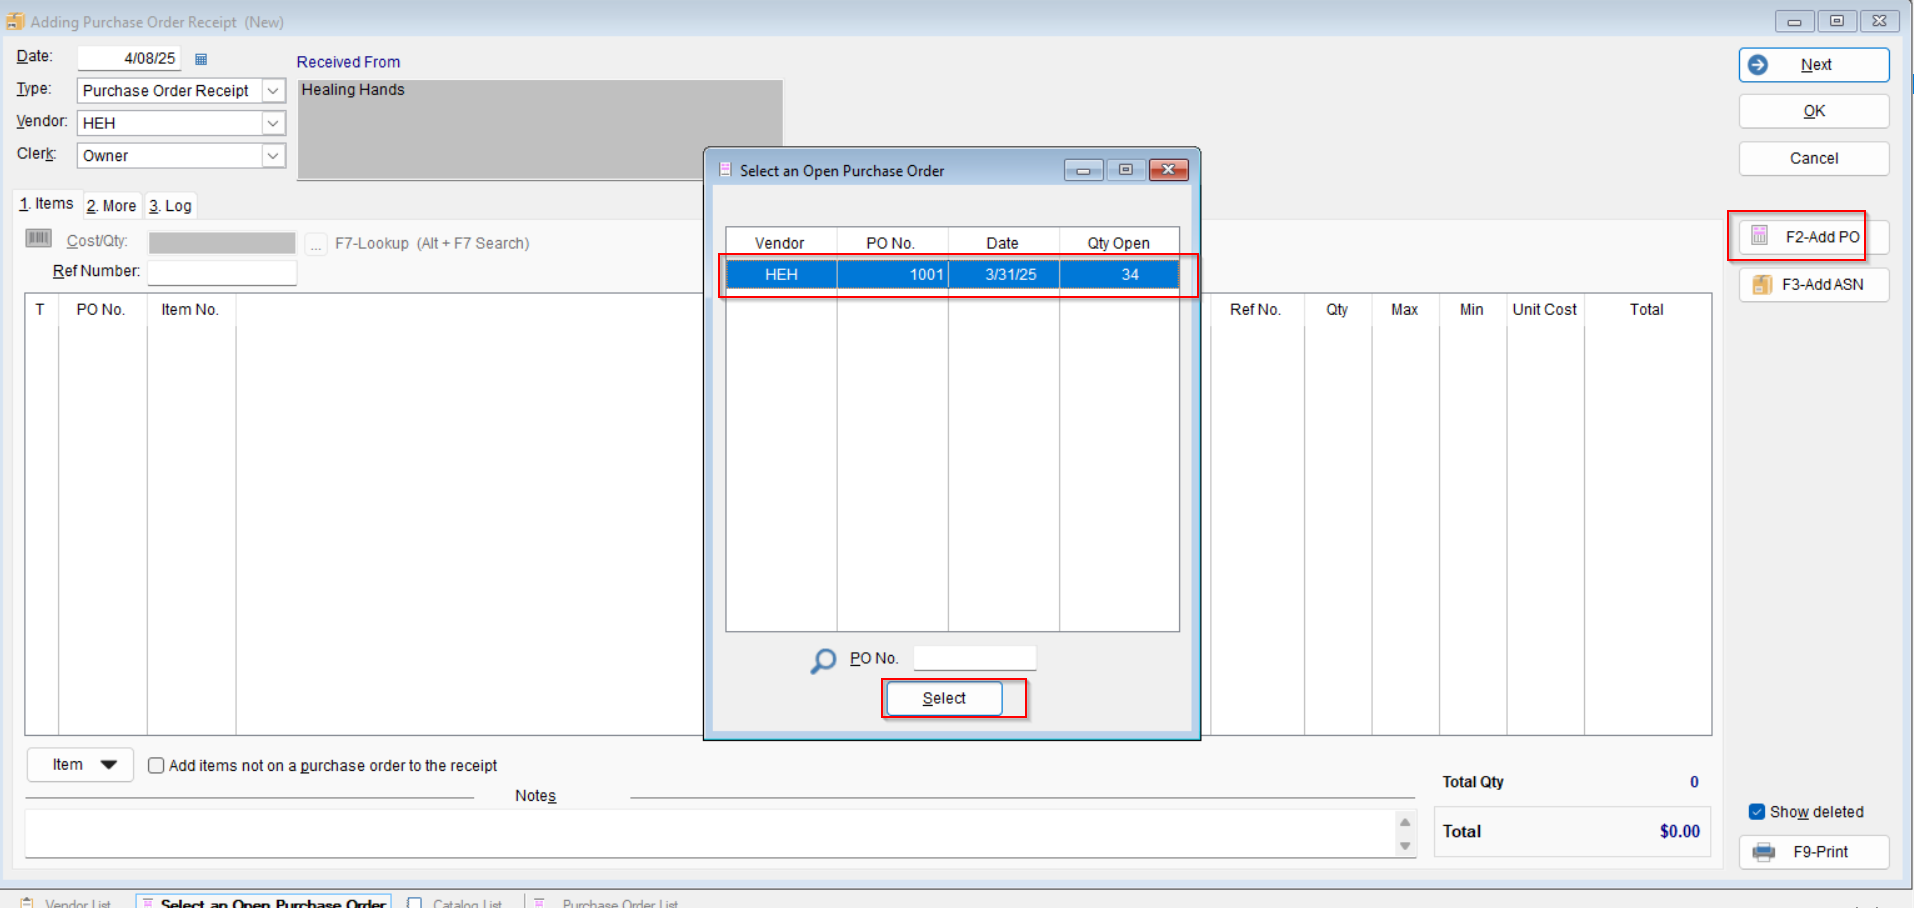
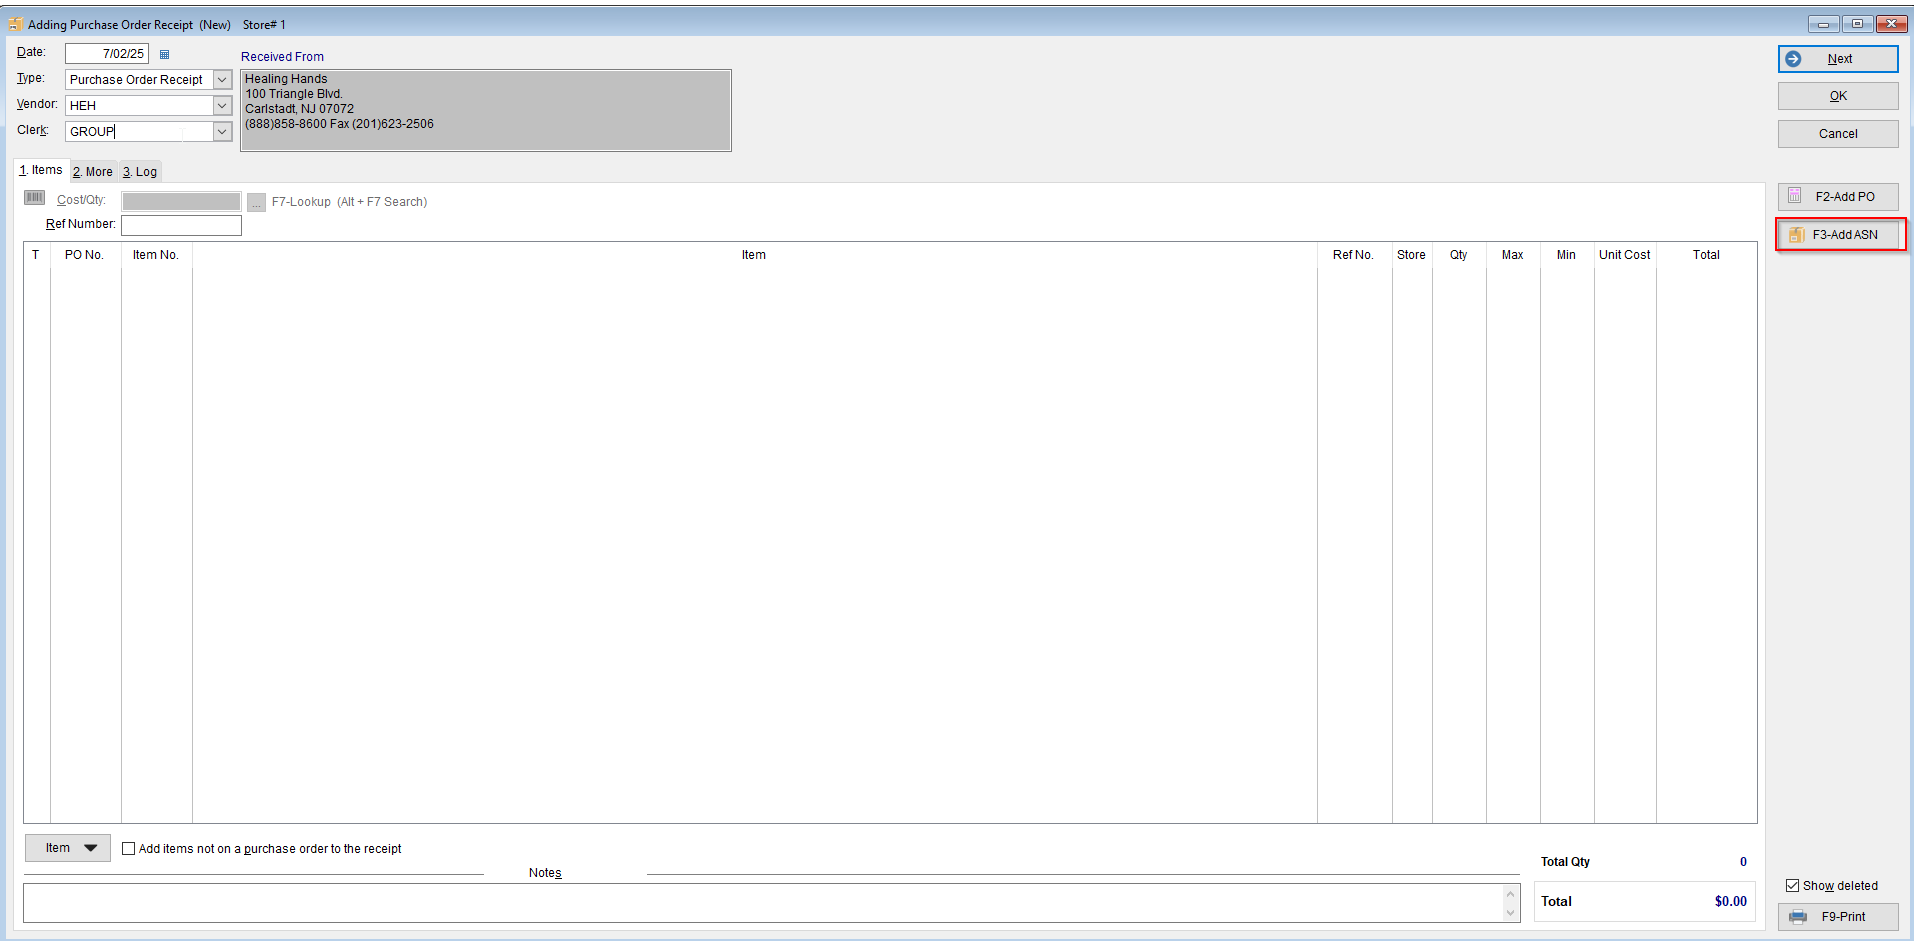
- Select the F2-Add PO button
-
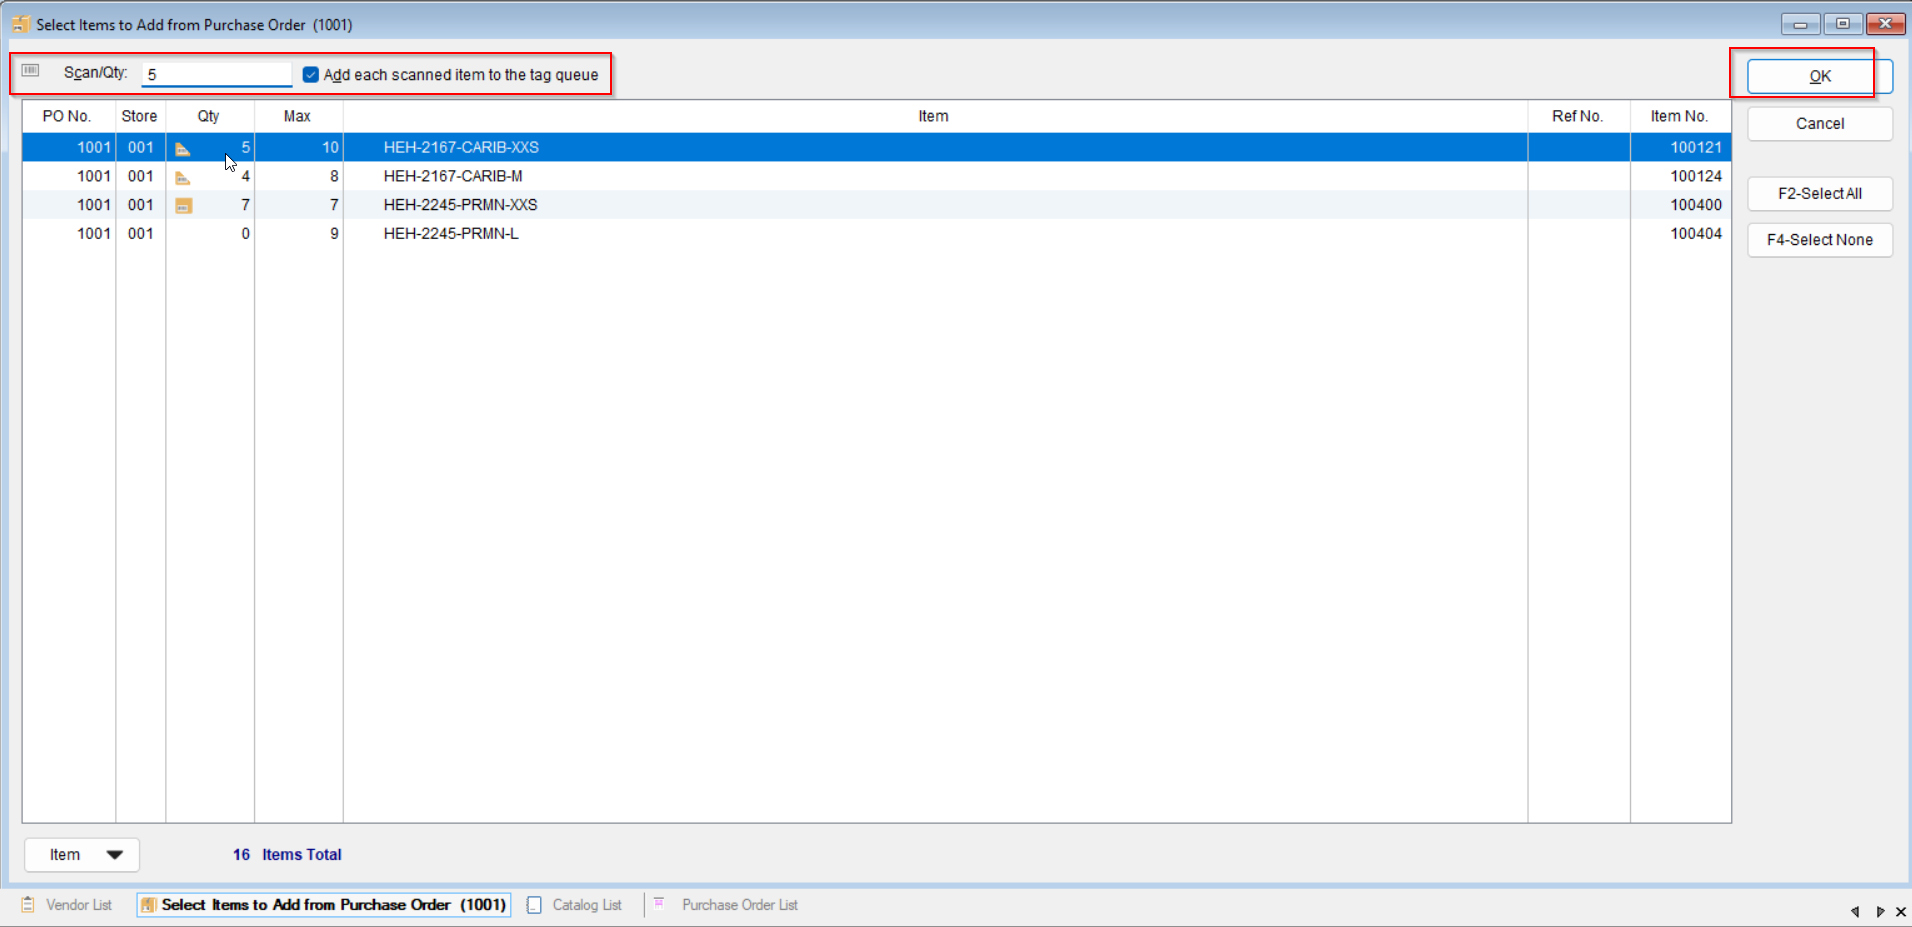
- The Select an Open Purchase Order screen will appear, highlight the desired purchase order and press Select
- The Select an Open Purchase Order screen will appear, highlight the desired purchase order and press Select
-
- Now you’ll be able to select the items that need to be received. Either scan the items to update the receiving list or highlight the desired item, enter the quantity in the Scan/Qty field and press Enter.
-
- If you’d like to add an item to the tag queue for each item entered, check the option
-
- Once all of the desired items are added select OK
- Once all of the desired items are added select OK
-
- The items will be added to the purchase order receipt.
- If another purchase order needs to be added to the purchase order receipt, select F2-Add PO and complete the process again.
Receive Using ASNs
- The Second way to receive items is by using ASNs
*Please note, ASNs are only generated if you EDI an order*
- Click the F3 Add ASN.
- Next, hit F10 Get ASNs.
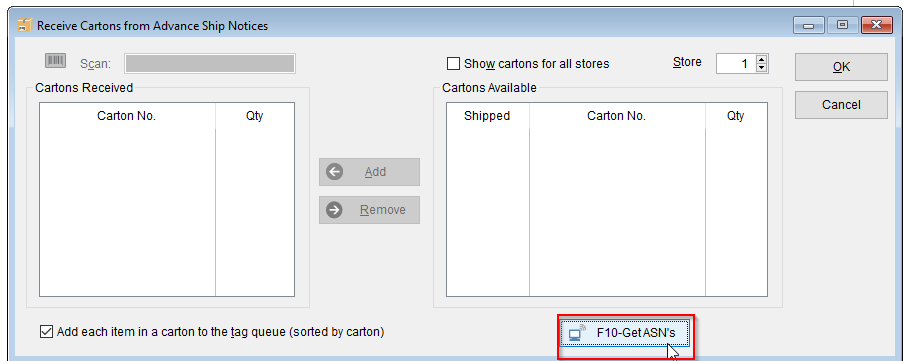
- Once ASNs are generated, you will either scan the ASN on the box or highlight the ASN from the list and hit the Add button.
- Then select OK.
-
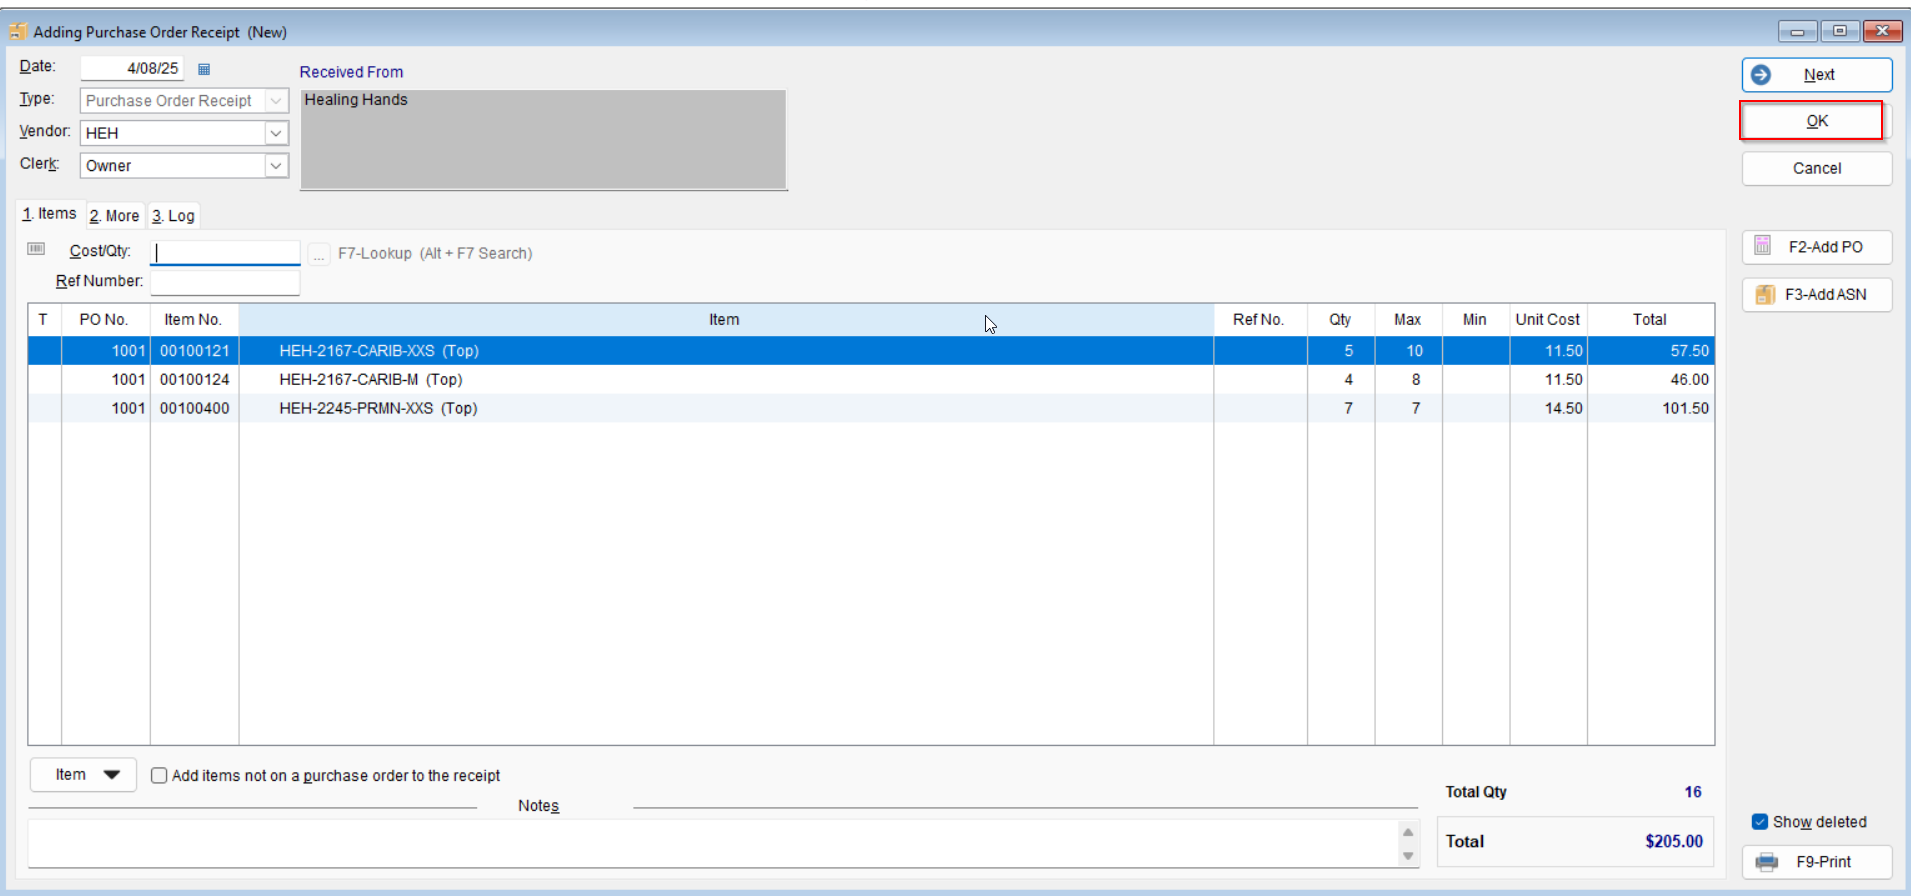
- Once all of the desired items are added, select OK
- Once all of the desired items are added, select OK
-
- The receiving list will be saved. Select F8-Working Off to move the purchase order the Completed tab
- The receiving list will be saved. Select F8-Working Off to move the purchase order the Completed tab