Setup Your Twilio Texting Platform
You can now easily send texts to your customers to notify them that an order is ready for pickup, their order has shipped, or for any number of purposes.
These are the initial steps to help you configure your Twilio account to start working with The Uniform Solution. You will sign up for a Twilio account, and then confirm your mobile number (don’t worry, this isn’t the number your customers will see). After you confirm your mobile number you will select a Twilio phone number that will be used to communicate with your customers. And finally you will upgrade from the free account and submit your account info into The Uniform Solution.
U.S. A2P 10DLC Messaging Registration Required, Starting July 5, 2023”
All SMS and MMS messages sent to U.S. phone numbers using ten-digit long code (10DLC) phone numbers must be sent via an approved campaign with Twilio.
Here How to Register Twilio account for A2p 10DLC messing
If you have any issues with the instructions in this article please reference the following documentation provided directly on the Twilio site
- Twilio’s A2P 10DLC Onboarding
- Upgrading to a Paid Account
- Purchasing a Local Number
- Registering to use A2P 10DLC Messaging
- A2P 10DLC Campaign Approval Requirements
- Brand Registration Failure
- Sole Proprietor vs Standard A2P 10DLC Registration
- Submitting Twilio Support Ticket
Start your Twilio sign up
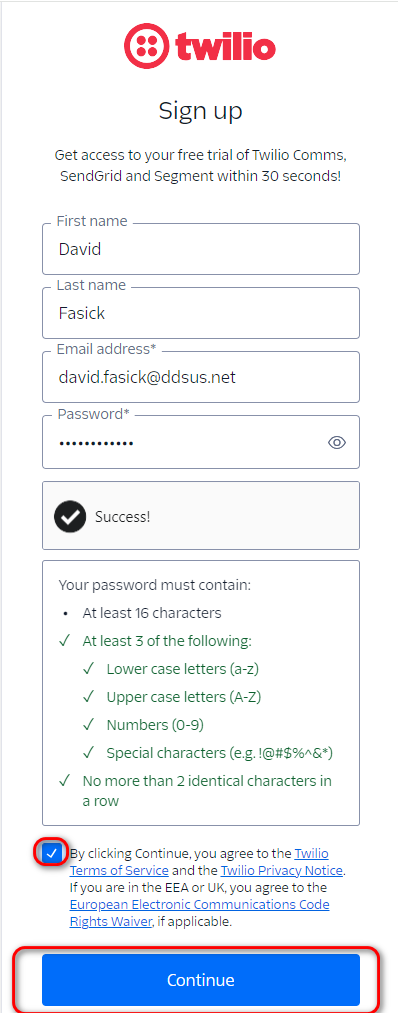
- Visit the Twilio website signup
- Click on Sign Up
- Enter your information in the Sign Up form (note the selections in the drop-down menus)
- Click Check Box stating you agree to the terms and conditions
- Click on the continue button
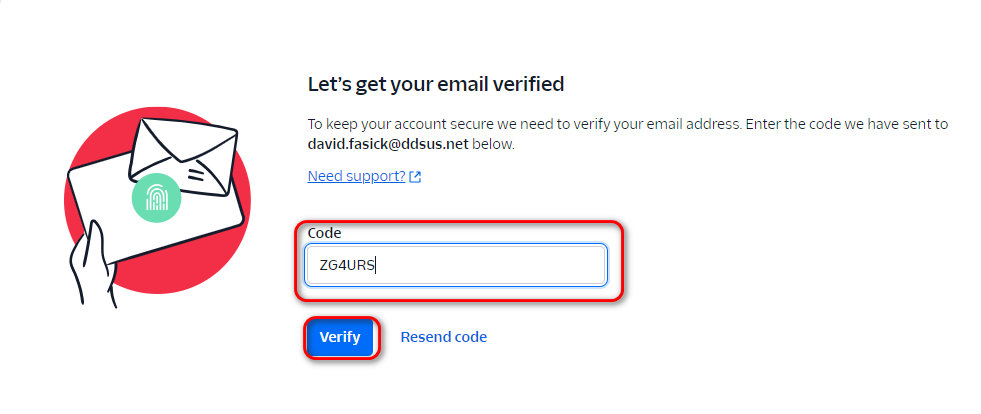
- Confirm your email by entering in the code they emailed you and clicking the Verify button
- Confirm the Mobile number for your account
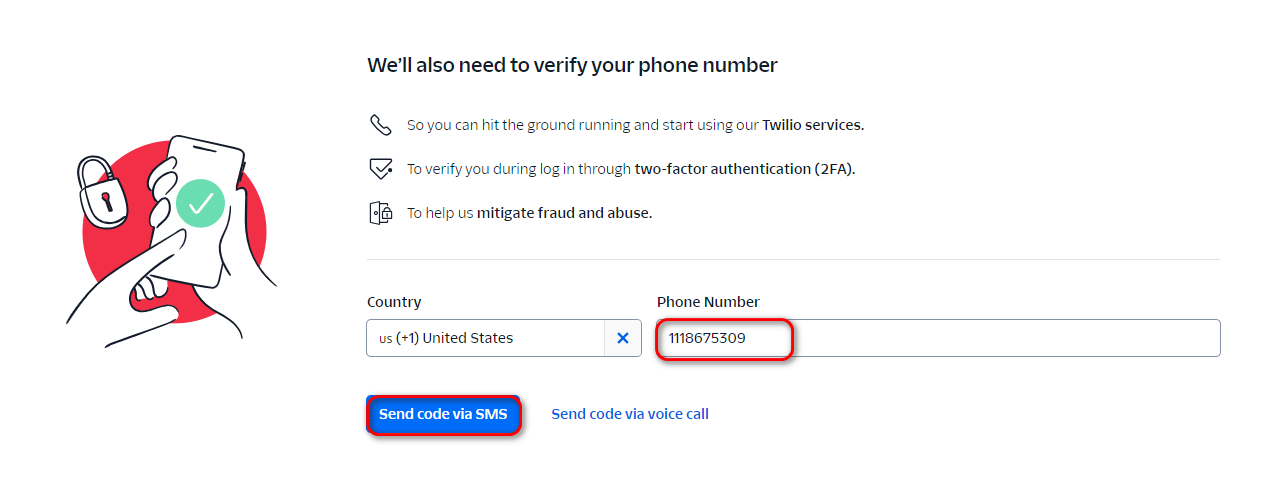
- Enter in the Verification code they sent you and click the Verify button
- Save off your recovery code to a safe place that you can always go back and access
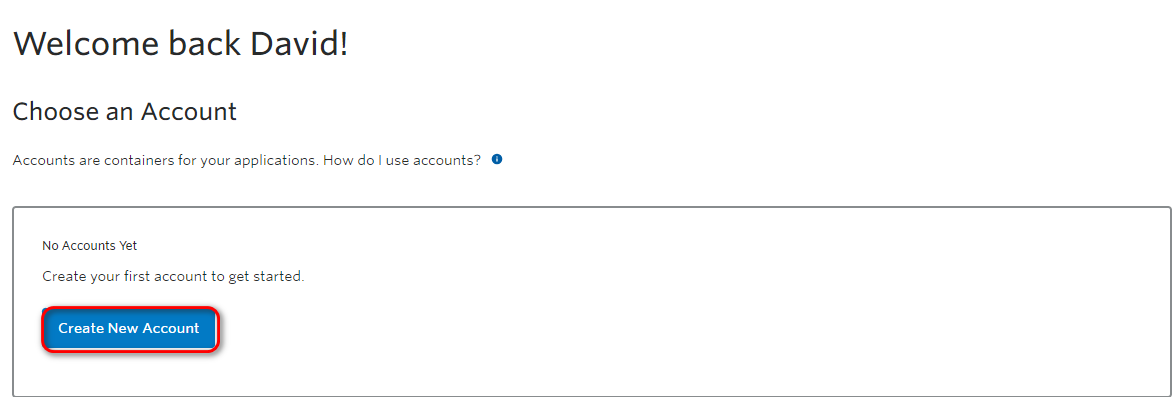
- Once you get to the accounts page click the Create New Account button
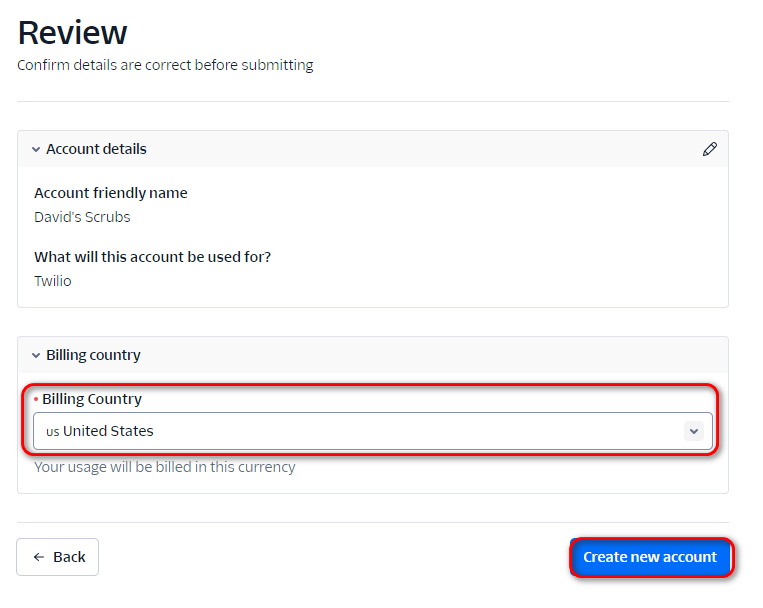
- Enter in your name and select the Twilio radio button in the “What will this account be used for?” section
- At the Review screen make sure the Billing Country dropdown is selected to the proper country
- Twilio will ask you for information on how you plan to use the product. Fill this out with your information/needs
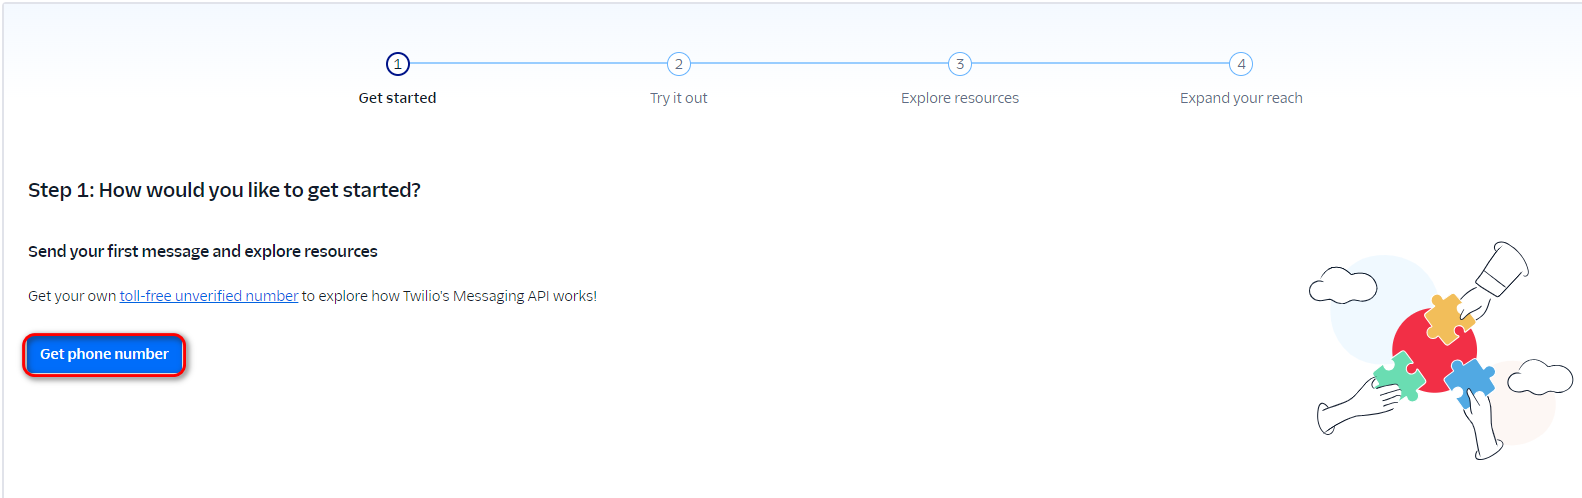
- When you get to the console page Click the Get phone number button
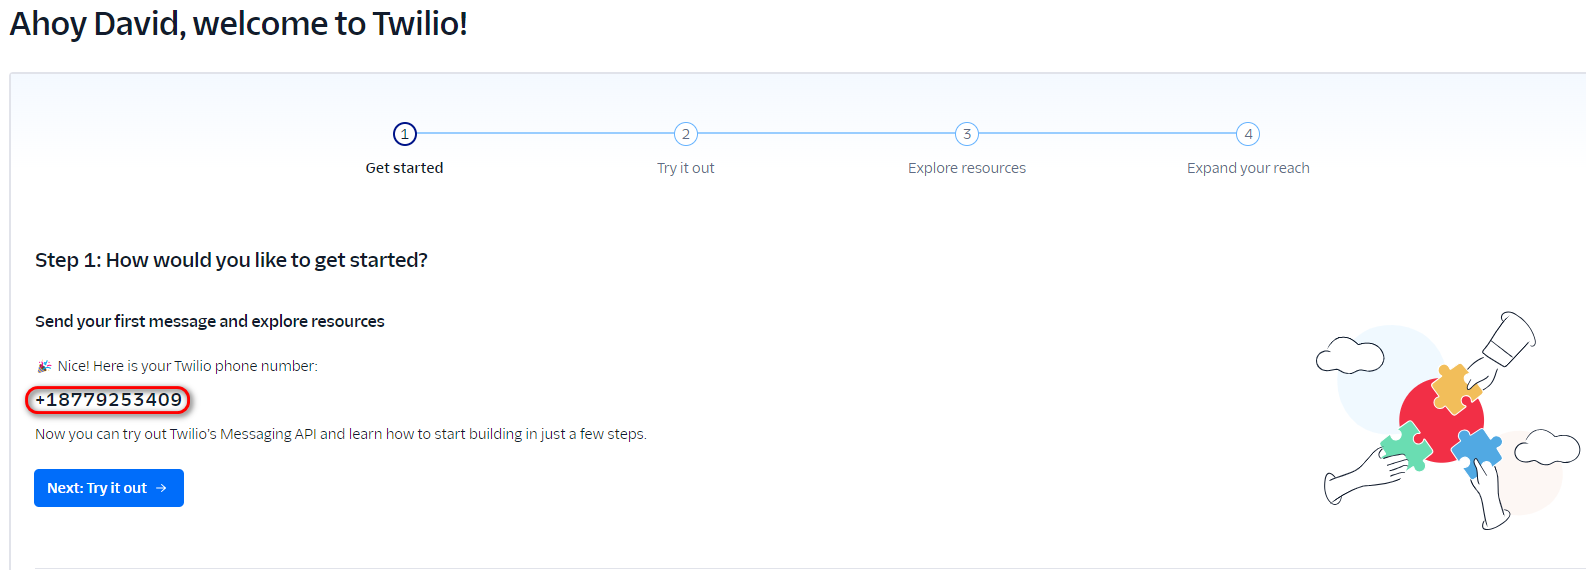
- You will now see that you have a Twilio phone number listed
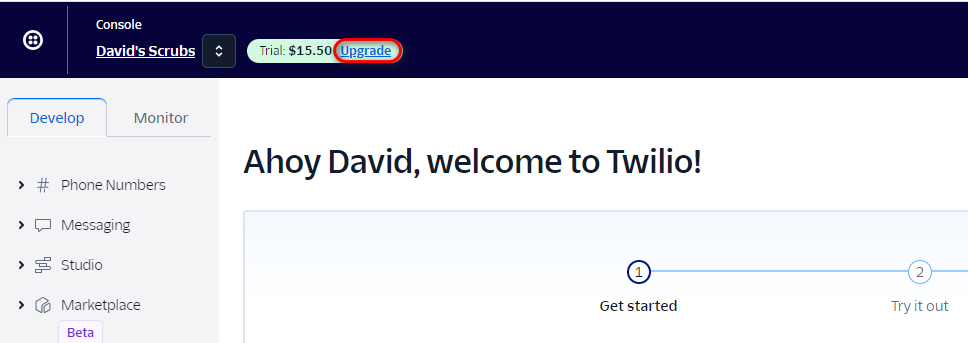
- Upgrade your Twilio account beyond the trial version by clicking on the Upgrade link at the top of the page.
- On the first upgrade account screen click continue
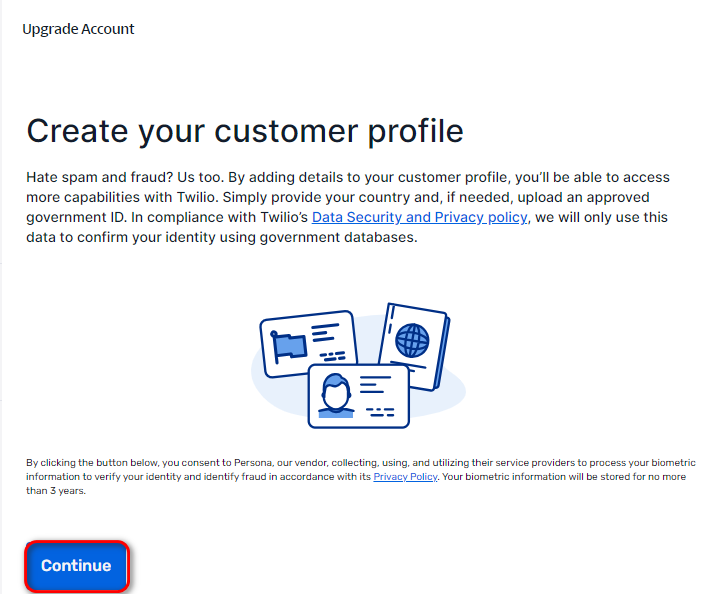
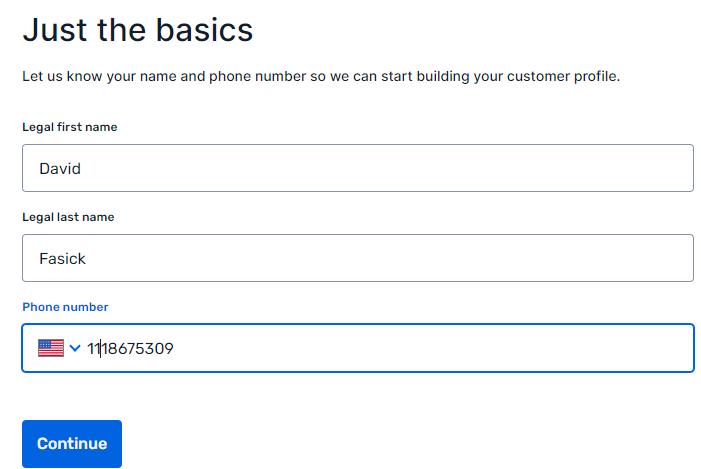
- Verify your name and phone number and click Continue
- On the Identity type page click the Business use radio button and then the Direct Customer radio button
- On the next page fill out your business information in the associated fields
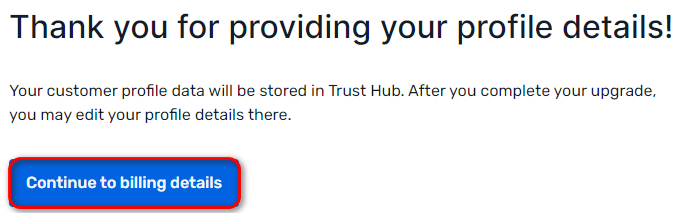
- Once you complete that click on the Continue to billing details button
- Fill out the billing information to complete the upgrade

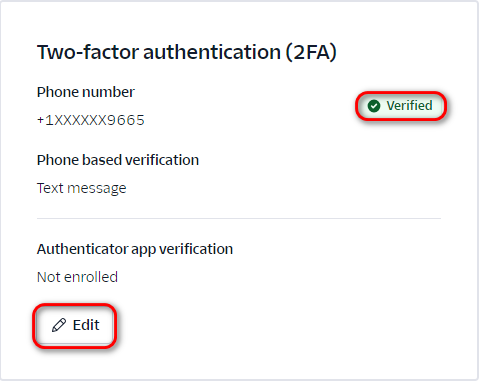
Turn On Two Factor Authentication
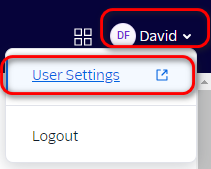
- Click on your Profile name in the top right and click on the User settings drop down
- Make sure you have 2FA set to verified
- If you want to add an authenticator app you can click on the edit button and do so
- If you want to add an authenticator app you can click on the edit button and do so
Add your Twilio account to The Uniform Solution
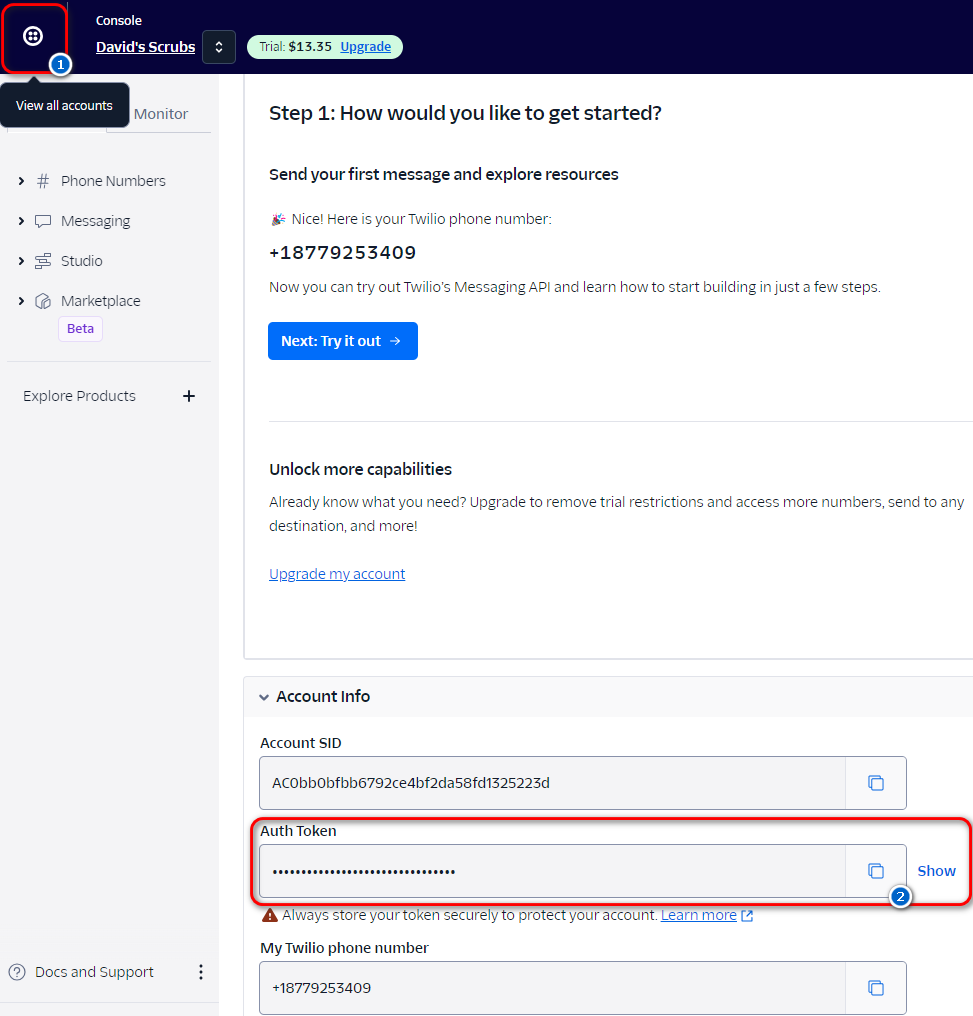
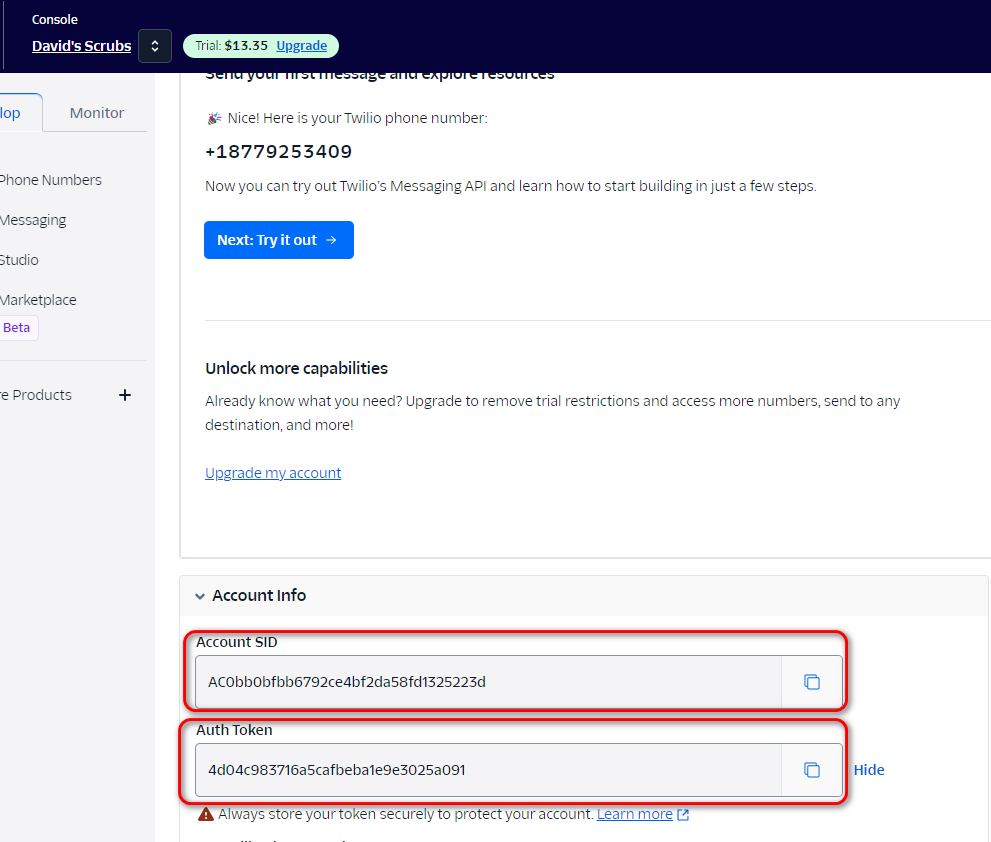
- Go to Console view by clicking on the top left icon. Scroll down to the Auth Token section and click on the copy icon
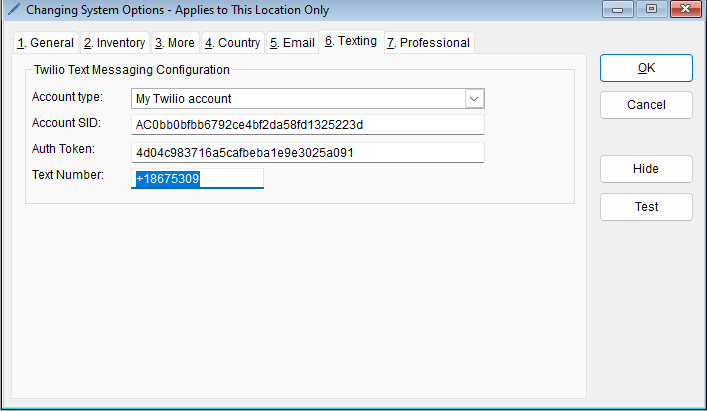
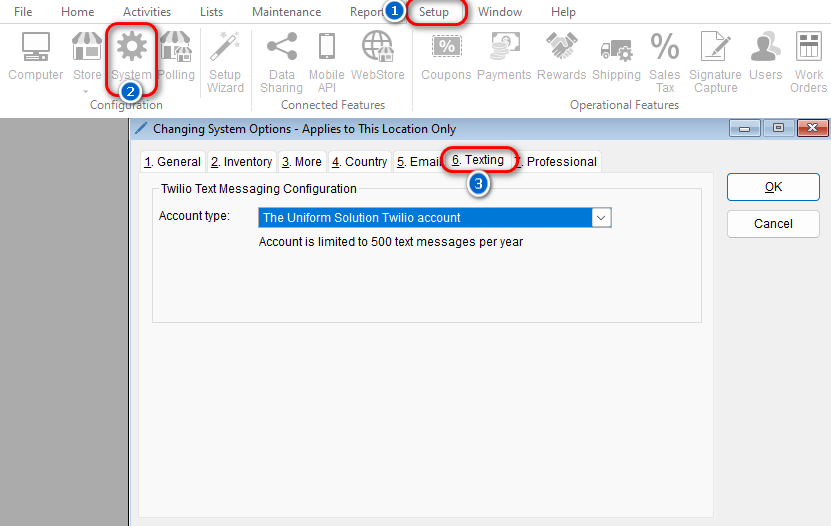
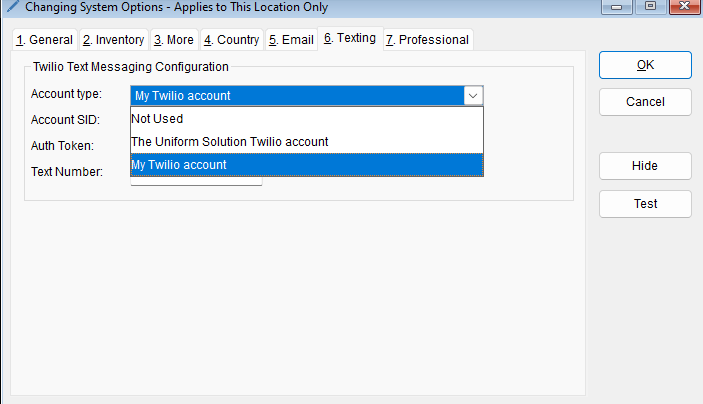
- Now open The Uniform Solution and go to Setup > System > and select the Texting tab
- Under the Account type section click the drop down and select My Twilio account
- Copy over the Account SID and AUTH TOKEN from your Twilio account page
- Paste the SID, Auth Token, and Text number into the respective fields in The Uniform Solution
- Note: The Account SID and AUTH TOKEN are case-sensitive so be sure to match uppercase letters.
Configure how customers send messages back to you
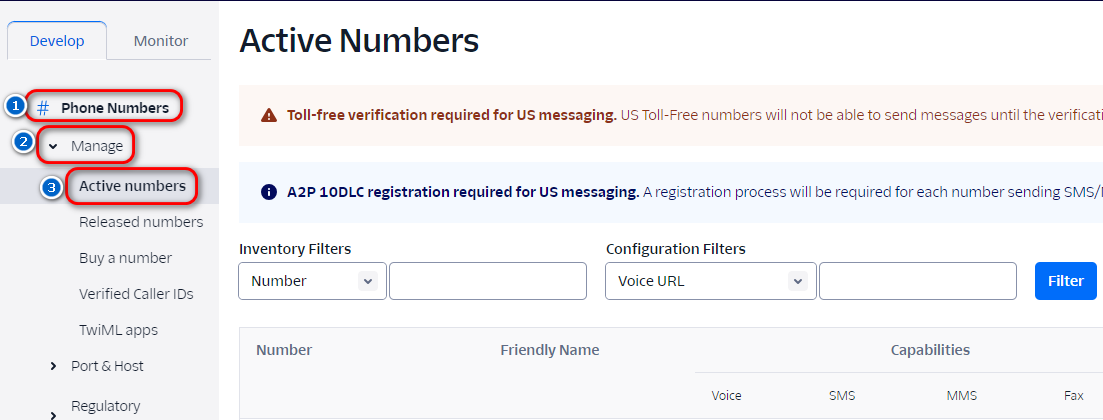
- Go back to the Twilio Console Dashboard and click Phone Numbers > Manage > Active Numbers
- Click on the phone number in the middle of the screen
- Scroll down to the Messaging Configuration section and in the A message comes in URL field enter in https://Your Web Address/welcome/sms/reply/
- Click Save configuration
- Test your configuration in The Uniform Solution by clicking on the Test button
- Enter in your mobile number, or a mobile number that you can use to receive text messages and click Send to attempt the test and receive the message


Congratulations on setting up your Twilio account!
Multi-Store Setup
If you do not wish to receive reply texts specific to each location then you do not need to proceed.
For each location we are going to follow similar instructions as listed above. In order for each location to receive replies they will each need a subaccount on Twilio associated with that unique location.
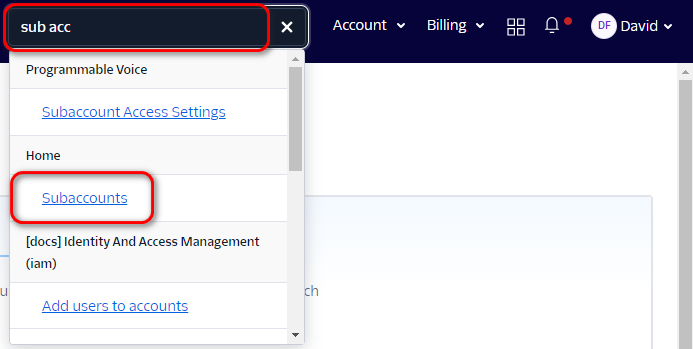
- Go back to your Console page and in the search menu at the top type out Sub accounts and select the following option
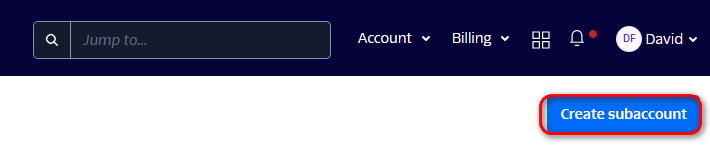
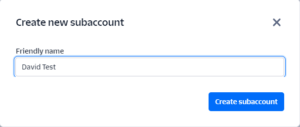
- Click the Create subaccount button at the top right
- Enter in the name you want to associate with this number/subaccount and click Create Subaccount
- Enter in the name you want to associate with this number/subaccount and click Create Subaccount
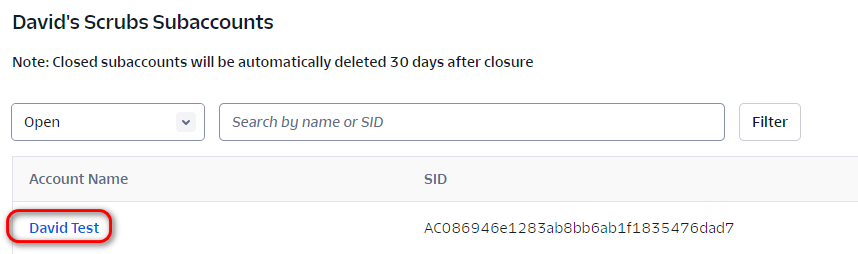
- Once the account is made click on the Account name
- Click the Get a Twilio Phone number button
- Select Buy a Number
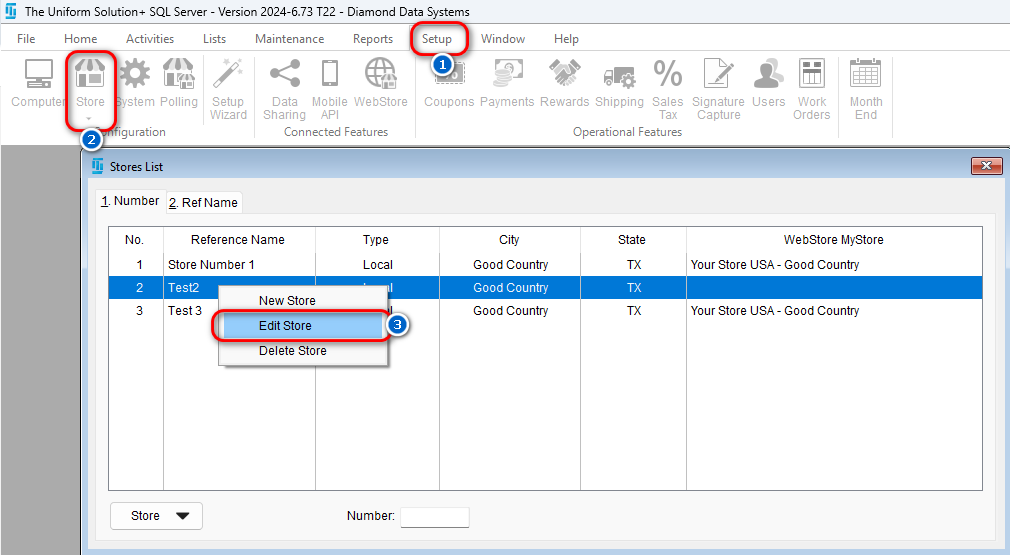
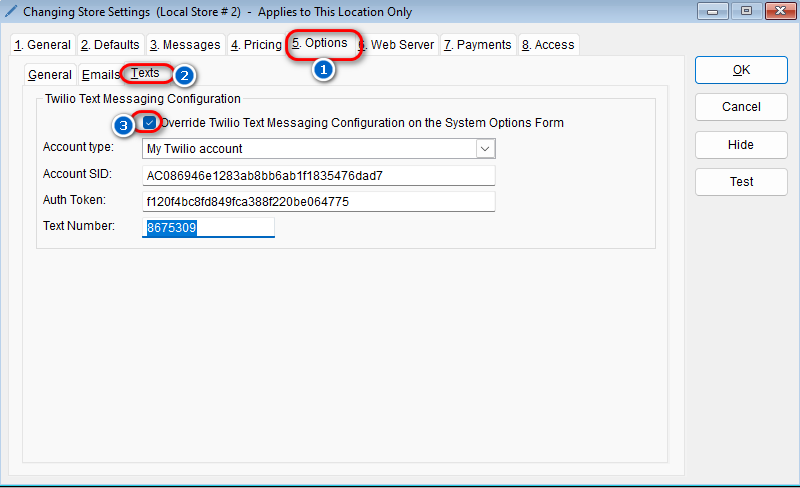
- Once you have the number, SID, and Auth Token you will go back to your TUS software and go to setup tab > store settings > right click on the select the store > click on edit store
- Click on the Options tab > Texts tab >Check the “Override Twilio Text Messaging configuration on the System Options form” box > then copy in your SID, Auth Token, and Text number from your Twilio sub account
- Follow the Message Configuration Instructions earlier in this articles for the new sub account
Now you’re all set!