Here are instructions for adding special order items when customers also have items they want to purchase and take with them.

- Click the “New Sale” button on the toolbar
- Begin scanning the items the customer wants to purchase
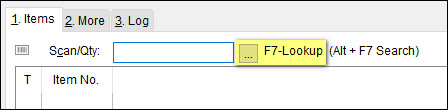
- To look up items the customer wants to order, hit the “F7” key on the keyboard or click the “F7 – Lookup” button
Enter the following information (or click the lookup button to search from a list)
- Vendor: enter vendor code or click lookup button to view all vendors
- Style: enter style or click lookup button to view all styles
- Color: enter the color code or click lookup button to view all colors
- Size: enter the size or click lookup button to view all sizes
- Type: select “Special Order” from the drop down list
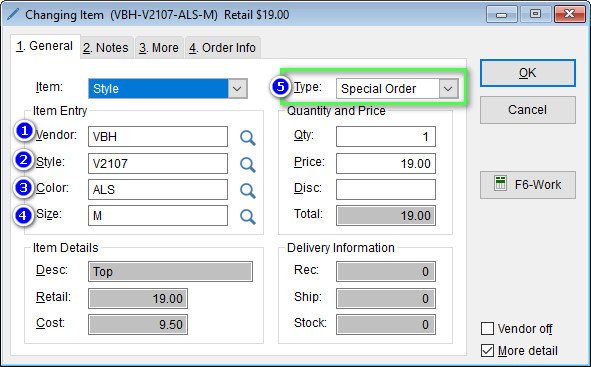
- Click OK to add the item to the invoice
Remember to add a customer to the order. Special order items require a customer.
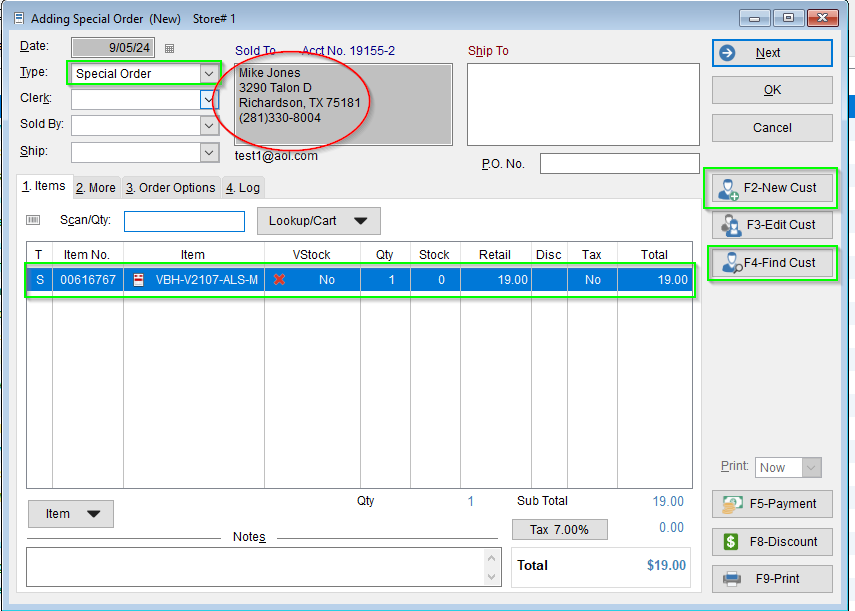
Here are the 3 ways you can add a customer to an order:
- Click “F2-New Cust” to add a new customer
- Click “F4-Find Cust” to search for an existing customer
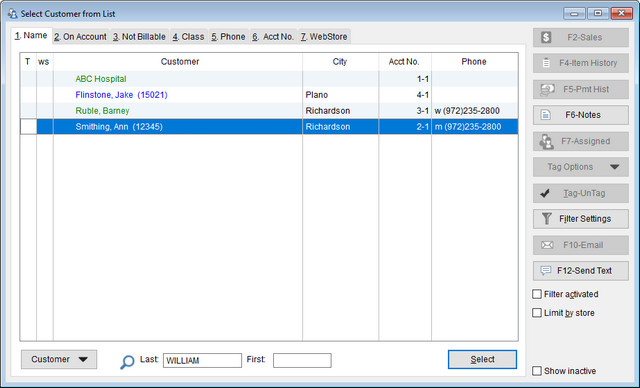
- Type the customer’s last name in the “Scan/Qty:” field and hit the “Enter” key. If one match is found, the program will automatically add the customer to the invoice. If there are no matches or multiple matches are found, the program will ask you to select a customer from the customer list.
After adding all items to the order, click the “F5-Payment” button to enter the payment and complete the sale.
Did you know? You can change the order type of an item from “P” (“Purchase”) to “S” (“Special Order”) by highlighting the item in the list and typing “S” in the Scan/Qty field, then hitting the “Enter” key.
Did you know? You can opt to keep special orders items on the invoice by deselecting the “Create a separate special order” checkbox located on the Order Options tab on the invoice.